EasyManua.ls Logo

Datamax DMX E E-4204 - User Manual

Datamax DMX E E-4204
92 pages
Print Icon
To Next Page IconTo Next Page
Loading...
E-4203 / E-4204 / E-4304
w/USB
Operator’s Manual

Questions and Answers

  • N
    Nathan SmithJul 28, 2025
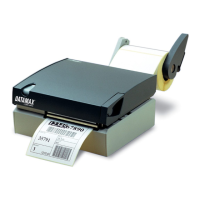
    How to fix a Datamax DMX E E-4204 Printer when label alignment results in no paper movement?
    • B
      bgrimesJul 28, 2025
      If attempting to perform Label Alignment on the Datamax Printer results in no paper movement, it is likely that with the Present Sensor enabled, Label Alignment cannot be performed without a Label Length. To resolve this, set Label Alignment to AUTO, then press and hold FEED until media moves for the automatic length measurement. Alternatively, re-measure the Label Alignment Length using Printer Setup mode to enter the new length. Print a Database Configuration label to ensure the new length has been set.
  • J
    jpattersonAug 6, 2025
    Why is the Datamax Printer label alignment incorrect, resulting in a short label length when pressing FEED?
    • R
      rodney52Aug 6, 2025
      If the Datamax Printer's label alignment is incorrect and pressing FEED results in a short, one-inch label length, the Label Alignment Length is likely incorrect. The default is 1.00”, and this occurs when a larger label length is used without setting the appropriate length. To fix this, set Label Alignment to AUTO by pressing and holding FEED until the paper moves for automatic Label Alignment Length measurement. Alternatively, measure the label length and use the Setup Menu to set the new length. Print a Database Configuration label to ensure the new length has been set.
  • T
    Timothy MartinAug 10, 2025
    Why is the Datamax DMX E E-4204 label alignment incorrect, resulting in a longer label length when pressing FEED?
    • L
      Lori CollinsAug 10, 2025
      If the Datamax Printer's label alignment is incorrect and pressing FEED results in a label length longer than actual (one-inch), the Label Alignment Length is likely incorrect. The default Label Alignment Length is 1.00”, and this behavior occurs when a larger label length is used without setting the appropriate length. To resolve this, set Label Alignment to AUTO by pressing and holding FEED until the paper moves for automatic Label Alignment length measurement. Alternatively, measure the label length and use the Setup Menu to set the new length. Print a Database Configuration label to ensure the new length has been set.
  • M
    Matthew MurrayAug 14, 2025
    What to do if tear mode is selected but the label stop position is not far enough forward on a Datamax Printer?
    • R
      Robert WoodsAug 15, 2025
      If the Datamax Printer's tear mode is selected but the label stop position is not far enough forward, it could be due to another present position being determined (enabling the Present Sensor causes the label stop position to be approximately 0.1” behind the peel bar) or an incorrect Present Adjust value. You can disable the Present Sensor to resolve this. Also ensure that the host computer is not providing a Present Distance shorter than required for the Tear Bar. Alternatively, use the Setup Menu to modify the Present Adjust value.
  • R
    reynoldsemilyAug 18, 2025
    What to do if tear mode is selected but the label stop position is too far forward on a Datamax Printer?
    • L
      Lauren SharpAug 18, 2025
      If the Datamax Printer's tear mode is selected but the label stop position is too far forward, it could be because another present position has been determined or because the Present Adjust value is incorrect. To fix this, ensure that the host computer is not providing a Present Distance longer than required for the Tear Bar. You can also use the Setup Menu to modify the Present Adjust value.
  • L
    Luis WilsonAug 23, 2025
    Why does the FAULT Indicator illuminate during label alignment on a Datamax DMX E E-4204?
    • T
      Tina KellyAug 23, 2025
      If the FAULT Indicator illuminates during label alignment on the Datamax Printer, it means that the label supply is empty. To resolve this, load media.
  • G
    greggmolinaOct 31, 2025
    What to do if the first label is wasted during alignment on a Datamax Printer?
    • A
      andreawilliamsOct 31, 2025
      If the Datamax Printer's first label is wasted during alignment, and subsequent labels print correctly, the alignment length might be too long, or the label's length and stop position may cause it to stop between labels on the media sensor. To resolve this, set Label Alignment to AUTO by pressing and holding FEED until paper moves for automatic measurement. Alternatively, re-measure the Label Alignment Length via the Menu Setup to set the new length. Make sure the desired length has been set. You can also try forcing an alignment and label measurement in AUTO mode, ensuring slack in the label stock for a slightly different measurement. Adjusting the Alignment Length manually in the Setup Menu by increasing or decreasing the value by 1 or 2 units (in./100) might also help, but be aware that...

Summary

Printer Overview

1.0 Introduction

Basic description of the E-Class printers, their configurations, and interfaces.

1.1 About this Printer

Details standard and optional features including printing, memory, and interfaces.

1.1.1 Standard Features

Lists printing, memory, interfaces, and operational capabilities of the printer.

1.1.2 Optional Features

Describes additional hardware options for enhanced functionality and performance.

Getting Started

2.0 Before Using the Printer

Initial steps for printer setup, including unpacking and inspection.

2.0.1 Removing the Packaging

Steps to safely unpack the printer and its accessories from the shipping container.

2.0.2 Inspecting and Requirements

Checking printer contents and listing necessary additional items for label generation.

Setting Up the Printer

3.0 Introduction

Overview of printer setup procedures, including connection, media, and ribbon loading.

3.1 Connecting the Printer

Guides on connecting power and data interfaces to the printer.

3.1.1 Power Connection

Details how to connect the printer to a power source using the appropriate adapter.

3.1.2 Interface & Cable Connections

Explains USB, serial, and parallel connection methods and cable requirements.

3.2 Adjusting the Media Sensor

How to set up the media sensor for accurate detection of labels and gaps.

3.3 Loading Media

Step-by-step instructions for loading labels or tags into the printer.

3.3.1 Loading Media for Peel Configuration

Specific instructions for loading media when using the peel-off configuration.

3.4 Loading Ribbon

Instructions for loading thermal transfer ribbon for printing.

3.5 Flash Memory Expansion

How to install optional flash memory modules for storing formats and fonts.

Using the Front Panel

4.0 Introduction

Overview of the printer's control panel, lights, and buttons.

4.1 Indicator Lights

Explains the function of Power, Fault, and Paused indicator lights on the control panel.

4.2 Button Functions

Details button operations in Normal, Setup, and Calibration modes.

4.2.1 Normal Mode Operations

Button functions for basic printing tasks like pause, feed, and cancel.

4.2.2 Setup & Calibration Modes

Button functions for printer setup, menu navigation, and calibration.

4.3 Printer Setup Menu

Lists and describes printer setup menu items and their possible values.

4.4 Label Alignment

Guides on configuring and troubleshooting label alignment for accurate printing.

4.5 Calibration Procedures

Instructions for auto and manual media sensor calibration.

4.6 Internal Labels

How to print configuration, dot check, and test labels.

Maintenance and Adjustments

5.0 Introduction

Overview of maintenance and adjustment procedures for the printer.

5.1 Cleaning the Printhead

Instructions for cleaning the printer's printhead using recommended solvents.

5.2 Media Width Adjustment

How to adjust the printhead for different media widths using the thumbwheel.

5.3 Ribbon Width Adjustment

How to adjust ribbon tension for optimal printing based on media/ribbon width.

5.4 Fine Printhead Adjustment

Fine-tuning print quality via the printhead adjustment set screw.

5.5 Printhead Replacement

Step-by-step guide for safely removing and replacing the printer's printhead.

5.6 Darkness Adjustment

Adjusting print contrast for clarity after printhead replacement.

5.7 Resetting to Factory Defaults

How to restore the printer to its default operational settings.

5.8 Downloading Firmware and Fonts

Process for updating printer software and downloading new fonts.

Troubleshooting

6.0 Introduction

Overview of troubleshooting common printer issues and potential solutions.

6.1 Troubleshooting Tips

Lists common printer problems and their solutions with page references for further detail.

Specifications

Mechanical Specifications

Details physical dimensions, weight, and operating temperature of the printer.

Printing Specifications

Information on print method, speed, and resolution capabilities.

Media;Ribbon Specifications

Details on supported media types, widths, and ribbon roll capacity.

Communications Specifications

Information on interface types, baud speed, and handshaking protocols.

Fonts and Barcodes

Information on available fonts and supported barcode symbologies.

Datamax DMX E E-4204 Specifications

General IconGeneral
Print MethodThermal Transfer / Direct Thermal
Print Resolution203 dpi
Print Speed4 ips
Operating Temperature40°F to 95°F (4°C to 35°C)
ConnectivitySerial, USB
Supported Barcode TypesCode 39, Code 128, UPC-A, UPC-E, EAN-8, EAN-13, Interleaved 2 of 5, Codabar, Postnet
Supported Media TypesRoll-fed, Die-cut, Continuous, Fan-fold, Tag stock, Tickets
Media Thickness0.0025" (0.0635 mm) to 0.010" (0.254 mm)

Related product manuals