4
2
2
2
.
.
.
2
2
2
I
I
I
n
n
n
t
t
t
e
e
e
r
r
r
f
f
f
a
a
a
c
c
c
e
e
e
C
C
C
o
o
o
n
n
n
n
n
n
e
e
e
c
c
c
t
t
t
i
i
i
o
o
o
n
n
n
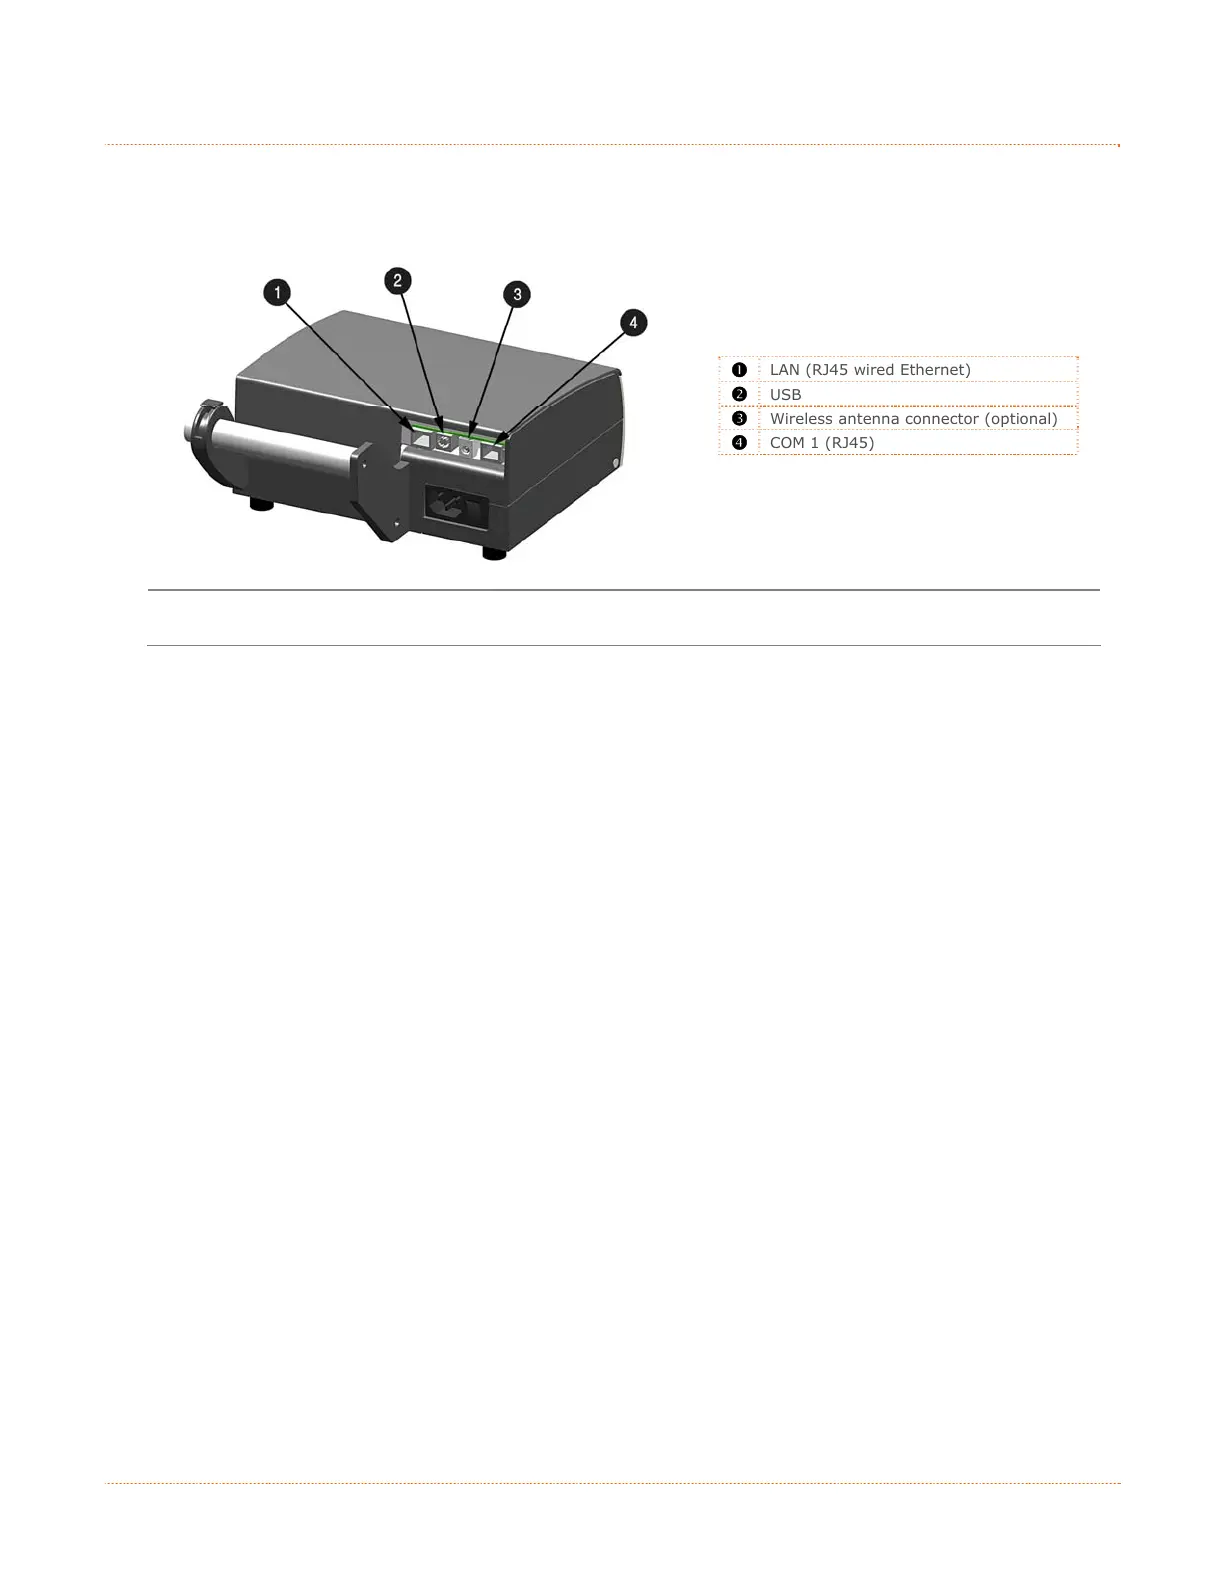
The printer can be connected to the host via the USB, serial, wired Ethernet, or optional wireless. The
printer will automatically connect to the first port that delivers valid data. Once established, the printer’s
power must be cycled ‘Off’ and ‘On’ to change an interface connection.
LAN (RJ45 wired Ethernet)
USB
Wireless antenna connector (optional)
COM 1 (RJ45)
Before connecting Power or interface cables to the printer, ensure the Power On/Off Switch is in the
‘Off’ position.
Serial Connections (COM1)
The serial interface supports RS-232C communications via a RJ45 connector. The following list of serial
port settings is menu selectable (via host software/driver) and must match the host computer’s serial port
settings: > Baud Rate (Default 9600 bps) > Word Length (Default 8 bits).
Serial to Parallel Converter
An optional serial to parallel converter cable (part# 540707) is available for applications that require a
parallel connection to the host.
USB Connection (USB)
The USB Interface is supported in Windows 95 and greater. Depending upon the operating system of your
host computer, installation may differ slightly.
Wired and Optional Wireless
For setup information on wired and optional wireless connections, see Appendix B.