13 / 24
Facelook X1 User’s Manual
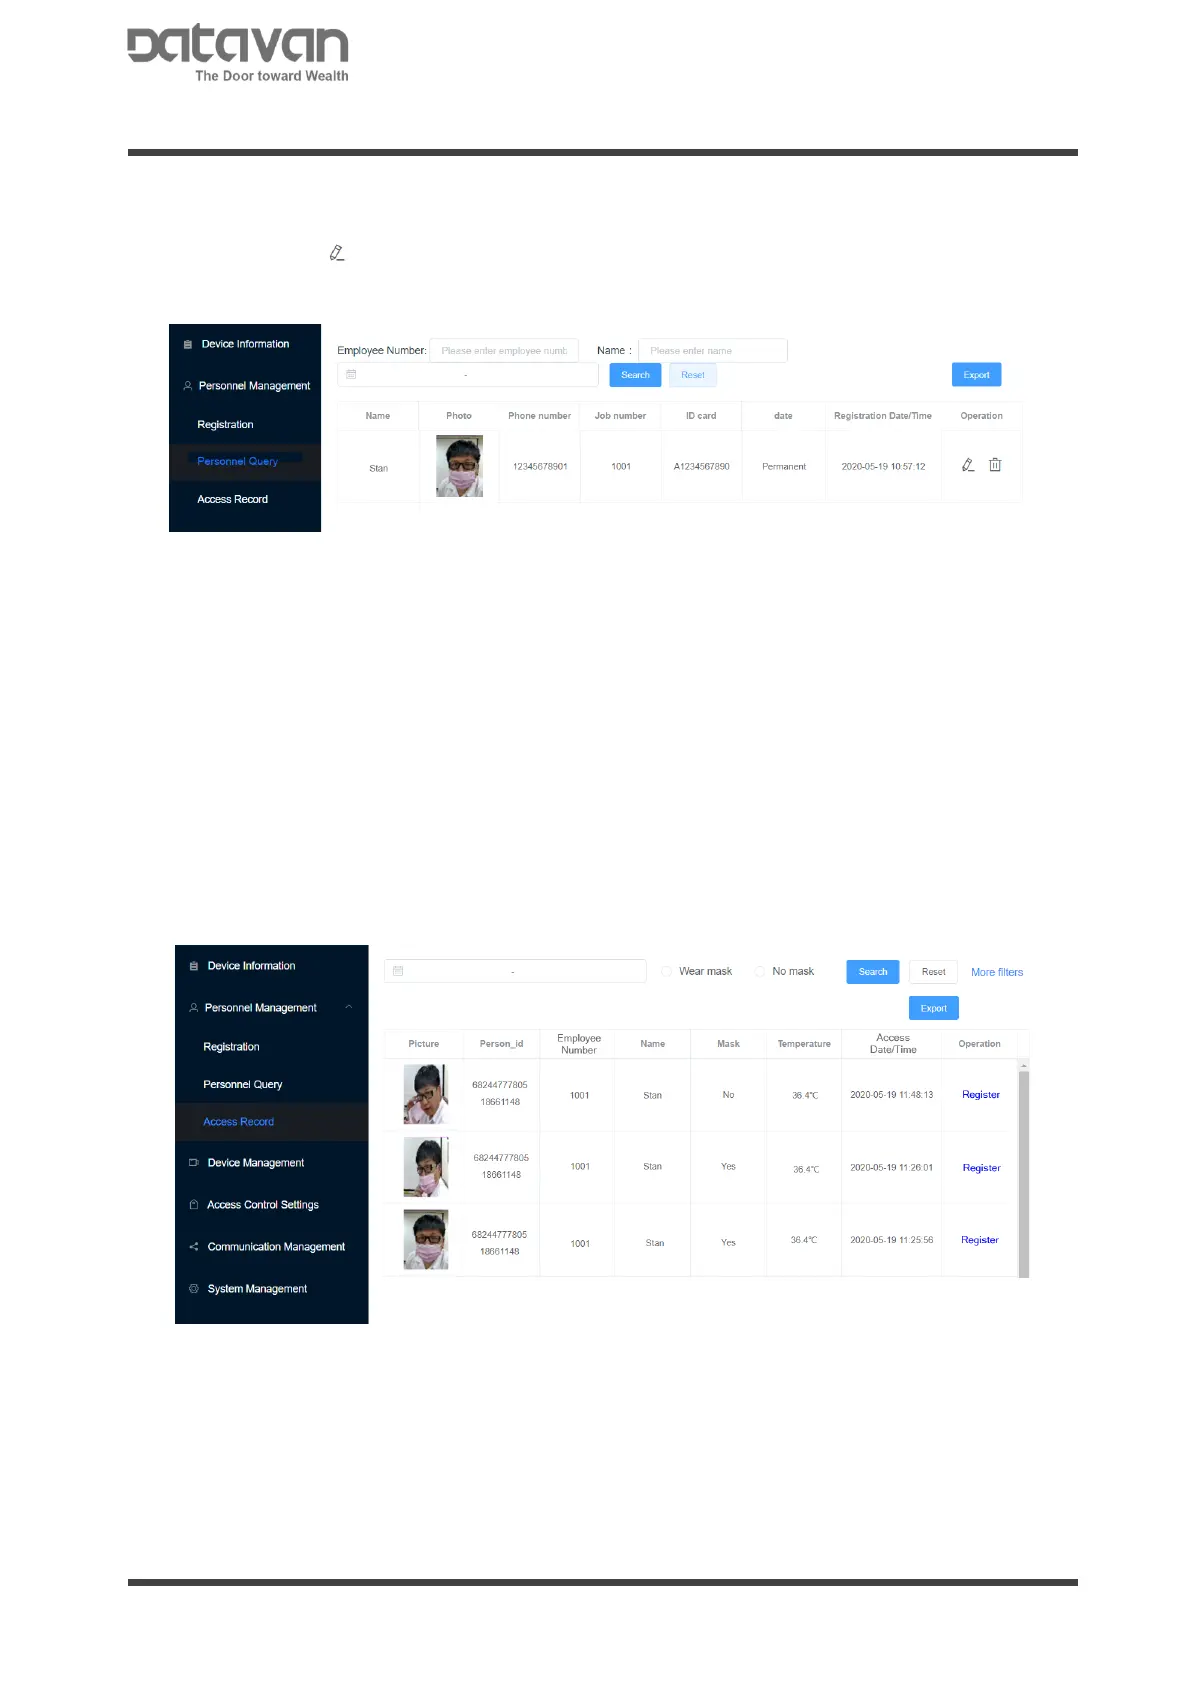
4. Personnel Query
The registered persons are listed in this page. Query the person according to the
employee number, name or registered date by the option column.
Click edit icon to revise the personnel information.
Click delete icon to delete this person.
Click [Export] to export the personnel database and save as a .tar file in PC.
Note
The exported file is “person.tar” which is a compressed file. A folder of pictures and a
db file, identySDK.db, will be discovered when un-compress all files and folders. The
file, person.tar, is actually only for device and is processed as personnel database.
5. Access Record
The access records can be reviewed in Access Record.
Select [Wear mask] or [No mask] as search option.
Click [More Filters] for more search options.
Click [Register] to register this person if the person is not registered yet.
Click [Export] to export the access record as a .zip file and save in PC. The system
will prompt a dialogue box to select encryption or not. If select encryption, input
password. Then click [OK] to start download. At this moment, keep the dialogue with
any operation until the download process is finish. Finally click [Cancel] to close the
dialogue box.
Note
If the data for access record is very large, data process will take long time and show
no message when exporting. In this case, try to set date period for fewer days, for
example, 1 or 2 days, for access data exporting.
Note
By default, the export file will be saved in folder ‘Downloads’ in PC. Go to this folder
and unzip the ‘download.zip’ in PC. A folder of pictures and a csv file, record.csv, will
be discovered when un-compress all files and folders. This record.csv also can be
opened by MS Excel for edit or review the access record details.