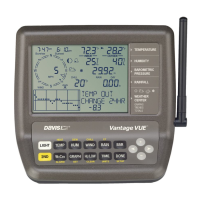
Console Diagnostic Mode
36
• An “X” flashes for every data packet received by the console.
• An “R” displays when the console is trying to re-establish a lost connection. The
console tries for 10 minutes to re-establish a connection before going into L
Mode.When no data packets have been received for 10 minutes, the console dashes-
out any missing sensor readings.
• An “L” displays when the signal is lost (and the console is “asleep.”) The console
stays in this mode for 15 minutes until returned to “R” mode. To force the console
into “R” mode (“wake up” the console), enter and exit Setup Mode.
Check Console Reception
Enter Setup mode by pressing and holding DONE, then pressing the - key at the same
time. Wait a few minutes while the console lists all the stations transmitting within
range (See “Screen 1: Active Transmitters” on page 10 for more information). If the
console does not detect your transmitter, check the following:
• Adjust the console and ISS antennas so that they are in line of sight with each other.
• Reduce the distance between the ISS and the console.
• If the console is directly beneath the ISS, the antennas should be horizontal.
• Try distancing your console from your ISS, at least 10 feet apart.
• Change the Transmitter ID (on both the console and the ISS) to a number other than
1.
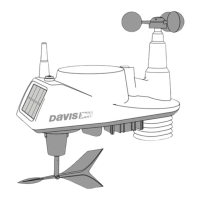
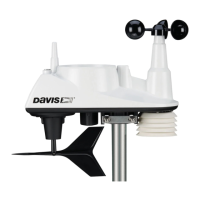
Refer to the ISS Installation Manual or other station manual for instructions on how to
check the station for potential transmission problems.
Console Diagnostic Mode
In addition to logging weather data, the console continuously monitors the station’s
radio reception. You may find this information very helpful, especially when you are
choosing locations for your console and ISS.
The Console Diagnostics Mode consists of two screens, the Statistical Diagnostic
Screen and the Reception Diagnostic Screen. The Statistical Diagnostic screen applies
for both cabled and wireless weather stations. The Reception Diagnostic screen applies
only to wireless weather stations and is not accessible to a cabled weather station.
Note: Radio transmission data used by the diagnostic screens clears each day at midnight.
Diagnostic Screen Commands
• Press and hold TEMP, then press HUM to display the Statistical Diagnostic screen.
• Press the > key to display signal statistics for the next installed transmitter ID.
• Press 2ND and then press CHILL to toggle between the Statistical and Reception
Diagnostic screens.
• A degree (
°) sign displays in right corner of value 1 of the Reception Diagnostic
screen (screen 2) to differentiate which screen is currently displayed.
• Press DONE to exit the diagnostic screen.