26
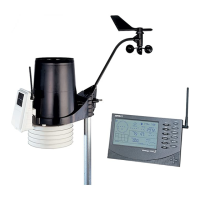
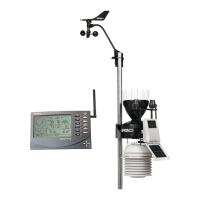
Guidelines for Installing the Sensor Suite on a Pole
• When mounting the rain collector base and anemometer together on opposite
sides of the pole, remember that whichever side is mounted first, the U-bolt from
the opposite side must also be placed around the pole before tightening the U-
bolts. (If it is not, there is no way to slide it in later.)
• In each side’s mounting base, there is a groove to accommodate the other
mounting base’s U-bolt.
• Once the two sides of the sensor suite have been loosely mounted together on the
pole, swivel the unit to the correct direction and then tighten the hex nuts. The
desired height can also be achieved by sliding the sensor suite vertically before
tightening.
Option 1: Installing the Sensor Suite and Anemometer Together
Try to install the sensor suite so the anemometer arm is aiming true north.
Note: If your anemometer arm cannot be mounted aiming true north, you will need to
calibrate the wind direction on your console to display accurate wind directions. See
your WeatherLink Console User Guide.
1. Place the U-bolt for the anemometer around the pole so that its round end fits in
the top groove on the rain collector mounting base. The groove is right above two
large holes.
2. While holding the mounting base of the rain collector against the pole, place the
two ends of the remaining U-bolt around the pole and through the two holes in the
base.
3. Slide the metal backing plate over the bolt ends as they stick out over the rain
collector base. Loosely secure the backing plate with a lock washer and hex nut
on each of the bolt ends as shown previously.
Note: Leave the hex nuts loose to swivel the sensor suite base on the pole.
4. The two ends of the anemometer’s U-bolt should now be pointing away from the
mounted rain collector side. Slide the anemometer’s mounting base over the
protruding bolt ends. Place a flat washer, a lock washer and a hex nut on each of
the bolt ends as shown above. Do not tighten the nuts yet.
5. Raise the sensor suite unit to the desired height on the pole and swivel it so the
anemometer arm is pointing north.
6. Using an adjustable wrench or 7/16" wrench, tighten all four hex nuts until the
sensor suite is firmly fastened on the pole.