25
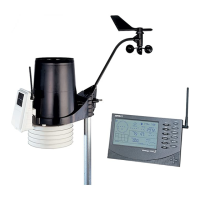
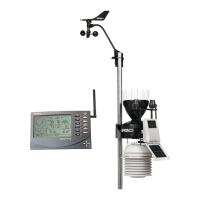
Installing the Sensor Suite and Anemometer on a Pole
When installing the sensor suite on a pole, the rain collector /radiation shield section
of the sensor suite and the anemometer can be mounted together as a single unit, or
the two sections can be mounted separately.
Accessories for Pole Mounting
• Use the Mounting Tripod (#7716) for easy mounting, especially on a roof.
• Use the Mounting Pole Kit (#7717) to raise the installation height by up to 37.5"
(0.95 m).
General Guidelines for Installing on a Pole
• With the supplied U-bolts, the sensor suite and anemometer can be mounted on a
pole having an outside diameter ranging from 1
1
/
4
" to 1
3
/
4
" (32 – 44mm).
• Larger U-bolts (not supplied) can be used to mount to a pole with a maximum
outside diameter of 2
1
/
2
" (64mm).
• To mount on a smaller pole, obtain a U-bolt that fits the sensor suite base
openings but that has a shorter threaded section. If mounting on a smaller pole
with the included U-bolts, the bolt interferes with the rain collector cone. The
pole must be sturdy enough to be stable. Any movement of the pole will affect
wind and rain data.
• Use the built-in bubble level to ensure sensor suite is level.
Note: If your anemometer arm cannot be mounted aiming true north, you will need to
calibrate the wind direction on your Console to display accurate wind directions. See
your WeatherLink Console User Guide.
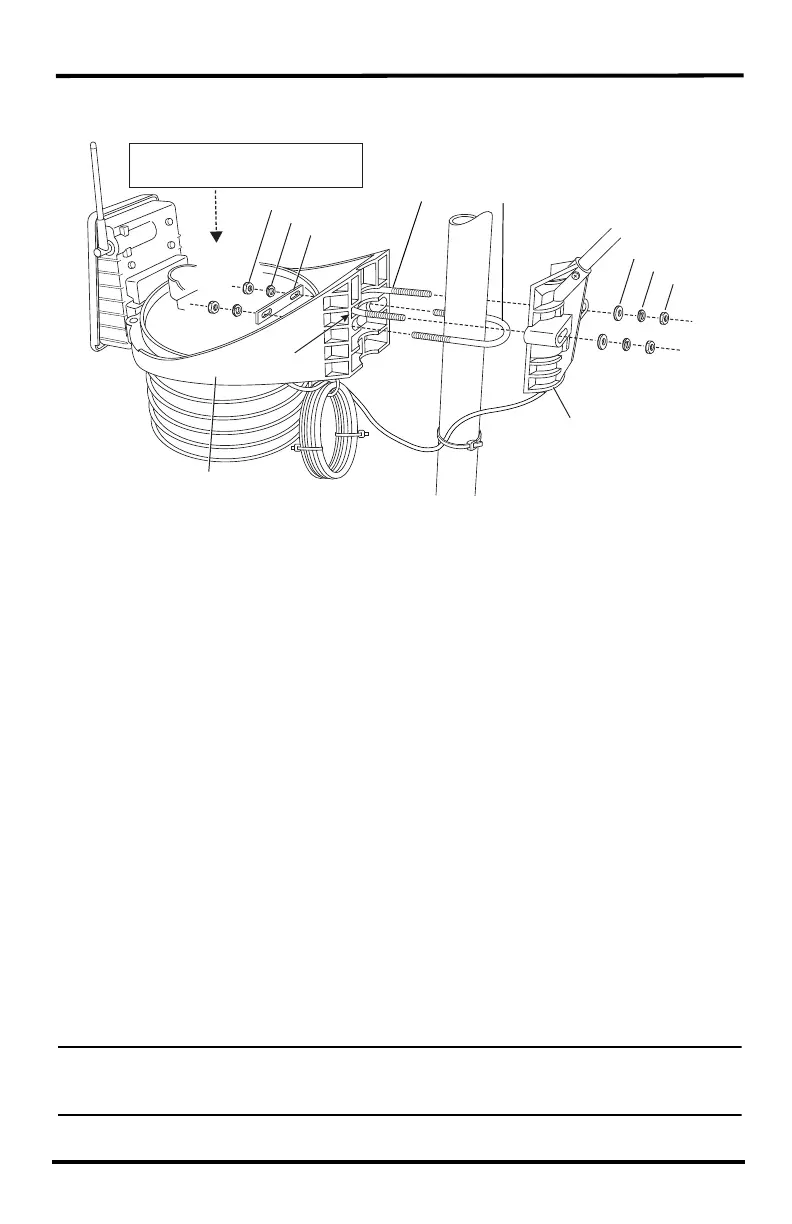
1/4" Hex Nut
1/4" Lock Washer
Backing Plate
U-Bolts:
Rain Collector
Mounting Base
Groove for
U-Bolt
1/4" Flat Washer
1/4" Lock Was
1/4" Hex N
Anemometer
Mounting Base
Built-in bubble level
behind tipping spoon mechanism
Anemometer U-Bolt Rain Collector U-Bolt
Tipping spoon not
shown for clarity.
 Loading...