Service Manual
22
Color Settings Only
All Settings
Enable LCD Conditioning
DDC/CI Enable Disable
Automatic Adjustment (press “+“ directly)
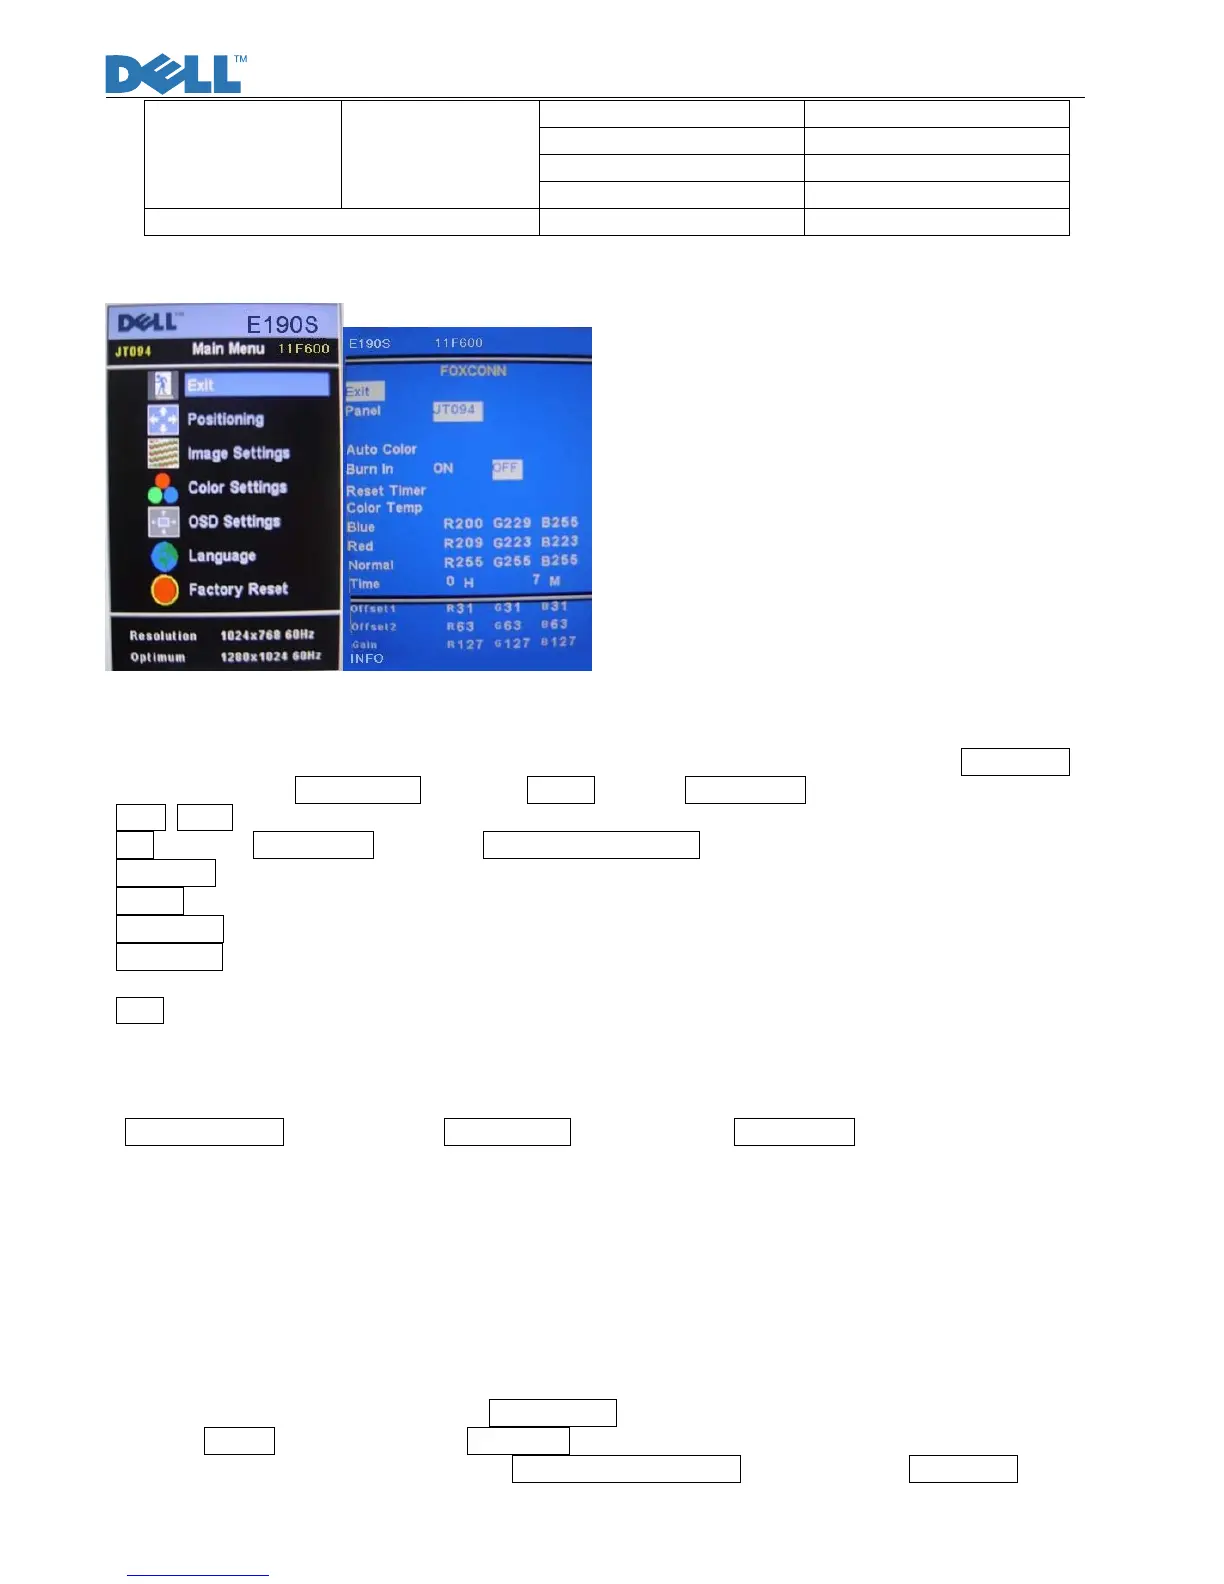
3. Factory Mode Introduction
Fig.1 Fig.2
With signal input, press “Power” button to turn off the monitor. Press “Menu” and “Auto/Plus” buttons together, and
then press “Power” button to turn on the monitor. After power on, press “Menu” button to call out Main Menu
(Fig.1). Pull down to Factory Reset and choose Factory to enter Factory mode (Fig.2).
Panel: JT094: Current using panel part number(DELL supply)
Exit: Exit from Factory mode and back to Reset to Factory Settings.
Auto Color: Automatically calibrate chip ADC parameters by using internal DAC. (Only with Burn-in ON)
Burn In: Enable or disable the Burn-in mode by choosing ON or OFF.
Reset Timer: Reset the “Turn-on time” of the panel to 0H0M.
Color Temp: The R, G, B of Blue Preset (9300K), Red Preset (5700K) and Normal Preset (6500K) are generated
from scaling chip’s back-end white-balance program.
Time: Turn-on time of the panel.
4. Burn-in pattern
If it is a new monitor without VGA cable plugged in, burn-in pattern will self-generate automatically.
Burn-in pattern will not be stopped until plugging in the VGA cable. Then, press “Menu” button to call out
OSD Main Menu; pulling down to Factory Reset item and execute All Resetting to disable Bun-in ON.
5. Auto Color Balance (Automatically calibrate chip ADC parameter by using chip
internal DAC.)
5.1 If it is a new-built set, press “Auto/Plus” button to execute “Auto Color” at 32gray scale pattern.
5.2 Please confirm the following steps to perform “Auto Color Balance”:
- Connect the VGA cable with the standard video pattern generator and display 32gray scale pattern on
the monitor.
- Press “Power” button to power off the monitor.
- Press “Menu” and “Auto/Plus” buttons simultaneously; then press “Power” button to power on the
monitor.
- Press “Menu” button, pull down to Factory Reset and choose “Factory” item.
- Set Burn In to ON, then execute Auto Color.
- With “Auto Color” finished, return to Reset to Factory Settings OSD and execute All Settings to enable
burn-in OFF.