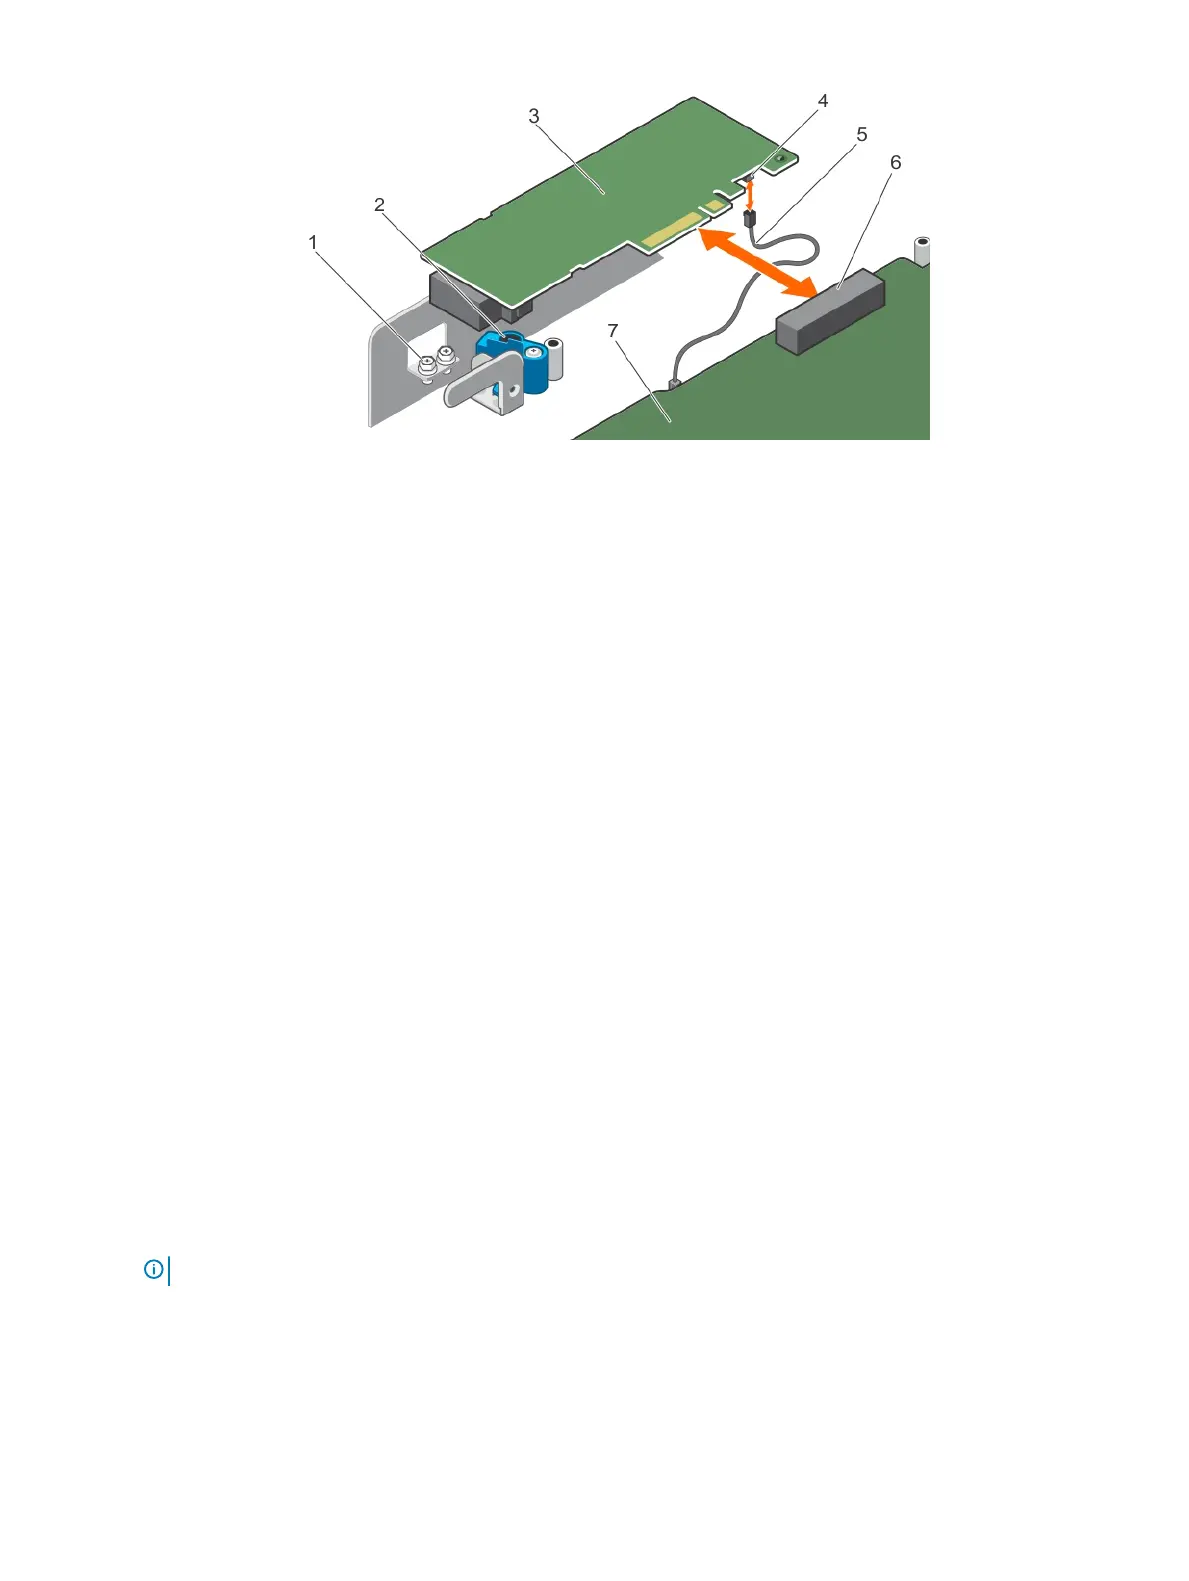
Figure 24. Removing and installing the internal PERC card
1 screw (2) 2 PERC card lock
3 PERC card 4 LED cable connector on the PERC card
5 PERC card LED cable 6 PERC card connector
7 LED cable connector on the system board
Next steps
1 Install the internal PERC card.
2 Install the expansion card riser.
3 Follow the procedure listed in the After working inside your system section.
Installing the internal PERC card
Prerequisites
1 Follow the safety guidelines listed in Safety instructions section.
2 Follow the procedure listed in the Before working inside your system section.
3 Remove the expansion card riser.
4 Keep the Phillips #2 screwdriver ready.
Steps
1 Connect the PERC LED cable to the LED cable connector on the PERC card.
2 Insert the PERC card in the PERC card slot.
3 Press and slide the tab on the PERC card lock to disengage it from the slot on the chassis.
4 Turn the internal PERC card lock to engage it with the PERC card.
5 Install the rst screw to secure the PERC card lock to the PERC card.
6 Install the second screw to secure the PERC card to the chassis.
NOTE
: Use the two screws supplied with the system to secure the PERC card to the PERC card lock and the chassis
7 Connect the PERC LED cable to the LED cable connector on the system board.
Next steps
1 Install the expansion card riser.
2 Follow the procedure listed in the After working inside your system section.
Installing and removing system components
73
 Loading...