EasyManuals Logo

Dell EMC PowerEdge R750 Service Manual

Dell EMC PowerEdge R750
238 pages
To Next Page IconTo Next Page
To Previous Page IconTo Previous Page
Page #56 background imageLoading...
Page #56 background image
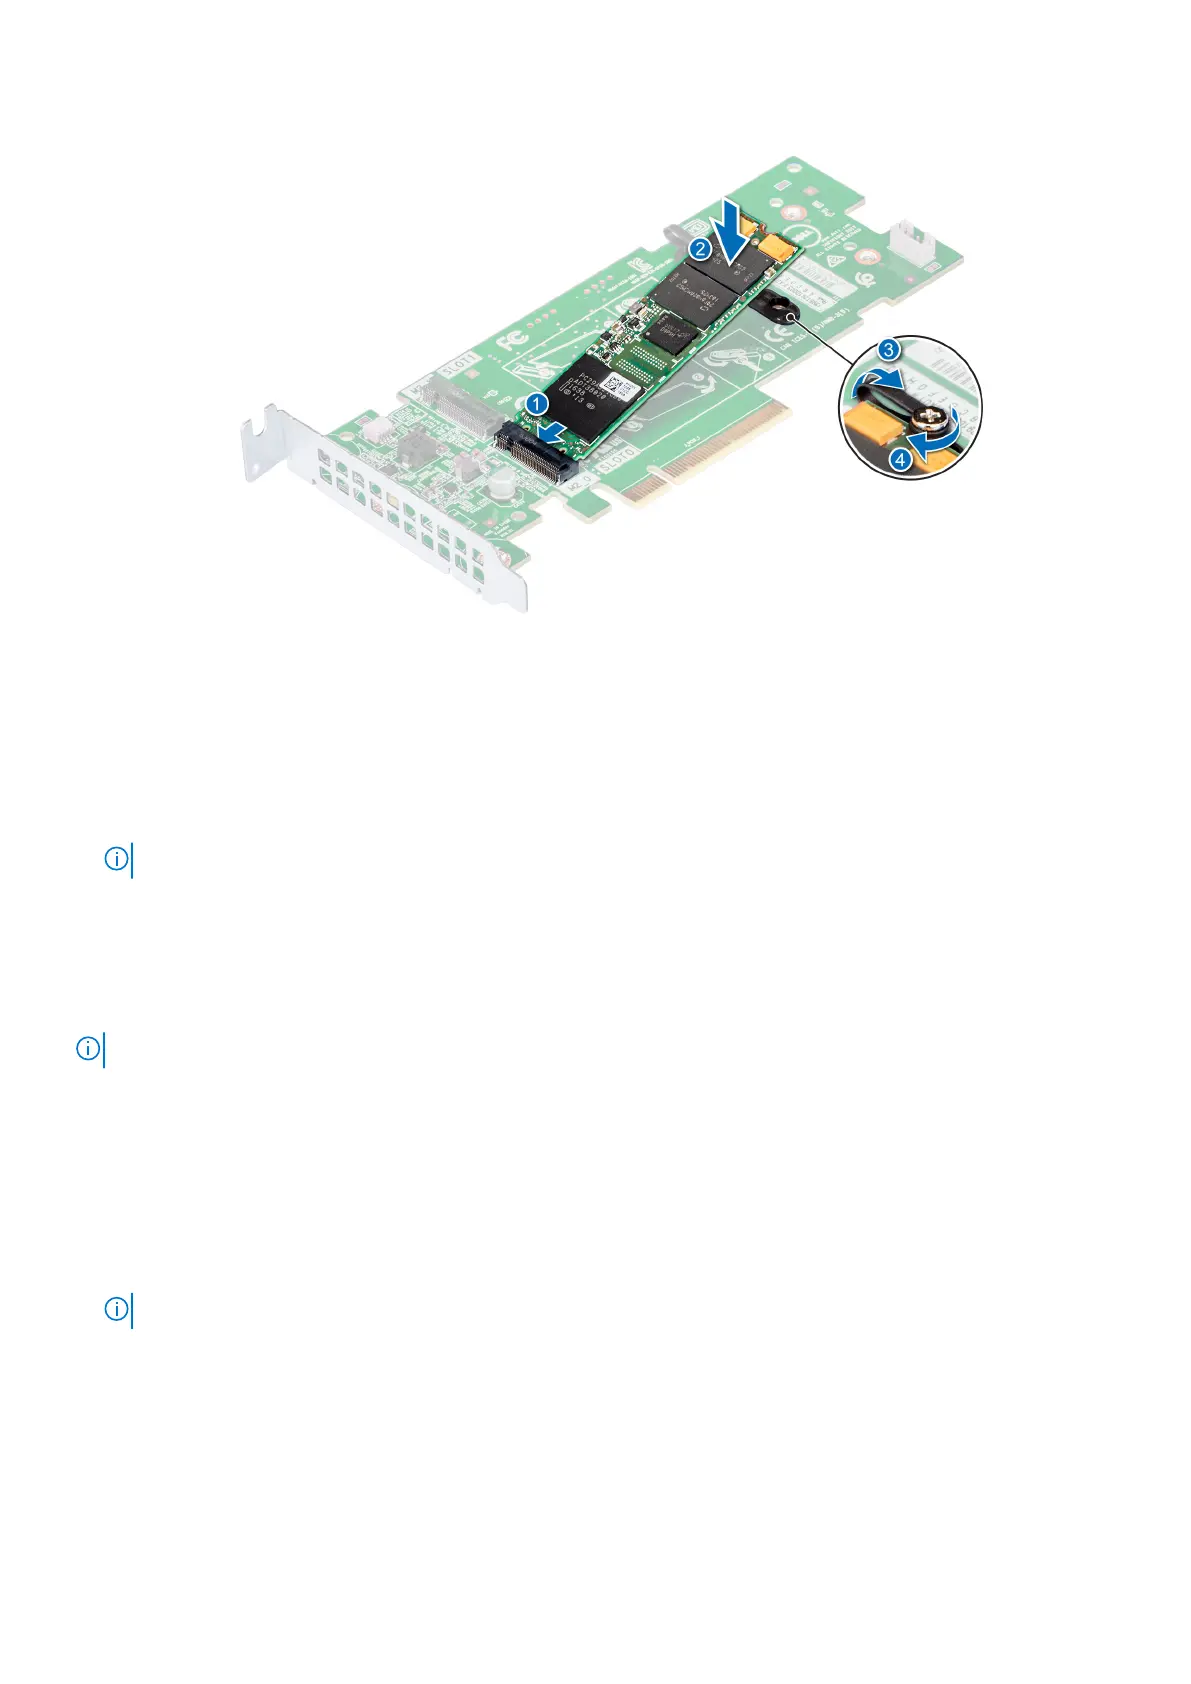
Figure 53. Installing the M.2 SSD module
a. module connector (2)
b. screws (2)
c. modules (2)
Next steps
1. Install the BOSS card.
NOTE: Installing the BOSS card is similar to installing the expansion card riser.
2. Install the air shroud.
3. Follow the procedure listed in After working inside your system.
Optional front bezel
NOTE: LCD panel is optional on the front bezel. If the front bezel has an LCD panel, see LCD panel section.
Removing the front bezel
The procedure to remove the front bezel with and without the LCD panel is the same.
Prerequisites
1. Follow the safety guidelines listed in the Safety instructions.
2. Keep the bezel key handy.
NOTE: The bezel key is part of the LCD bezel package.
Steps
1. Unlock the bezel.
2. Press the release button, and disengage the left end of the bezel.
3. Unhook the right end, and remove the bezel.
56
Installing and removing system components

Table of Contents

Questions and Answers:

Question and Answer IconNeed help?

Do you have a question about the Dell EMC PowerEdge R750 and is the answer not in the manual?

Dell EMC PowerEdge R750 Specifications

General IconGeneral
Form Factor2U rack server
ProcessorUp to 2x 3rd Generation Intel Xeon Scalable processors, with up to 40 cores per processor
MemoryUp to 32 DDR4 DIMM slots
StorageUp to 24 x 2.5" SAS/SATA (HDD/SSD) or up to 12 x 3.5-inch SAS/SATA (HDD) drives, and up to 4 NVMe drives
Power Supply1100W
Network2 x 1GbE
RAID ControllerPERC H755
Expansion SlotsUp to 8 x PCIe Gen4 slots
GPU SupportUp to 3 x double-width GPUs or 6 x single-width GPUs
Operating System SupportMicrosoft Windows Server, Ubuntu, Red Hat Enterprise Linux, VMware ESXi, SUSE Linux Enterprise Server

Related product manuals