EasyManuals Logo

Dell Networking N4032 Getting Started Guide

Dell Networking N4032
60 pages
To Next Page IconTo Next Page
To Previous Page IconTo Previous Page
Page #21 background imageLoading...
Page #21 background image
Installation 19
1U Front-rack Installation
The rails that are attached to the switch must be configured.
1
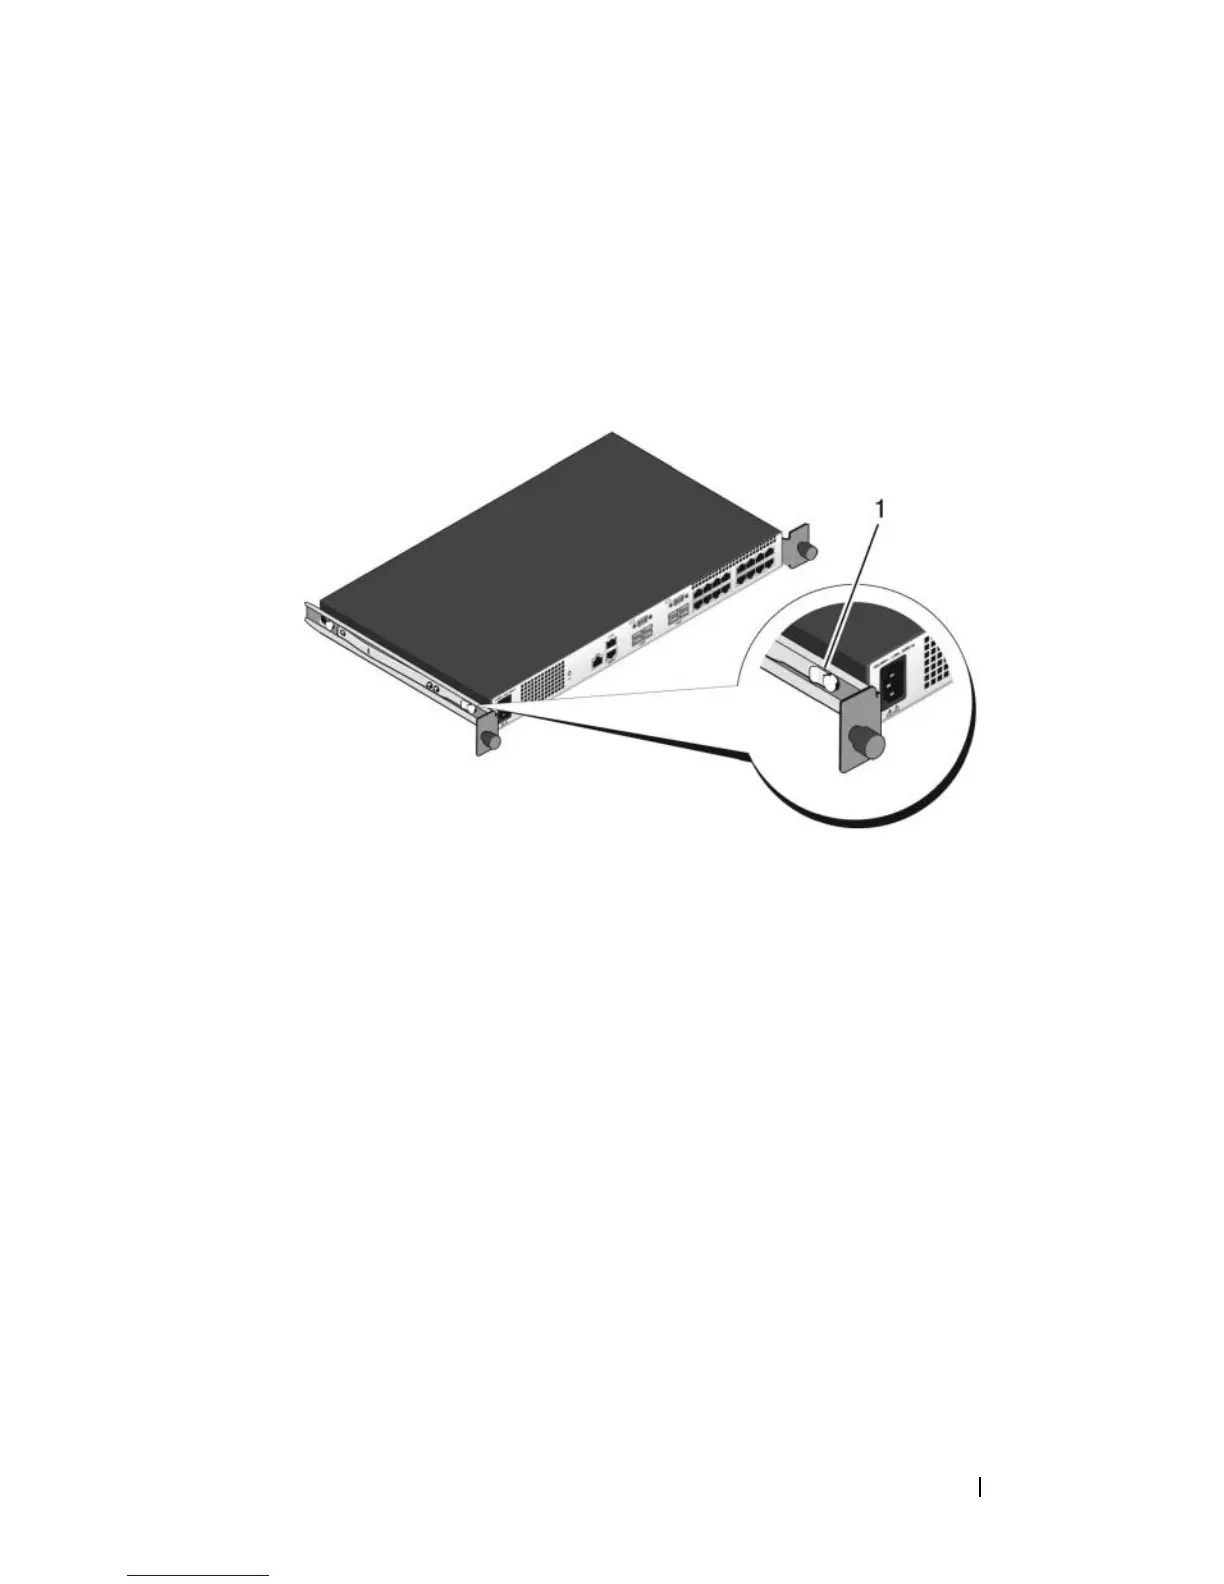
Attach the switch rails (inner chassis members) to the N4000 switch.
Figure 7, item 1 shows the detail for the front standoff with locking tab.
Figure 7. Attaching the Switch Rails
2
After both switch rails are installed, line them up on Ready-Rails previously
mounted to the rack and slide the switch in until flush with front of rack.
About 3inches prior to full insertion, the rail locking feature will engage to
keep the switch from inadvertently sliding out of the rack and falling.

Other manuals for Dell Networking N4032

Questions and Answers:

Question and Answer IconNeed help?

Do you have a question about the Dell Networking N4032 and is the answer not in the manual?

Dell Networking N4032 Specifications

General IconGeneral
Rack Units1U
LayerLayer 3
ManageableYes
StackableYes
MAC Address Table Size32, 000 entries
Jumbo Frame SupportYes
Jumbo Frame Size9216 bytes
Input Voltage100-240 VAC
Operating Temperature0°C to 45°C (32°F to 113°F)
Uplink Ports8 x 10 Gigabit Ethernet 10GBASE-T
Power SupplyDual, hot-swappable
Operating Humidity10% to 90% non-condensing

Related product manuals