What to do if my Dell Desktop says 'INVALID CONFIGURATION INFORMATION-PLEASE RUN SYSTEM SETUP PROGRAM'?
M
Mr. Robert Simmons Jr.Sep 15, 2025
If your Dell Desktop displays 'INVALID CONFIGURATION INFORMATION-PLEASE RUN SYSTEM SETUP PROGRAM', correct the appropriate options in the system setup program.
T
Timothy PrinceAug 25, 2025
What to do if my Dell OptiPlex 3060 Tower Desktop says 'Hard-disk drive failure'?
W
warddouglasAug 25, 2025
If your Dell Desktop displays 'Hard-disk drive failure', shut down the computer, remove the hard drive, and boot the computer from an optical drive. Then, shut down the computer, reinstall the hard drive, and restart the computer. If the problem persists, try another drive. Run the Hard Disk Drive tests in Dell Diagnostics. Also, it could be a possible hard disk drive failure during POST.
G
Garrett MorganAug 25, 2025
What does 'Keyboard failure' mean on my Dell OptiPlex 3060 Tower and how to fix it?
W
whitneysheltonAug 26, 2025
A 'Keyboard failure' message on your Dell Desktop indicates a keyboard failure or a loose cable. Reseat the cable; if that doesn't solve the problem, replace the keyboard.
J
jordankathleenAug 26, 2025
What to do if my Dell OptiPlex 3060 Tower Desktop says 'HARD-DISK DRIVE READ FAILURE'?
J
Joshua BurchAug 27, 2025
If your Dell Desktop displays 'HARD-DISK DRIVE READ FAILURE', shut down the computer, remove the hard drive, and boot the computer from an optical. Then, shut down the computer, reinstall the hard drive, and restart the computer. If the problem persists, try another drive. Run the Hard Disk Drive tests in Dell Diagnostics.
M
Mr. Craig Tran Jr.Sep 16, 2025
How to fix 'KEYBOARD CLOCK LINE FAILURE' on a Dell Desktop?
D
Danny BernardSep 16, 2025
To fix a 'KEYBOARD CLOCK LINE FAILURE' on a Dell Desktop, for external keyboards, check the cable connection. Run the Keyboard Controller test in Dell Diagnostics.
S
shepherdrachelSep 23, 2025
What does 'MEMORY ALLOCATION ERROR' mean on my Dell OptiPlex 3060 Tower?
B
brownearlSep 23, 2025
The software you are attempting to run is conflicting with the operating system, another program, or a utility. Shut down the computer, wait for 30 seconds, and then restart it. Run the program again. If the error message still appears, see the software documentation.
B
Bonnie McdonaldSep 7, 2025
What does 'CD DRIVE CONTROLLER FAILURE' mean on my Dell Desktop?
D
Dawn RomeroSep 8, 2025
A 'CD DRIVE CONTROLLER FAILURE' on your Dell Desktop means that the optical drive does not respond to commands from the computer.
E
Eddie JonesSep 8, 2025
What does 'DATA ERROR' mean on my Dell OptiPlex 3060 Tower?
M
Monique HarperSep 8, 2025
A 'DATA ERROR' message on your Dell Desktop indicates that the hard drive cannot read the data.
A
Amanda ThomasSep 2, 2025
What to do if my Dell Desktop displays 'MEMORY ODD/EVEN LOGIC FAILURE AT ADDRESS, READ VALUE EXPECTING VALUE'?
K
krista36Sep 2, 2025
If your Dell Desktop displays 'MEMORY ODD/EVEN LOGIC FAILURE AT ADDRESS, READ VALUE EXPECTING VALUE', a memory module may be faulty or improperly seated. Reinstall the memory module or, if necessary, replace it.
K
Kelsey AndersonAug 31, 2025
What to do if my Dell OptiPlex 3060 Tower Desktop displays 'MEMORY ADDRESS LINE FAILURE AT ADDRESS, READ VALUE EXPECTING VALUE'?
D
Desiree ChoiAug 31, 2025
If your Dell Desktop displays 'MEMORY ADDRESS LINE FAILURE AT ADDRESS, READ VALUE EXPECTING VALUE', a memory module may be faulty or improperly seated. Reinstall the memory module or, if necessary, replace it.
Instructions and resources for contacting Dell support.
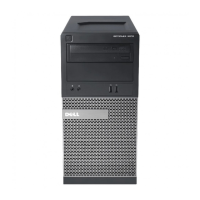
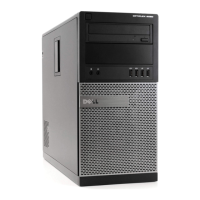
Dell OptiPlex 3060 Tower Specifications
General
Operating System
Windows 10 Pro
Form Factor
Tower
Processor
Intel Core i3/i5/i7
RAM
Up to 32GB DDR4
Storage
HDD/SSD up to 1TB
Graphics
Intel UHD Graphics 630
Ports (Front)
2 x USB 3.1, 2 x USB 2.0, 1 x headphone/mic combo
Ports (Rear)
4 x USB 3.1, 2 x USB 2.0, 1 x HDMI, 1 x RJ-45
Expansion Slots
1 x PCIe x16, 1 x PCIe x1
Power Supply
260W
Optical Drive
Optional DVD+/-RW
Ports
Front: 2 x USB 3.1 Gen 1, 1 x headphone/microphone combo jack; Rear: 4 x USB 3.1 Gen 1, 2 x USB 2.0, 1 x HDMI, 1 x VGA, 1 x serial port, 1 x RJ-45, 1 x line-out, 1 x line-in