NOTE: After removing the processor, place it in an antistatic container for reuse, return, or
temporary storage. Do not touch the bottom of the processor to avoid damage to the
processor contacts. Touch only the side edges of the processor.
Installing the processor
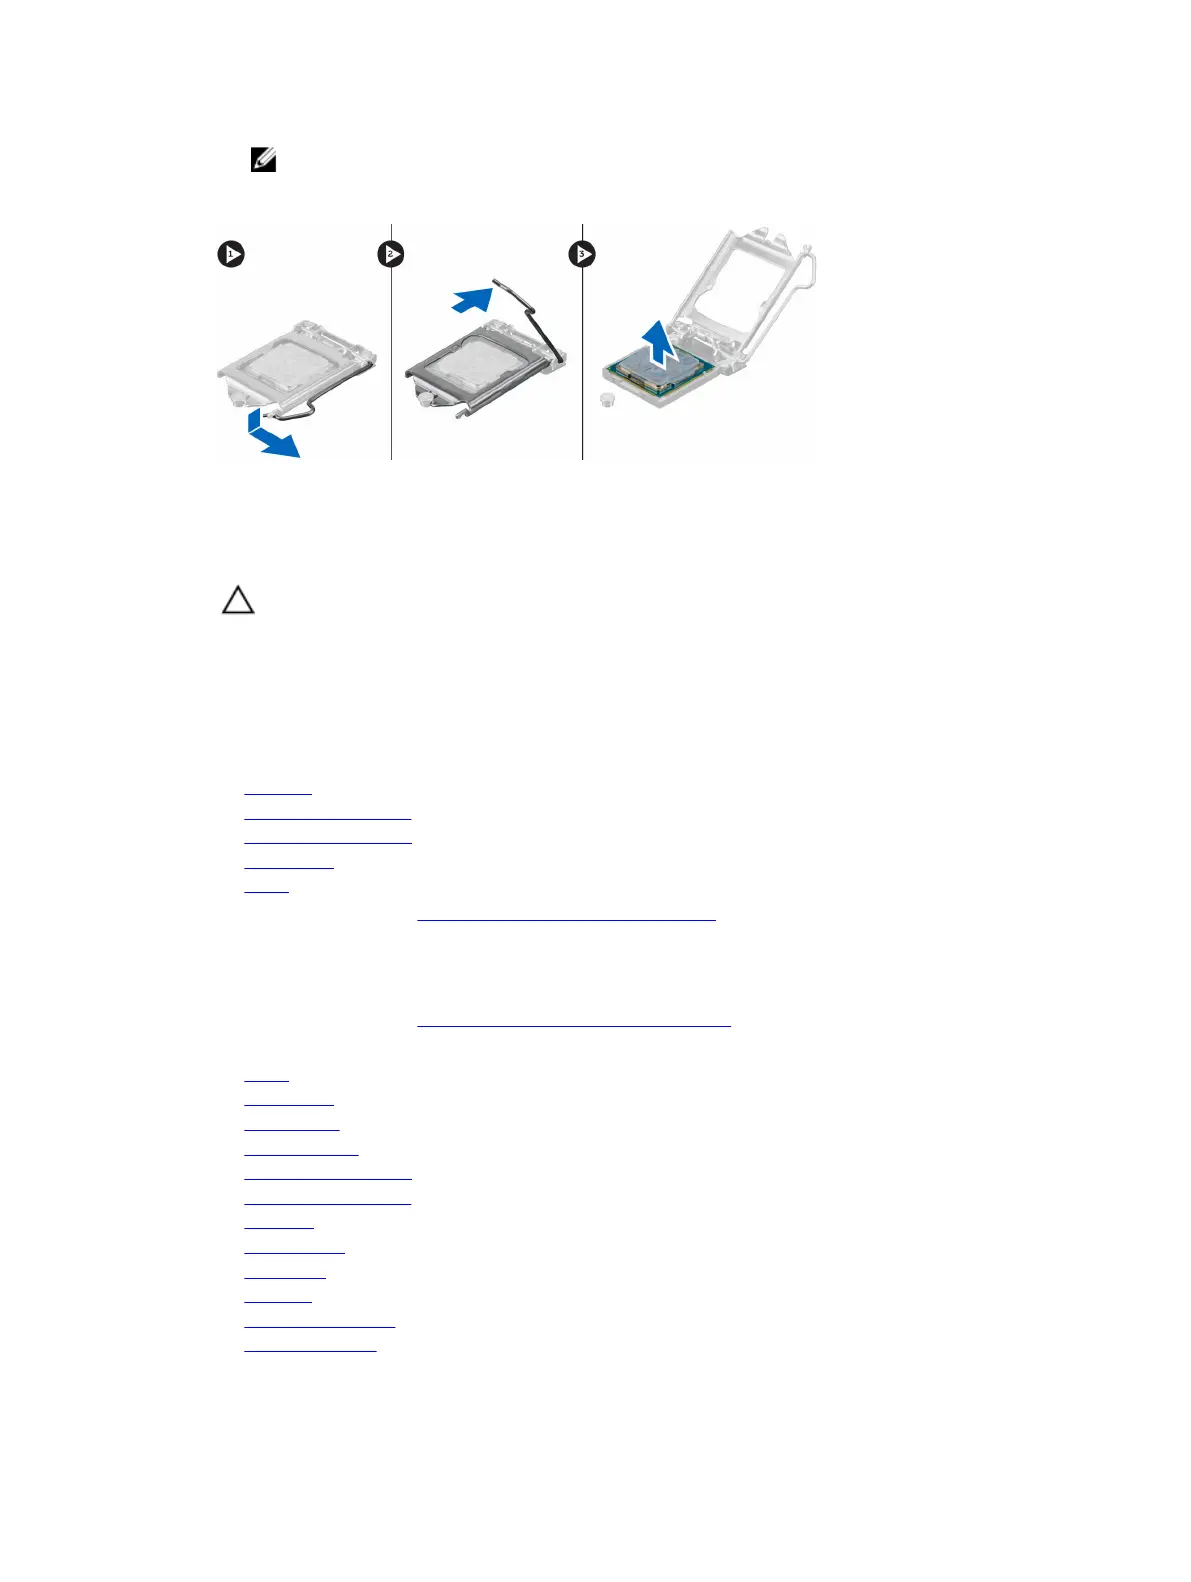
1. Align the processor with the socket keys.
CAUTION: Do not use force to seat the processor. When the processor is positioned
correctly, it engages easily into the socket.
2. Align the pin-1 indicator of the processor with the triangle on the socket.
3. Place the processor on the socket such that the slots on the processor align with the socket keys.
4. Close the processor shield by sliding it under the retention screw.
5. Lower the socket lever and push it under the tab to lock it.
6. Install:
a. heatsink
b. system-board shield
c. VESA mount bracket
d. back cover
e. stand
7. Follow the procedure in After Working Inside Your Computer.
Removing the system board
1. Follow the procedure in Before Working Inside Your Computer.
2. Remove the:
a. stand
b. back cover
c. cable cover
d. speaker cover
e. VESA mount bracket
f. system-board shield
g. memory
h. optical drive
i. hard drive
j. heatsink
k. power-supply unit
l. converter board
30