Removing the display assembly
1. Follow the procedure in Before Working Inside Your Computer.
2. Remove the:
a. stand
b. back cover
c. cable cover
d. speaker cover
e. VESA mount bracket
f. system-board shield
g. WLAN card
h. optical drive
i. hard drive
j. intrusion switch
k. power and OSD buttons board
l. converter board
m. power-supply unit
n. heatsink
o. processor fan
p. speakers
q. system board
NOTE: These instructions are valid only for non-touch computers. For touch computers, the
display panel should be disassembled in a clean-room environment.
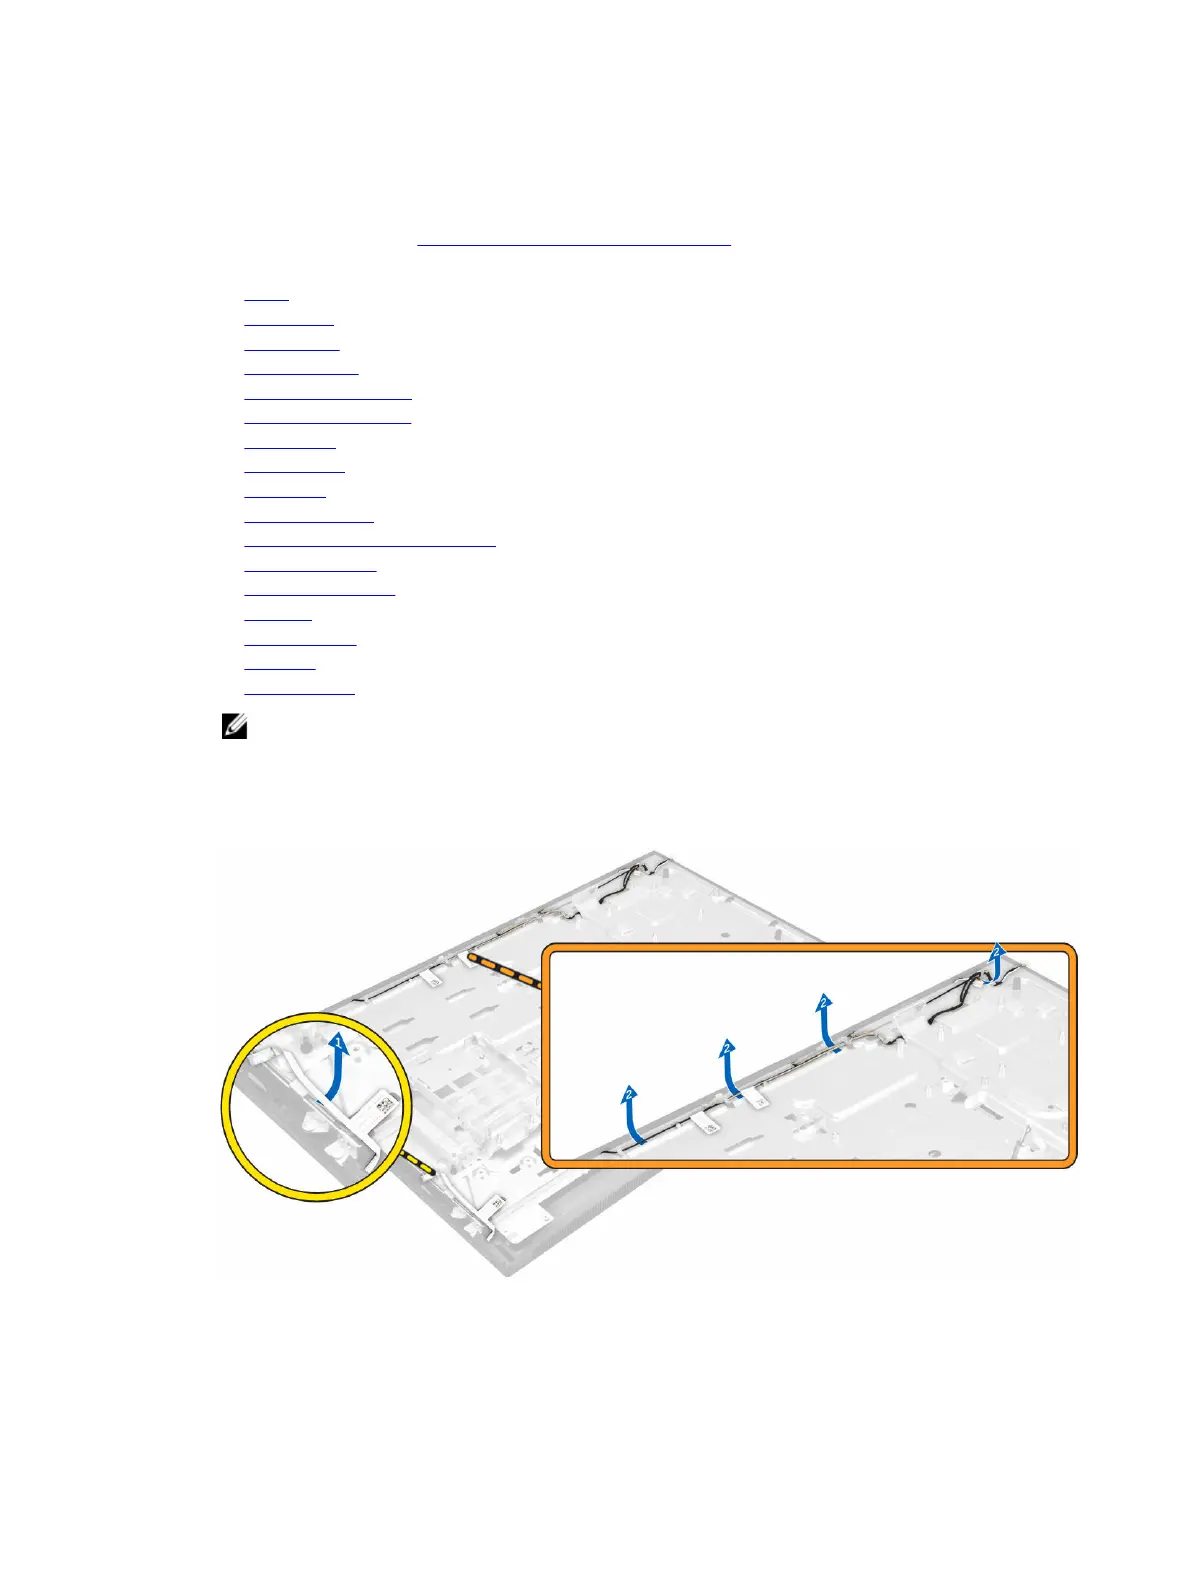
3. Perform the following steps as shown in the illustration:
a. Remove the power-switch cable from the retention clip [1].
b. Unthread the camera cable from the retention clips on the display panel [2].
4. Perform the following steps as shown in the illustration:
a. Peel off the tape to access the cables [1].
35