Back to Contents Page
Dell™OptiPlex™760ServiceManual
Chassis Intrusion Switch
Chassis Intrusion Switch
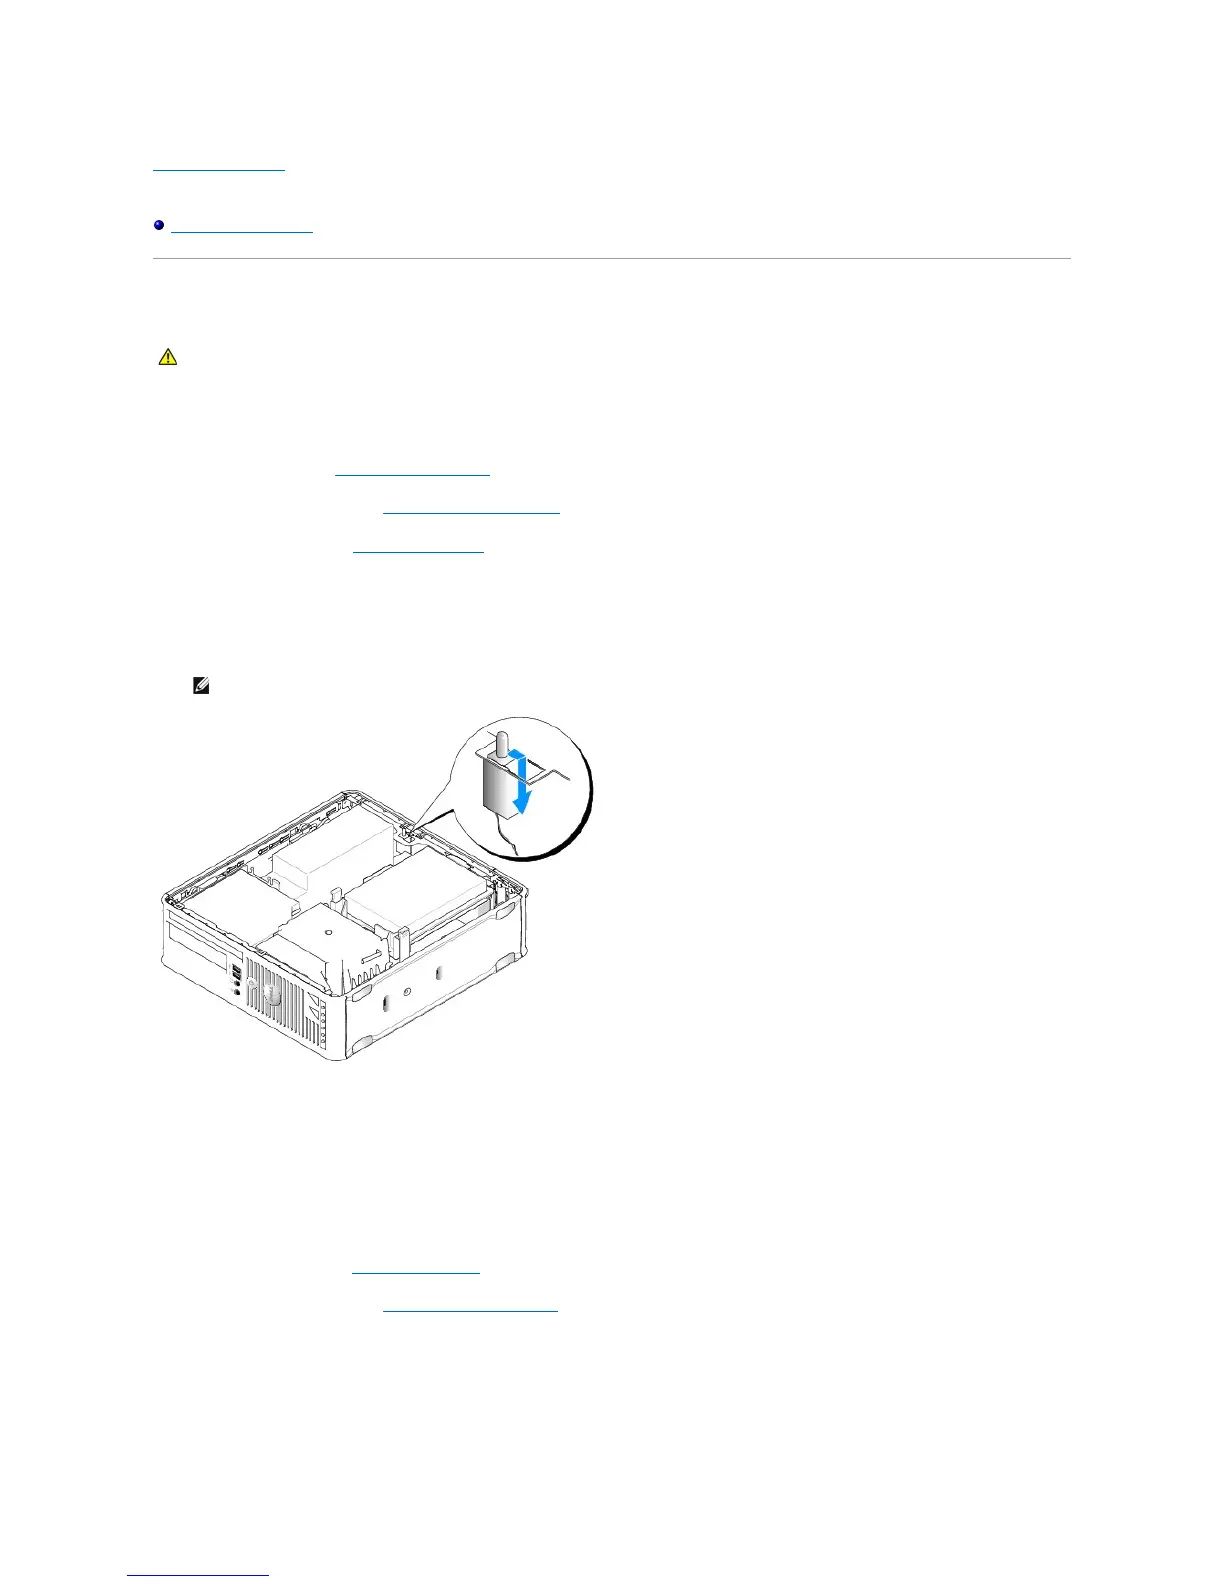
Removing the Chassis Intrusion Switch
1. Follow the procedures in Working on Your Computer.
2. Remove the computer cover (see Removing the Computer Cover).
3. Remove the hard drive (see Removing a Hard Drive).
4. Disconnect the chassis intrusion switch cable from the system board by using two fingers to squeeze the release mechanism on one side of the
connector as you pull to disconnect the cable connector.
5. Slide the chassis intrusion switch out of its slot in the metal bracket, and then push it down through the square hole in the bracket to remove the switch
and its attached cable from the computer.
Replacing the Chassis Intrusion Switch
1. Gently insert the switch from underneath the metal bracket into the square hole in the bracket, and then slide the chassis intrusion switch into its slot
until it snaps securely into place.
2. Reconnect the cable to the system board.
3. Replace the hard drive (see Installing a Hard Drive).
4. Replace the computer cover (see Replacing the Computer Cover).
5. If you are using a computer stand, attach it to the computer.
Resetting the Chassis Intrusion Detector
WARNING: Before working inside your computer, read the safety information that shipped with your computer. For additional safety best
practices information, see the Regulatory Compliance Homepage at www.dell.com/regulatory_compliance.