Back to Contents Page
Dell™OptiPlex™760ServiceManual
I/O Panel
I/O Panel
Removing the I/O Panel
1. Follow the procedures in Working on Your Computer.
2. Remove the computer cover (see Removing the Computer Cover).
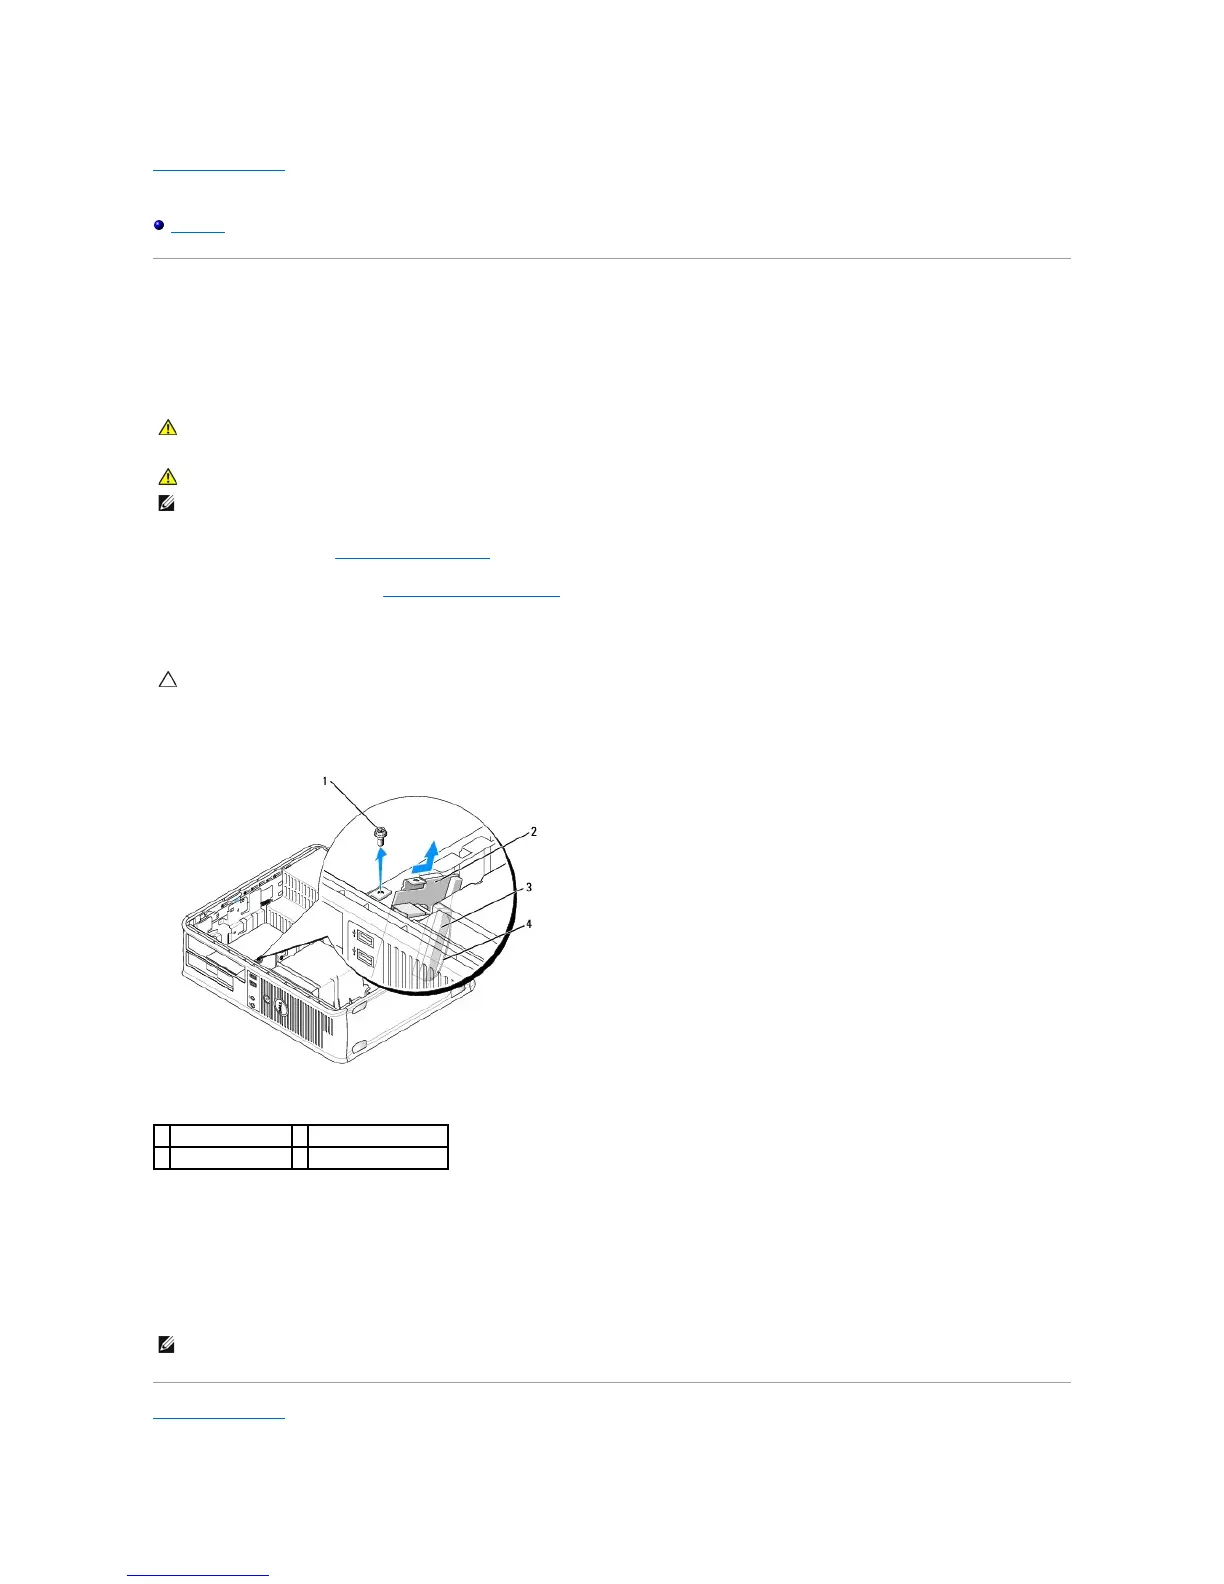
3. Remove the screw that secures the I/O panel to the desktop computer.
4. Gently rotate and slide the I/O panel away from the computer.
5. Remove the cable from the I/O panel by pulling on the pull tab.
Replacing the I/O Panel
To replace the I/O panel, follow the removal procedures in the reverse order.
Back to Contents Page
WARNING: Before working inside your computer, read the safety information that shipped with your computer. For additional safety best
practices information, see the Regulatory Compliance Homepage at www.dell.com/regulatory_compliance.
WARNING: To guard against electrical shock, always unplug your computer from the electrical outlet before removing the cover.
NOTE: Note the routing of all cables before disconnecting them, so that you can re route them correctly when installing the new I/O panel.
CAUTION: When sliding the I/O panel out of the computer, be extremely careful. Carelessness may result in damage to the cable connectors and
the cable routing clips.
NOTE: Use the guides on the I/O panel bracket to help position the I/O panel in place and use the notch on the I/O panel bracket to help seat the card.