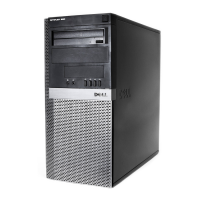
6. Replace the drive bezel (see Remove the Drive Bezel).
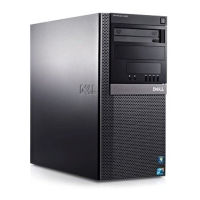
7. Connect the power and data cables to the drive and to the system board.
Always connect the optical drive SATA cable to a system board SATA connector that is labeled with a number higher than those connected to any hard drives
installed in the computer.
8. Check all cable connections, and fold cables out of the way to provide airflow for the fan and cooling vents.
9. FPerform the procedure After Working on Your Computer.
10. Update your configuration information in system setup by setting the appropriate Drive option (SATA-1, SATA-2, or SATA-3) under Drives. (See the Dell
™
Technology Guide.)
11. Verify that your computer works correctly by running the Dell Diagnostics (see the Dell
™
Technology Guide).
Back to Contents Page