Steps
1. Disconnect the data and power cables from the hard drive.
2. Press the tab on the hard-drive carrier and lift the hard-drive carrier to release the hard-drive carrier from the chassis.
3. Slide the hard-drive carrier away from the chassis and lift the hard-drive carrier out of the disk-drive cage.
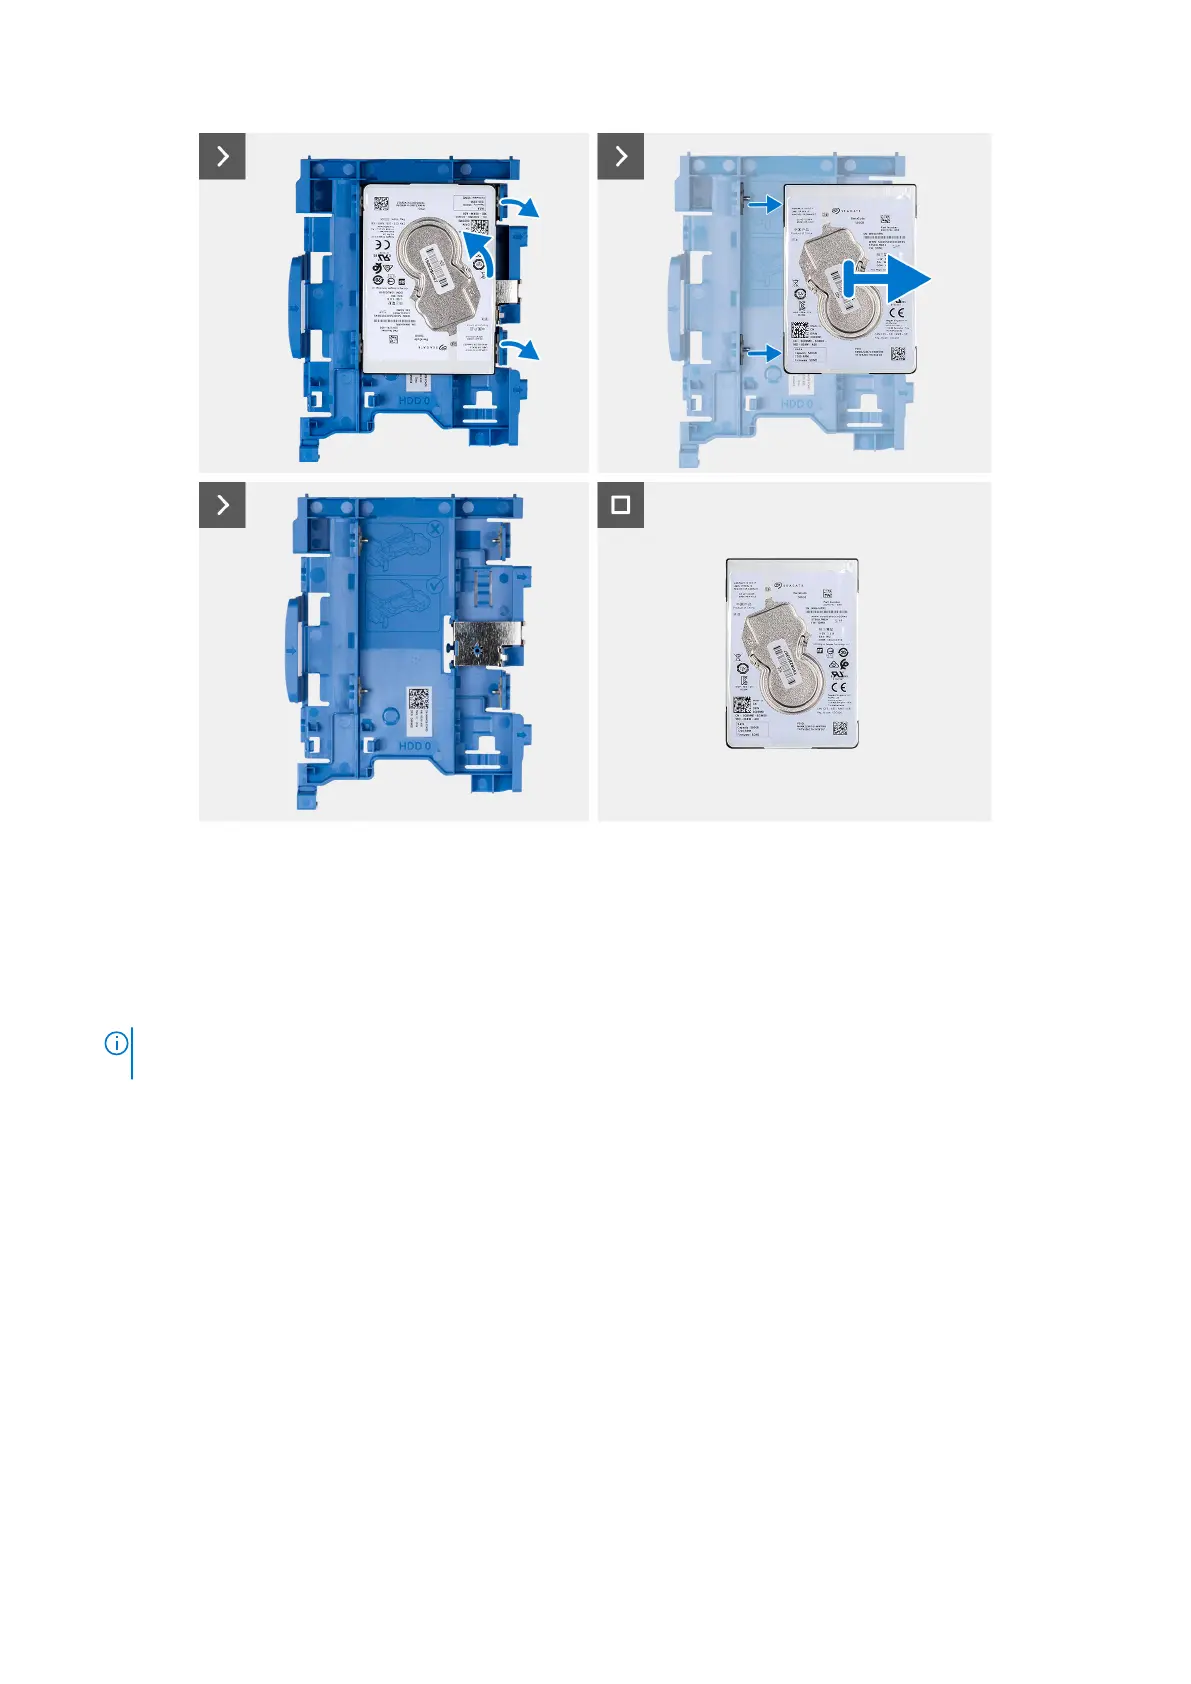
4. Pry the hard-drive carrier to release the hard drive from the mounting points on the hard-drive carrier.
5. Slide and lift the 2.5-inch hard drive off the hard-drive carrier.
NOTE:
Note the orientation or the SATA connector marking on the hard-drive carrier so that you can replace it
correctly.
Installing the 2.5-inch hard drive
Prerequisites
If you are replacing a component, remove the existing component before performing the installation procedure.
About this task
The following image indicates the location of the 2.5-inch hard drive and provides a visual representation of the installation
procedure.
44
Removing and installing Customer Replaceable Units (CRUs)