How to fix Non-RPMC Flash on Boot Guard fused system on Dell OptiPlex Small Form Factor Plus 7020 Desktop?
- VvrobinsonSep 23, 2025
If your Dell Desktop has Non-RPMC Flash on a Boot Guard fused system, verify Boot Guard configurations.
How to fix Non-RPMC Flash on Boot Guard fused system on Dell OptiPlex Small Form Factor Plus 7020 Desktop?
If your Dell Desktop has Non-RPMC Flash on a Boot Guard fused system, verify Boot Guard configurations.
What to do in No POST/No Boot/No Power situations with Dell OptiPlex Small Form Factor Plus 7020 Desktop?
In No POST/No Boot/No Power situations with your Dell Desktop, perform a Real-Time Clock (RTC) reset by holding the power button for 25 seconds.
How to fix Wi-Fi connectivity issues in Dell OptiPlex Small Form Factor Plus 7020 Desktop?
If your Dell Desktop has Wi-Fi connectivity issues, perform a Wi-Fi power cycle.
What to do if my Dell OptiPlex Small Form Factor Plus 7020 Desktop has Memory/RAM failure?
If your Dell Desktop is experiencing Memory/RAM failure, replace the failing memory module.
What to do if my Dell OptiPlex Small Form Factor Plus 7020 has No Memory/RAM detected?
If your Dell Desktop does not detect Memory/RAM, reseat the existing memory modules or install new ones.
What to do if my Dell OptiPlex Small Form Factor Plus 7020 says recovery image found but not valid?
If your Dell Desktop displays a recovery image found but not valid, verify the integrity of the recovery image.
What to do if my Dell OptiPlex Small Form Factor Plus 7020 has system board - EC detection of LCD power rail failure?
If your Dell Desktop has a system board with EC detection of an LCD power rail failure, inspect the power rail and system board.
What to do if my Dell Desktop says 'Recovery Image not found'?
If your Dell Desktop displays 'Recovery Image not found', recreate the recovery image.
What to do if my Dell OptiPlex Small Form Factor Plus 7020 Desktop has PCI of Video card or chip failure?
If your Dell Desktop has a PCI of Video card or chip failure, replace the video card.
How to fix LCD failure on Dell Desktop?
If your Dell Desktop has an LCD failure, check the LCD connections and replace the screen if faulty.
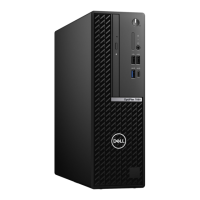
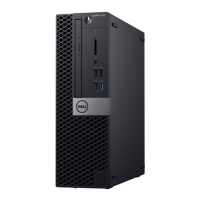
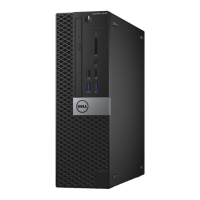
Diagram and description of the computer's front panel components.
Diagram and description of the computer's rear panel ports and connectors.
Provides physical measurements and weight of the computer.
Details supported processor types, speeds, and core counts.
Information about the computer's chipset and related components.
Lists the operating systems compatible with the computer.
Details memory slots, type, speed, and maximum configuration.
Illustrates supported memory configurations across slots.
Describes all external connectors available on the computer.
Lists and describes the internal expansion slots available.
Details about the wired network interface.
Information on supported Wi-Fi and Bluetooth modules.
Details about the computer's audio capabilities and ports.
Lists available storage types and their capacities.
Shows possible storage drive configurations.
Information on Redundant Array of Independent Disks support.
Details on the integrated media card reader functionality.
Specifications for the internal power supply unit.
Details on the connectors for the power supply unit.
Information on the capabilities of the built-in graphics processor.
Maximum resolutions supported by integrated GPU video ports.
Details on external display connectivity for integrated graphics.
Information on optional discrete graphics cards.
Maximum resolutions for discrete GPU video ports.
External display support for discrete graphics cards.
Details on built-in security features for hardware protection.
Information regarding the computer's environmental impact and materials.
Information on compliance with safety and regulatory standards.
Guidelines for optimal operating and storage conditions.
General safety guidelines for working inside the computer.
Preparation steps before disassembling the computer.
Key safety measures to observe during maintenance.
Measures to prevent Electrostatic Discharge damage to components.
Description of the components of an ESD field service kit.
Proper handling of sensitive parts during transport.
Final steps after completing internal computer work.
Important notes regarding BitLocker and BIOS updates.
Tools required for performing maintenance procedures.
Reference for screws used in component removal and installation.
Visual identification of the computer's main internal components.
Step-by-step instructions for removing the computer's side panel.
Step-by-step instructions for reinstalling the computer's side panel.
Procedure for safely removing the coin-cell battery.
Procedure for correctly installing the coin-cell battery.
Procedures for removing and installing the front bezel.
Instructions for removing and installing the 3.5-inch hard drive.
Procedures for removing and installing the disk-drive cage.
Instructions for removing and installing the optical drive.
Steps for removing and installing memory modules.
Procedures for installing and removing M.2 SSDs.
Instructions for installing and removing the Ultra Speed Drive Gen3 card.
Procedures for removing and installing the wireless card.
Instructions for removing and installing the media-card reader.
Procedures for removing and installing the graphics card.
Instructions for removing and installing the internal speaker.
Procedures for removing and installing the chassis intrusion switch.
Steps for removing and installing the power button assembly.
Instructions for removing and installing the system cooling fan.
Procedures for installing and removing internal and external antennas.
Instructions for removing and installing the PSU.
Steps for removing and installing the CPU cooler.
Procedures for removing and installing the CPU.
Instructions for installing and removing I/O modules like Serial, DP, HDMI, VGA, Type-C.
Detailed steps for removing the computer's main system board.
Detailed steps for installing the computer's main system board.
Lists the supported operating systems for the computer.
Information on obtaining necessary drivers and software updates.
How to access the BIOS setup utility.
Description of keys used for navigating BIOS setup menus.
Accessing the boot menu for one-time boot device selection.
Overview of configurable settings within the BIOS setup.
Instructions for updating the system's BIOS firmware.
Setting and managing system and BIOS passwords.
Procedure for resetting BIOS settings to default values.
Running pre-boot hardware diagnostics using SupportAssist.
Performing a self-test on the power supply unit.
Interpreting diagnostic LED blink patterns for error codes.
Using Dell SupportAssist OS Recovery for system restoration.
Procedure to reset the system's real-time clock and BIOS defaults.
Guidance on creating backup and recovery media.
Procedure for troubleshooting Wi-Fi connectivity issues.
Information on accessing online support and documentation.
Ways to contact Dell for support and service.
| Operating System | Windows 11 Pro, Windows 11 Home |
|---|---|
| Memory | Up to 64 GB |
| Storage | Up to 2TB M.2 PCIe NVMe SSD |
| Graphics | Intel UHD Graphics 730 (i3), Intel UHD Graphics 770 (i5, i7, i9) |
| Ports (Front) | 1 x USB 3.2 Gen 2x2 Type-C port |
| Ports (Rear) | 2 x USB 2.0 |
| Expansion Slots | 1 x M.2 2230 |
| Networking | Intel Wi-Fi 6E AX211, Bluetooth |
| Power Supply | 260 W |
| Form Factor | Small Form Factor |


