System board
Removing the system board
CAUTION: The information in this removal section is intended for authorized service technicians only.
Prerequisites
1. Follow the procedure in Before working inside your computer.
2. Remove the side cover.
3. Remove the front bezel.
4. Remove the 3.5-inch hard drive, if applicable.
5. Remove the disk-drive cage.
6. Remove the media-card reader, if applicable.
7. Remove the graphics card, if applicable.
8. Remove the memory modules.
9. Remove the solid-state drives, whichever is applicable.
10. Remove the wireless card or the external SMA antenna, whichever is applicable.
11. Remove the intrusion switch.
12. Remove the external SMA antenna module, if applicable.
13. Remove the processor fan and heat-sink assembly.
14. Remove the processor.
15. Remove the optional I/O modules, whichever is applicable.
About this task
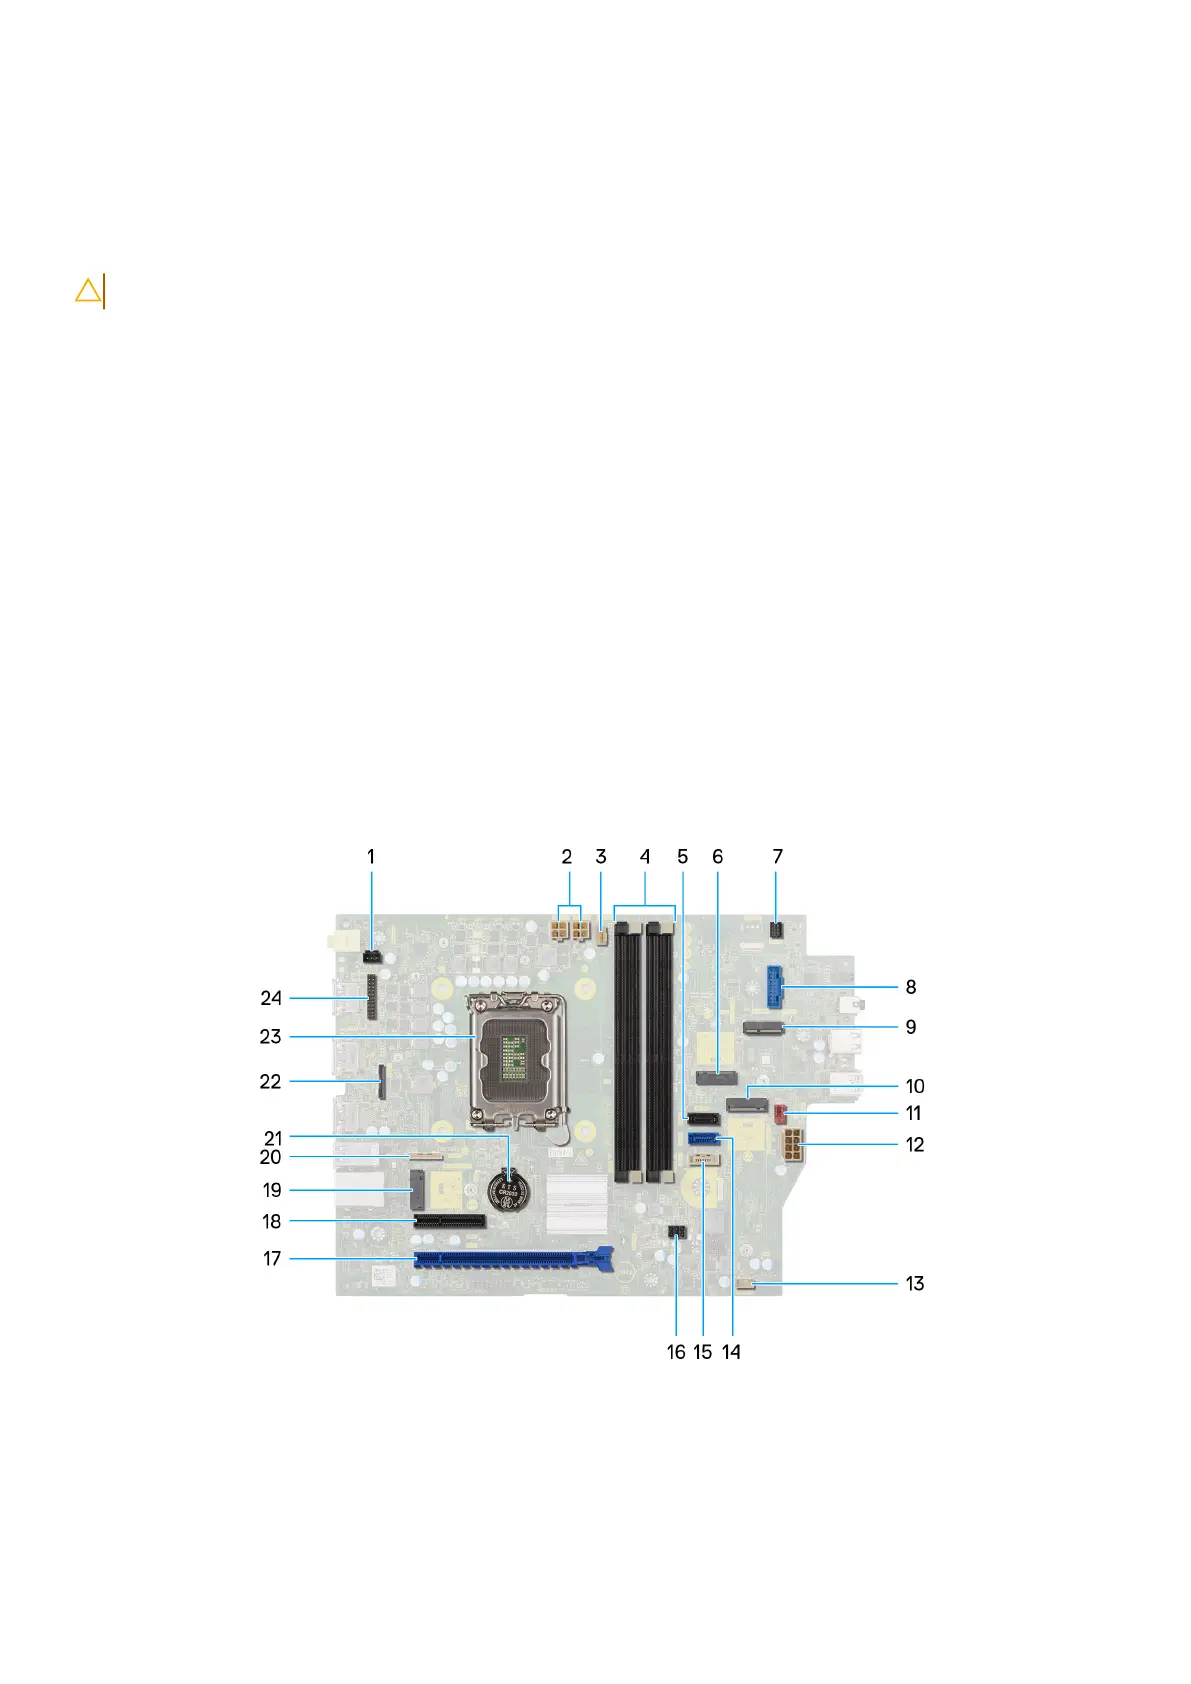
The following image indicates the connectors on your system board.
Figure 64. System board overview
1. Intrusion-switch connector (INTRUSION)
2. ATX CPU power connector (ATX CPU1 and ATX CPU2)
3. Processor-fan connector (FAN CPU)
Removing and installing Field Replaceable Units (FRUs)
107