About this task
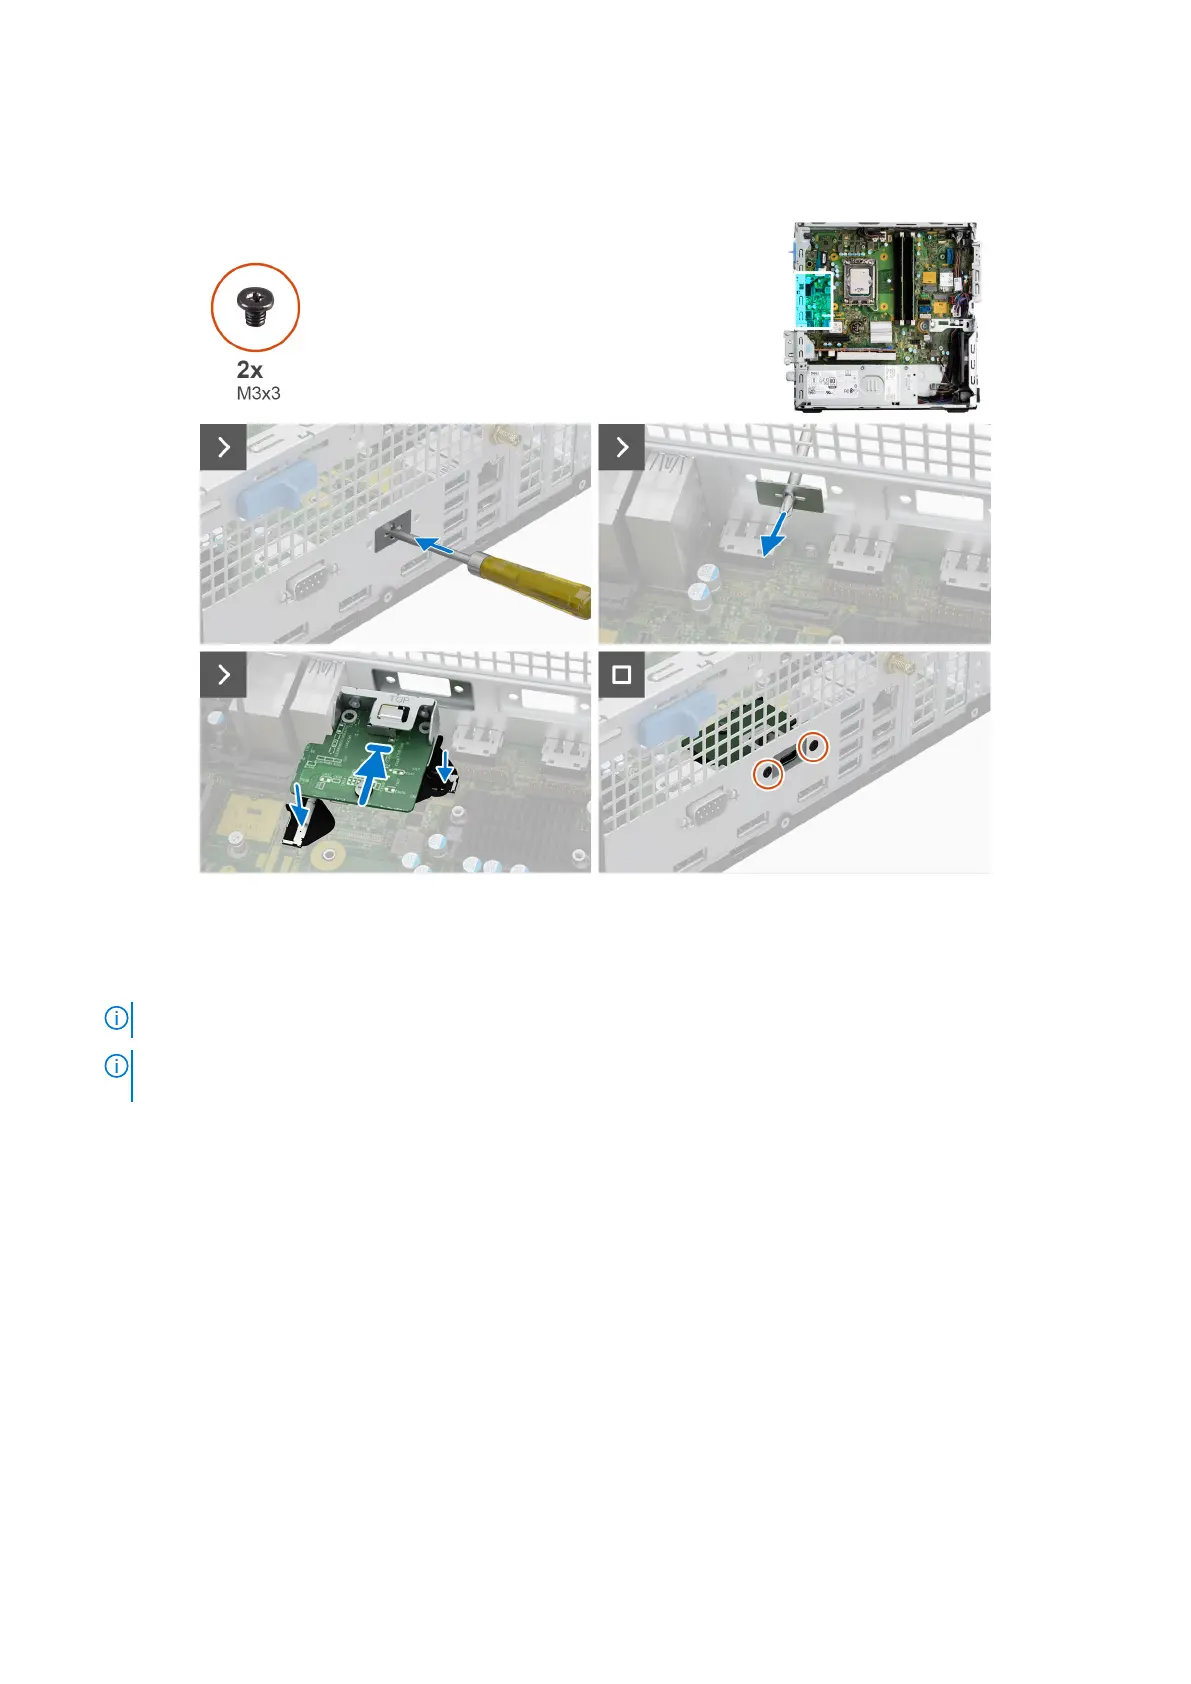
The following image indicates the location of the Type-C module and provides a visual representation of the installation
procedure.
Figure 63. Installing the Type-C module
Steps
1. Using a screwdriver, remove the Type-C module cover from the chassis.
NOTE: This step is applicable only when the Type-C module is being installed for the first time.
NOTE: To remove the optional-module cover, insert a flat-head screwdriver in the hole of the cover, push the cover to
release it, and then lift the cover off the chassis .
2. Connect the Type-C-module cables to their connectors (VIDEO and TYPE-C) on the system board.
3. Insert the Type-C module into the slot on the chassis.
4. Replace the two screws (M3x3) that secure the Type-C module to the chassis.
Next steps
1. Install the processor fan and heat-sink assembly.
2. Install the disk-drive cage.
3. Install the 3.5-inch hard drive, if applicable.
4. Install the front bezel.
5. Install the side cover.
6. Follow the procedure in After working inside your computer.
106
Removing and installing Field Replaceable Units (FRUs)