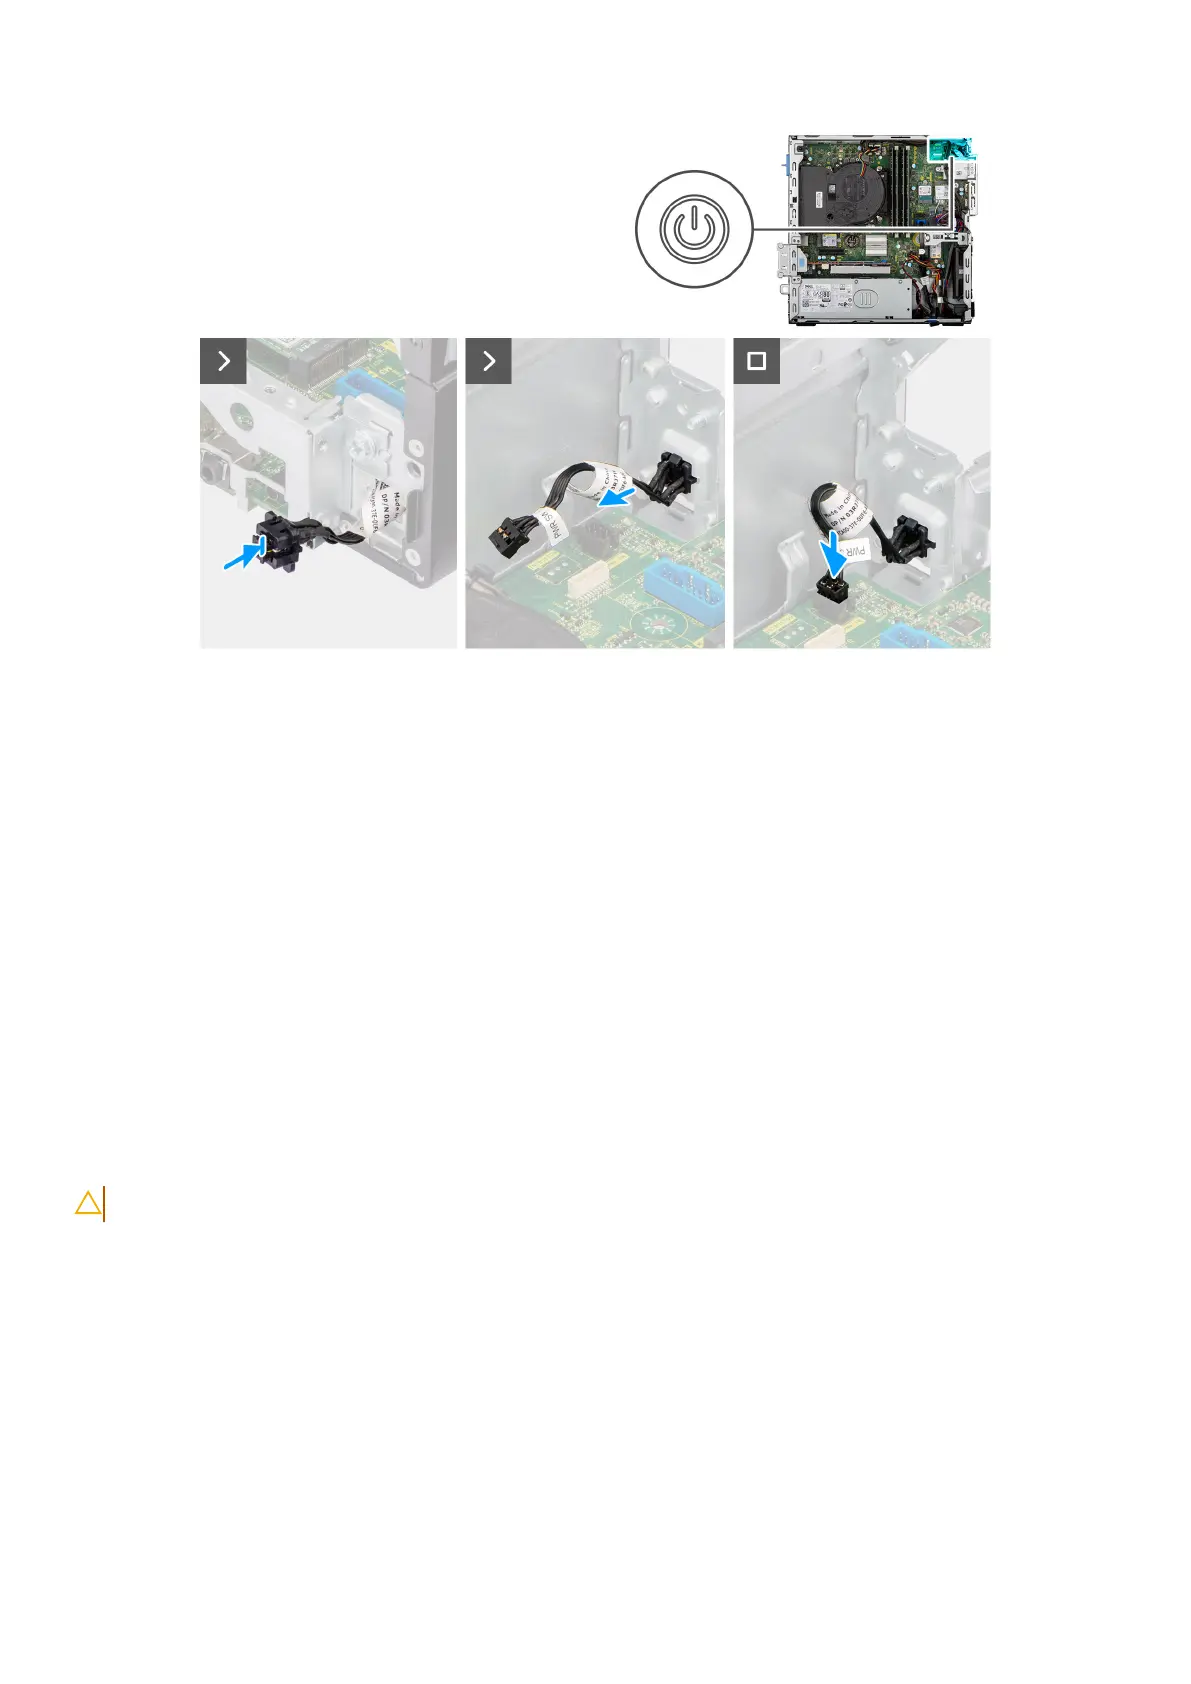
Figure 40. Installing the power button
Steps
1. Insert the power-button cable through the slot on the chassis from the front-side of the computer.
2. Align and place the power-button head into the slot on the chassis until it clicks into the place.
3. Connect the power button cable to its connector (PWR SW) on the system board.
Next steps
1. Install the disk-drive cage.
2. Install the 3.5-inch hard drive, if applicable.
3. Install the front bezel.
4. Install the side cover.
5. Follow the procedure in After working inside your computer.
System fan
Removing the system fan
CAUTION: The information in this section is intended for authorized service technicians only.
Prerequisites
1. Follow the procedure in Before working inside your computer.
2. Remove the side cover.
3. Remove the front bezel.
4. Remove the 3.5-inch hard drive, if applicable.
5. Remove the disk-drive cage.
About this task
The following images indicate the location of the system fan and provide a visual representation of the removal procedure.
Removing and installing Field Replaceable Units (FRUs)
79