Steps
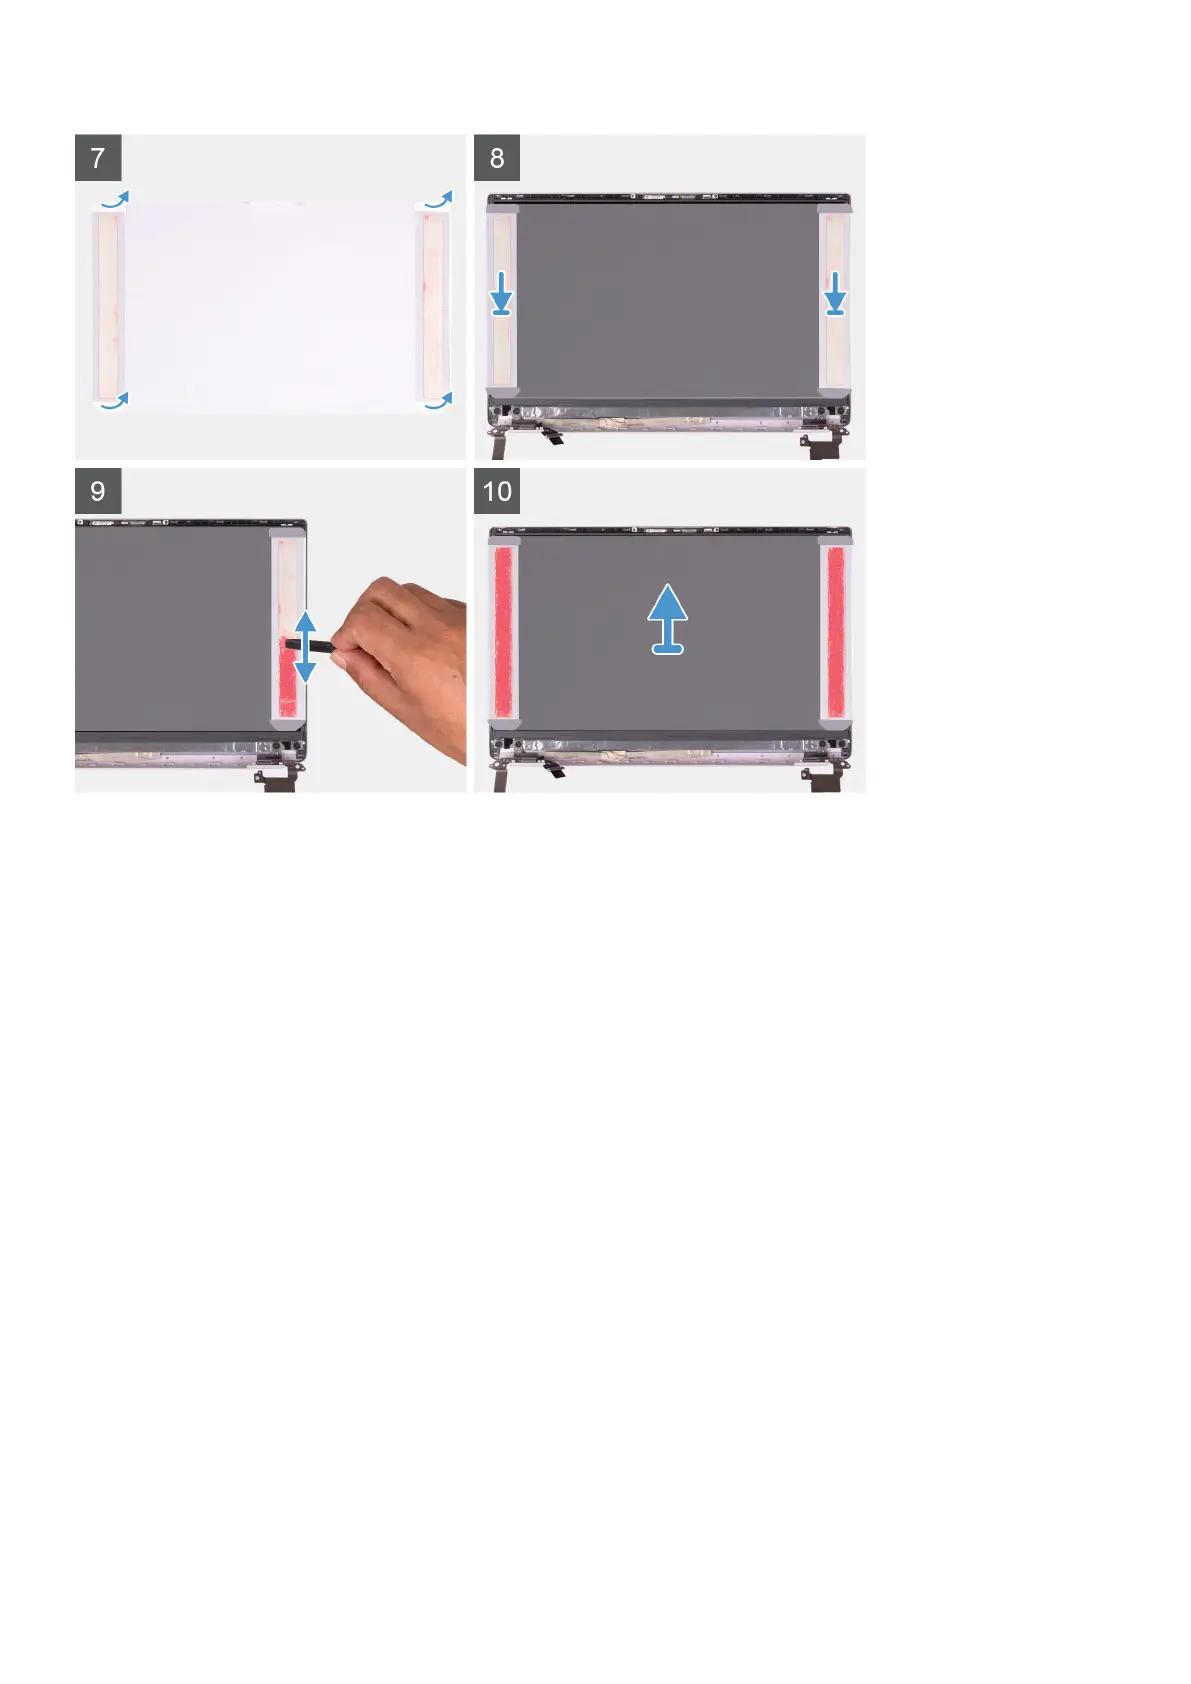
1. Peel off the transparent protective films from the SR tapes.
2. Align and adhere both the SR tapes to the plastic edge of the display back-cover.
3. Peel off the blue protective films from the SR tapes.
4. Starting from the top, align and place the display panel on the display back-cover.
5. Remove the release paper from the pressure film.
6. Adhere the pressure film on the display panel.
7. Using the flat end of the plastic scribe or handle of the screwdriver, press and roll over the pressure films until they turn
pink.
8. Peel off the pressure film from the display panel.
9. Place the display bezel on the display back-cover and snap it into place.
Next steps
1. Install the display bezel.
2. Install the display assembly.
3. Install the WLAN card.
4. Install the battery.
5. Install the base cover.
6. Follow the procedure in After working inside your computer.
Removing and installing components
53