Solid-state drive
Removing the M.2 2230 solid-state drive for computers shipped
with a plastic chassis
Prerequisites
1. Follow the procedure in Before working inside your computer.
NOTE: Ensure that your computer is in Service Mode. For more information, see step 6 in, Before working inside your
computer.
2. Remove the base cover for computers shipped with a plastic chassis.
About this task
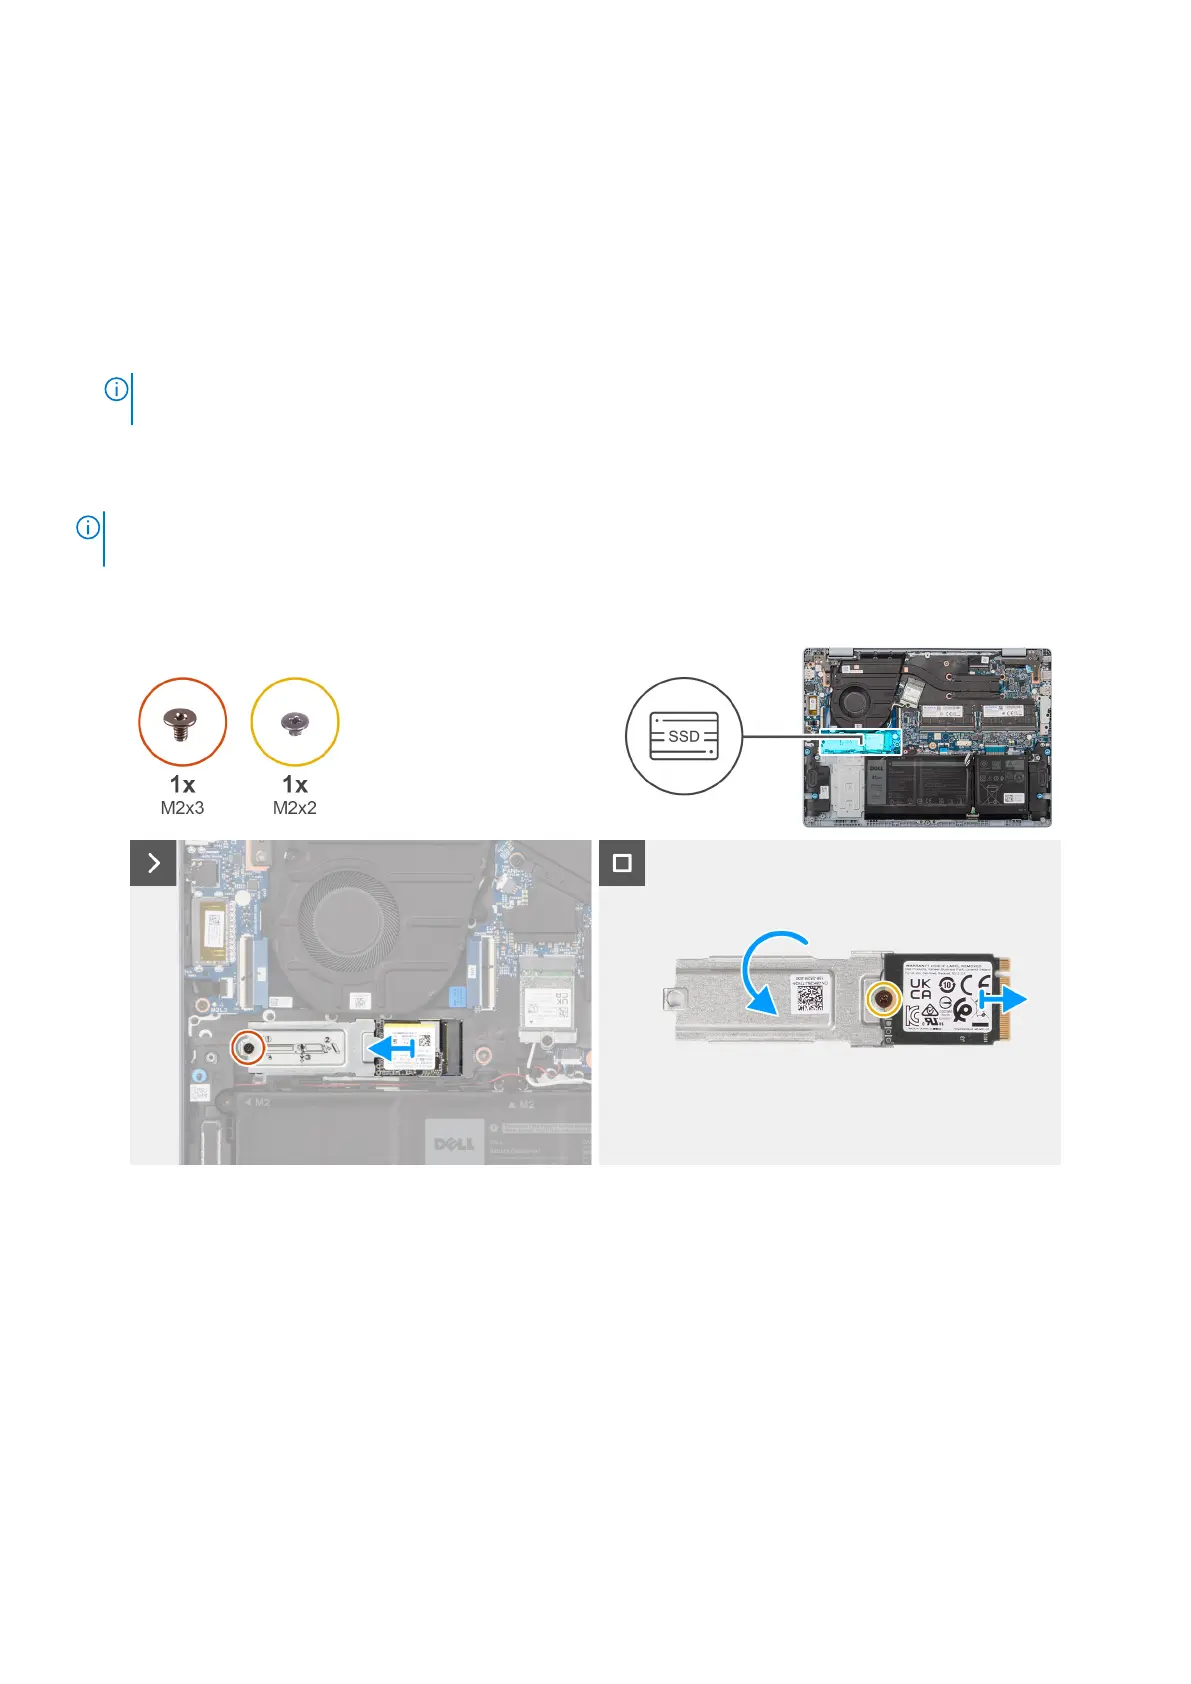
NOTE: The support card configuration on the M.2 card slot is:
● M.2 2230 solid-state drive + M.2 2230 solid-state drive mounting bracket
The following image indicates the location of the M.2 2230 solid-state drive and provides a visual representation of the removal
procedure.
Figure 24. Removing the solid-state drive
Steps
1. Remove the screw (M2x3) that secures the M.2 2230 solid-state drive assembly to the system board.
2. Slide and lift the M.2 2230 solid-state drive assembly off the system board.
3. Flip over the M.2 2230 solid-state drive assembly.
4. Remove the screw (M2x2) that secures the M.2 2230 solid-state drive to the M.2 2230 solid-state drive mounting bracket.
5. Lift the M.2 2230 solid-state drive off the M.2 2230 solid-state drive mounting bracket.
Removing and installing Customer Replaceable Units (CRUs)
49