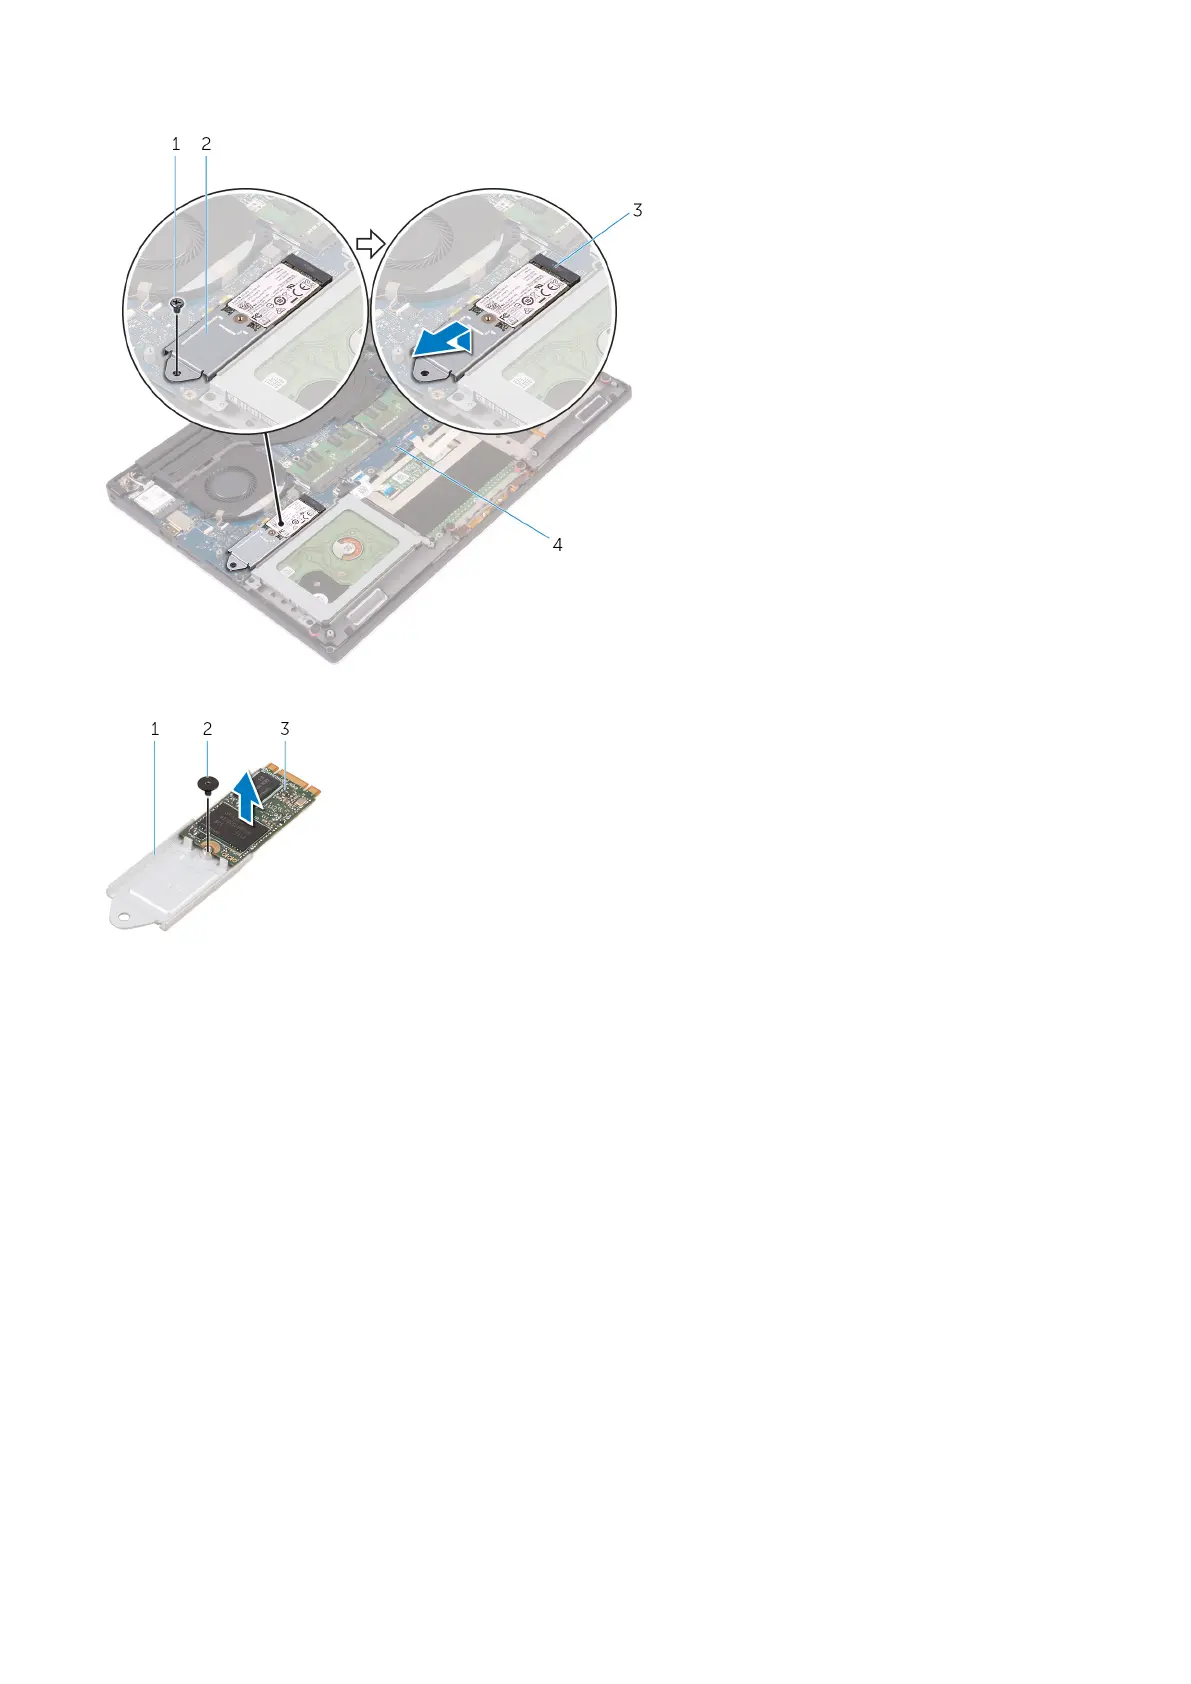
5. Remove the screw that secures the solid-state drive to the solid-state drive bracket [1, 2, 3].
6. Lift the solid-state drive off the solid-state drive bracket.
Installing the Solid-State Drive (half-length)
1. Align the screw hole on the solid-state drive bracket with the screw hole on the solid-state drive.
2. Replace the screw that secures the solid-state drive to the solid-state drive bracket.
3. Align the notches on the solid-state drive assembly with the tabs in the solid-state drive slot.
4. Slide the solid-state drive assembly at an angle into the solid-state drive slot.
5. Press the other end of the solid-state drive down and replace the screw that secures the solid-state drive to the system
board.
6. Install the:
a. battery
b. base cover
7. Follow the procedures in After Working Inside Your Computer.
Removing the Solid-State Drive (full-length)
1. Follow the procedures in Before Working Inside Your Computer
2. Remove the:
a. base cover
12
Disassembly and reassembly