Back to Contents Page
Replacing Drives
Dell™StudioHybridServiceManual
Removing the Hard Drive
Installing the Hard Drive
Removing the Optical Drive
Installing the Optical Drive
Your computer supports:
l One externally accessible SATA device (optical drive)
l One internally accessible SATA device (hard drive)
Removing the Hard Drive
1. Follow the procedure in Before You Begin.
2. Remove the computer cover (see Removing the Computer Cover).
3. Remove the drive cage (see Removing the Drive Cage).
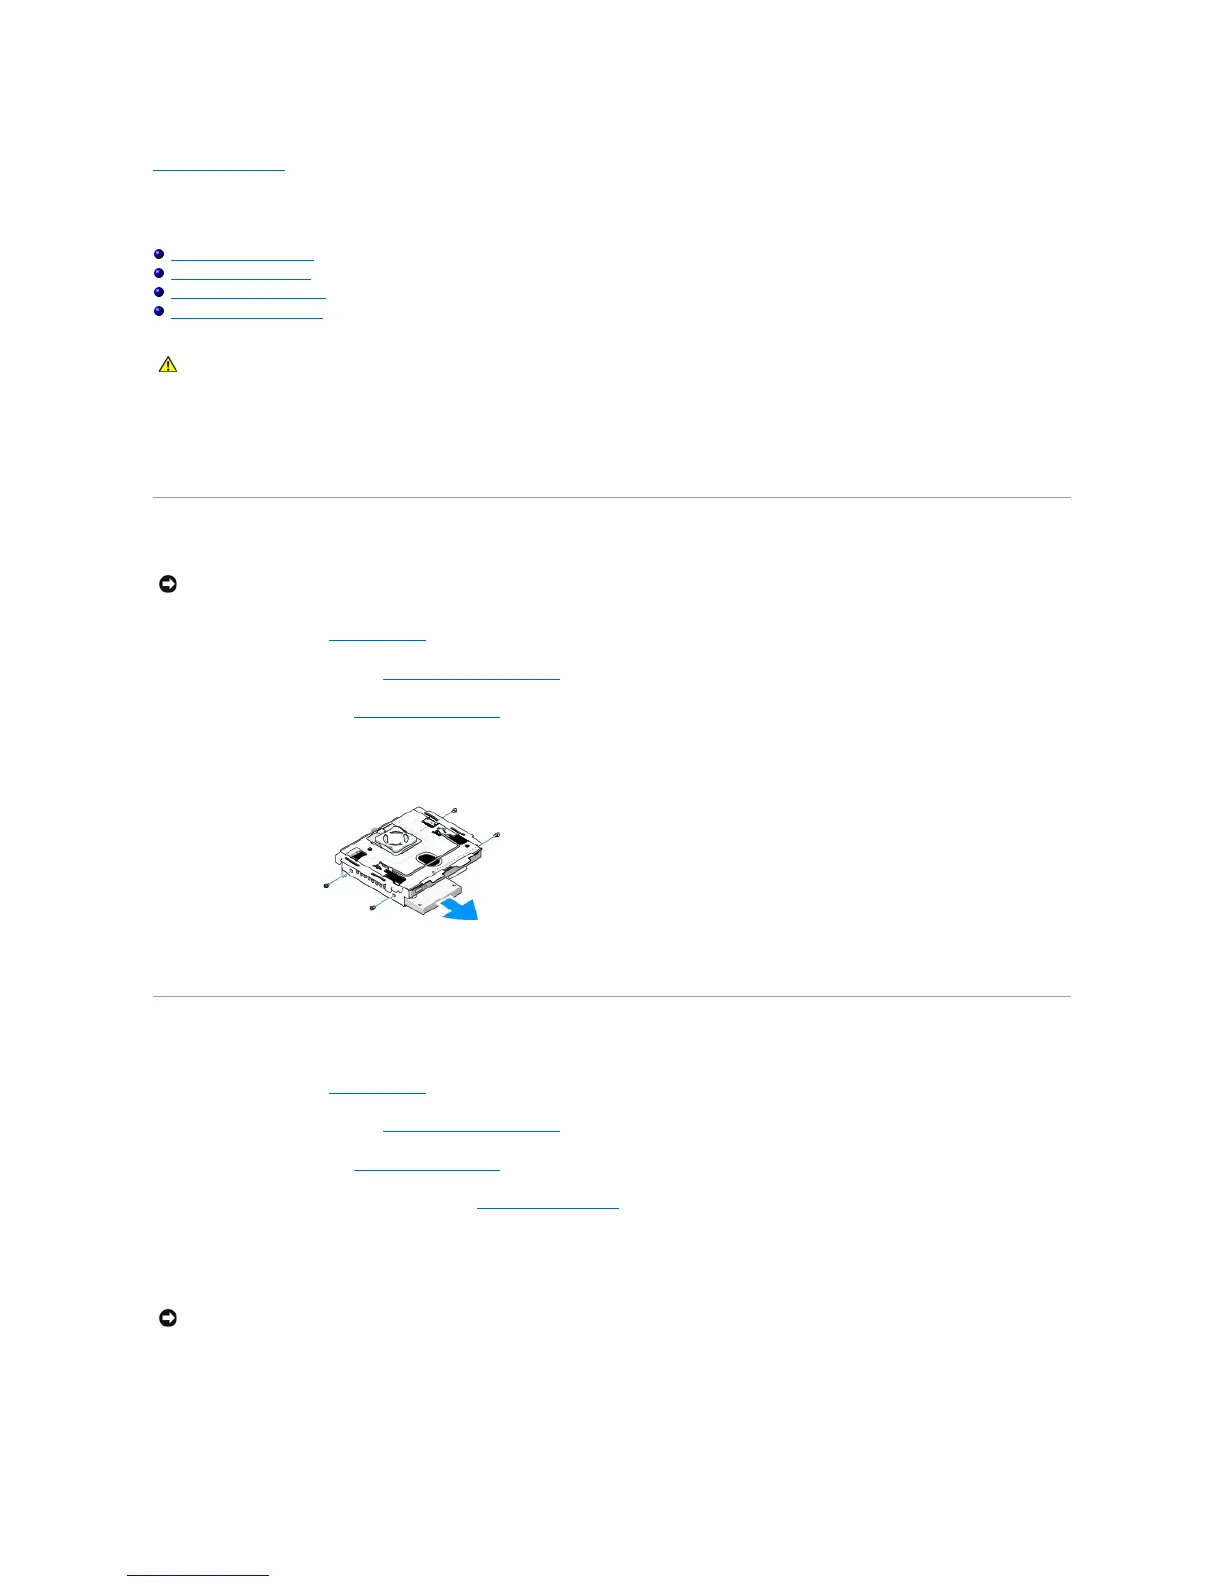
4. Remove the four screws that secure the hard drive to the drive cage. Turn the drive cage over and slide the hard drive towards the front of the drive
cage.
5. Hold the hard drive on either side while removing the hard drive.
Installing the Hard Drive
1. Follow the procedure in Before You Begin.
2. Remove the computer cover (see Removing the Computer Cover).
3. Remove the drive cage (see Removing the Drive Cage).
4. Remove the existing hard drive, if applicable (see Removing the Hard Drive).
5. Prepare the new hard drive for installation and check the documentation for the hard drive to verify that the hard drive is configured for your computer.
6. Verify that the hard-drive bay is empty and unobstructed.
7. Hold the hard drive on either side and slide the hard drive into the hard- drive bay until it clicks securely into place.
8. Secure the hard drive to the drive cage by replacing the four screws.
CAUTION: Before working inside your computer, read the safety information that shipped with your computer. For additional safety best
practices information, see the Regulatory Compliance Homepage at www.dell.com/regulatory_compliance.