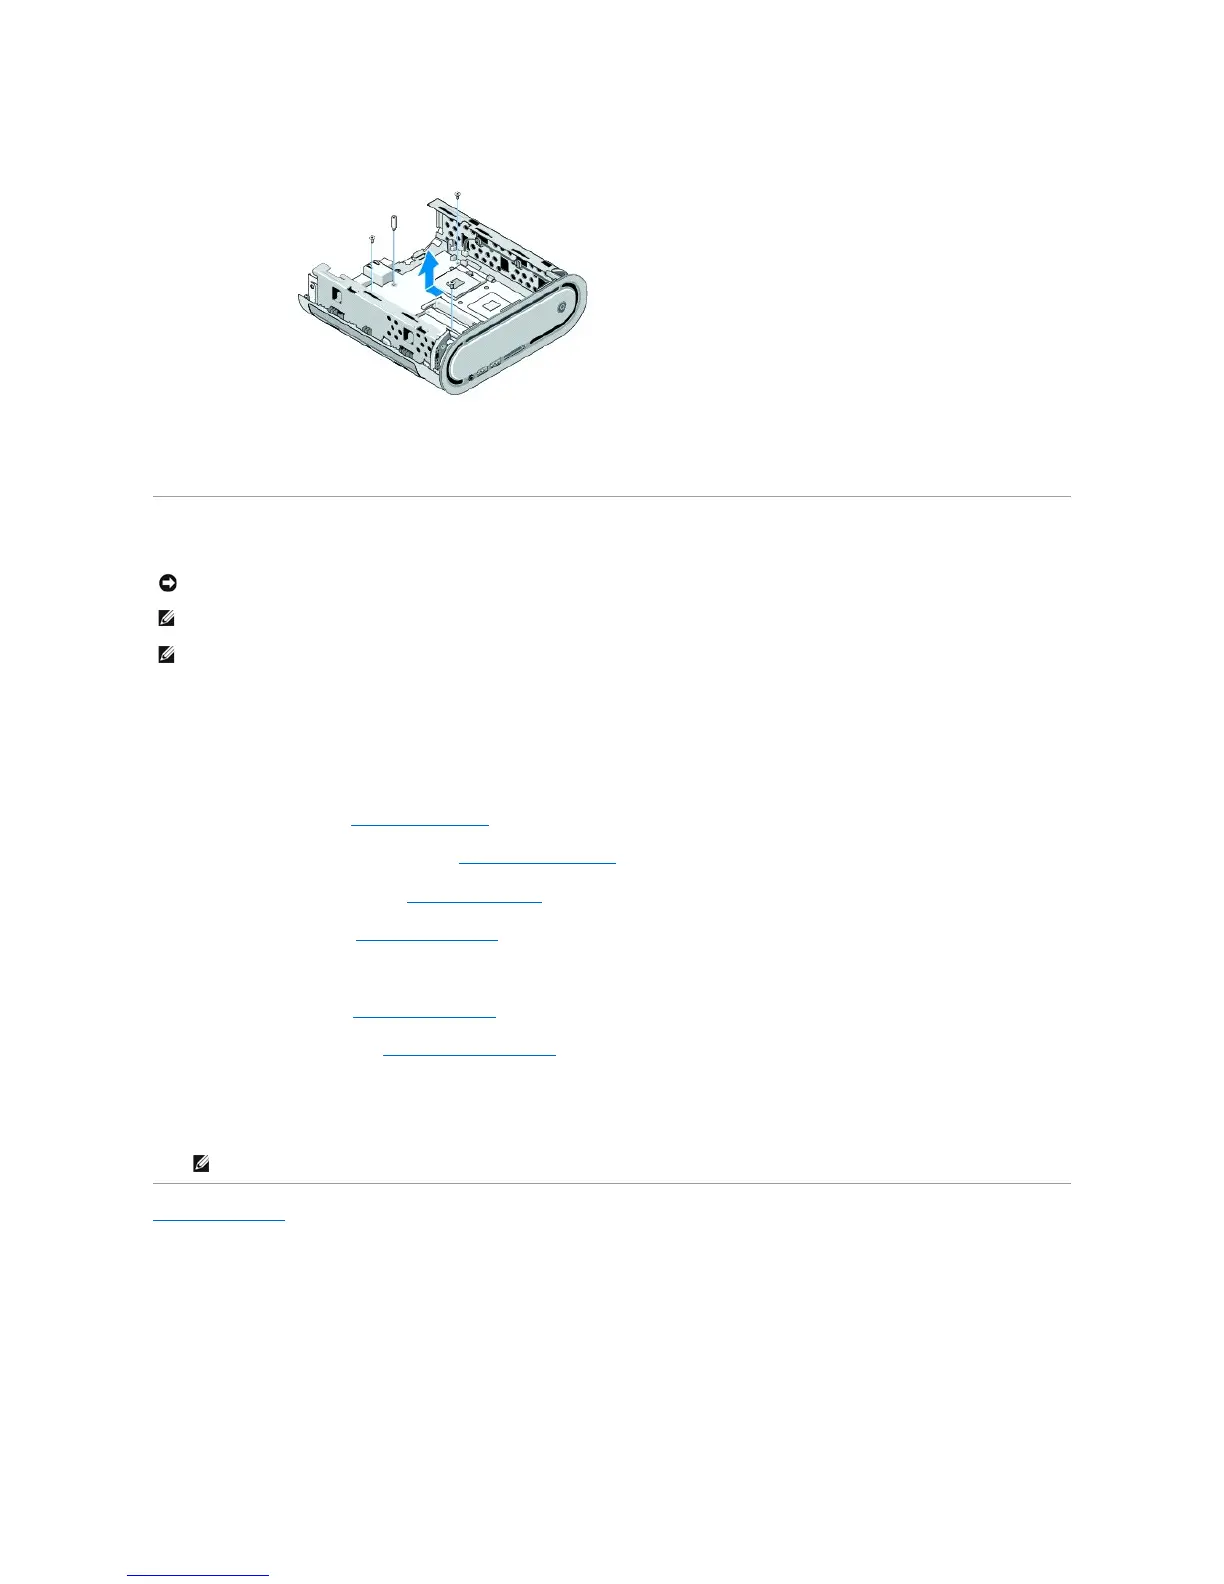
10. Slide the system board away from the front panel and out of the chassis.
Installing the System Board
1. Transfer components from the existing system board to the replacement system board, if applicable.
2. Orient the system board by aligning the screw holes on the system board with the screw holes on the chassis.
3. Replace the screws that secure the system board to the chassis.
4. Replace the processor (see Replacing the Processor).
5. Reconnect all cables to the system board (see System Board Components).
6. Replace the processor heat sink (see Installing the Heat Sink).
7. Replace the back panel (see Installing the Back Panel).
8. Replace any additional components that you removed from the system board.
9. Replace the drive cage (see Installing the Drive Cage).
10. Replace the computer cover (see Installing the Computer Cover).
11. Connect your computer and devices to electrical outlets, and then turn them on.
12. Flash the system BIOS, if required.
Back to Contents Page