Back to Contents Page
Replacing the Fan
Dell™StudioHybridServiceManual
Removing the Fan
Installing the Fan
Removing the Fan
1. Follow the procedures in Before You Begin.
2. Remove the computer cover (see Removing the Computer Cover).
3. Remove the drive cage (see Removing the Drive Cage).
4. Remove the back panel (see Removing the Back Panel).
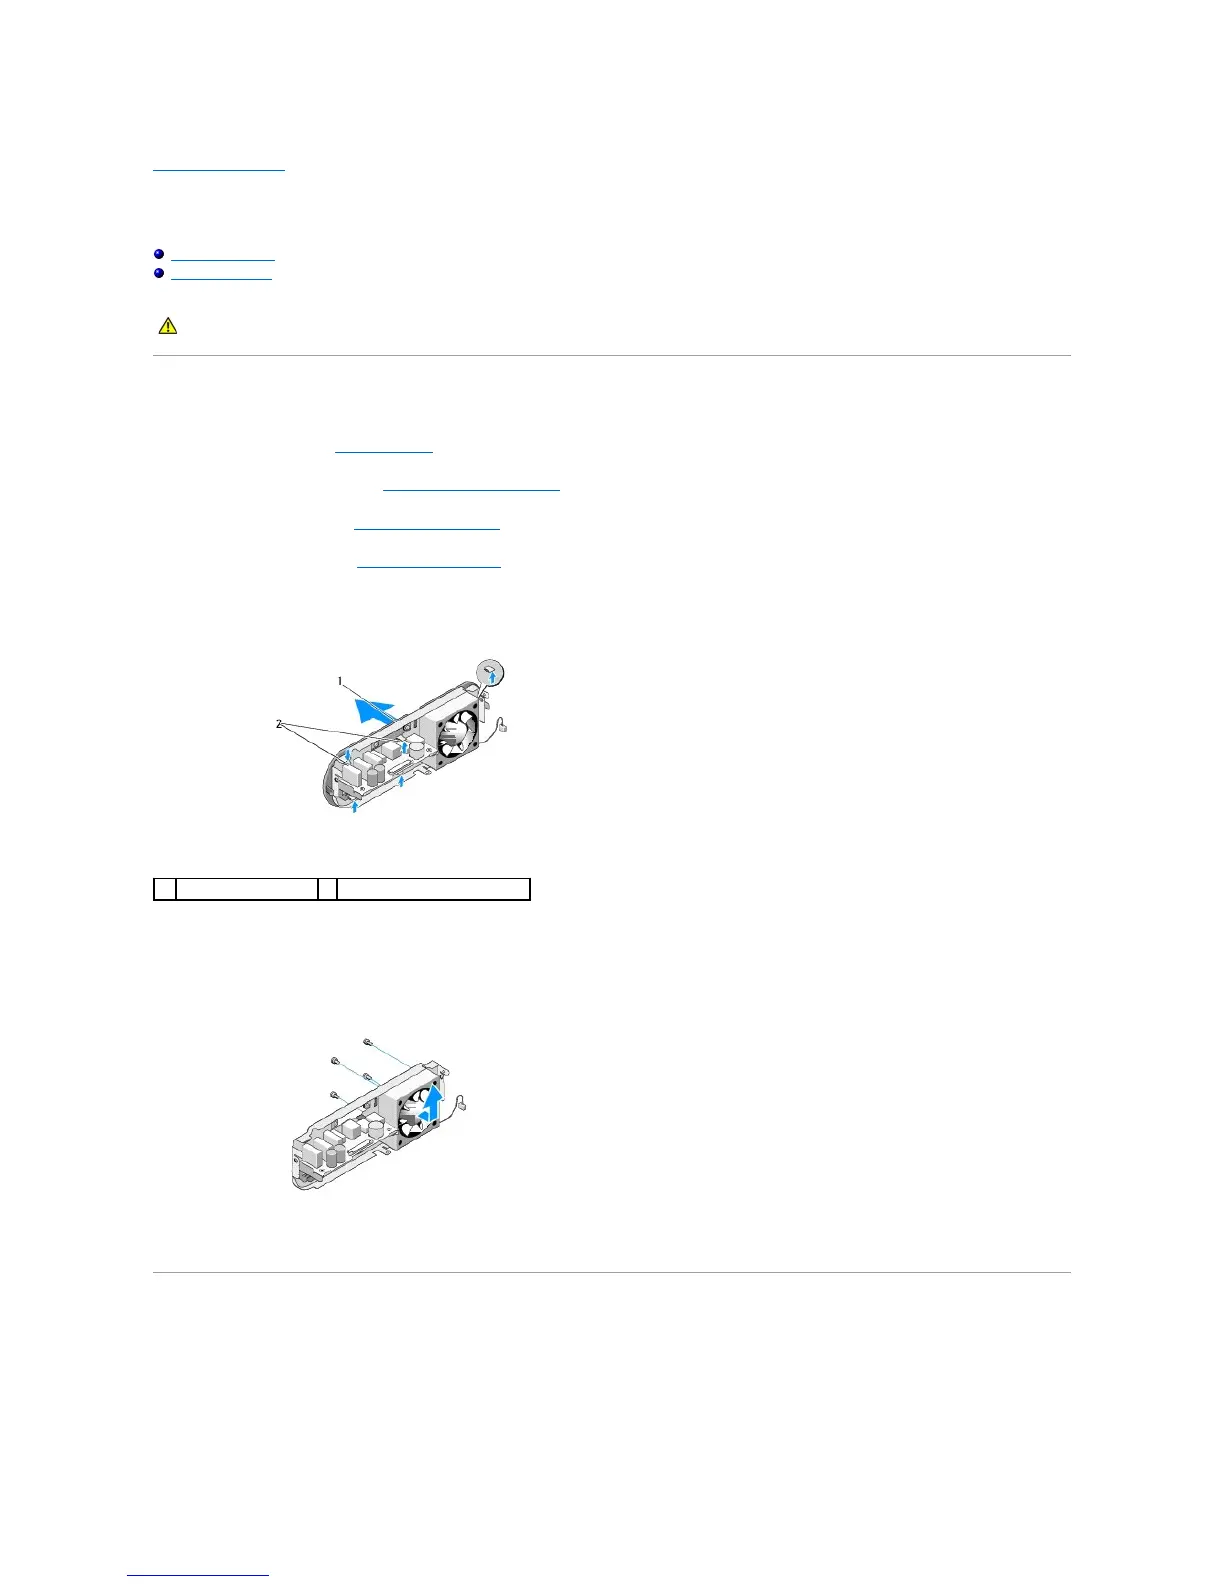
5. Remove the rear plastic cover by pushing the tabs as shown below.
6. Pull the back plastic cover away from the back panel.
7. Remove the four screws that secure the fan to the back panel.
8. Set the fan aside in a secure location.
Installing the Fan
1. Replace the four screws that secure the fan to the back panel.
2. Align the tabs on the back plastic cover with the slots on the back panel.
CAUTION: Before working inside your computer, read the safety information that shipped with your computer. For additional safety best
practices information, see the Regulatory Compliance Homepage at www.dell.com/regulatory_compliance.