4. Remove the system-board shield.
5. Remove the wireless card.
6. Remove the hard drive.
7. Remove the I/O cover.
8. Remove the bottom cover.
9. Remove the retractable-camera assembly.
10. Remove the fan.
11. Remove the I/O bracket.
12. Remove the speakers.
13. Remove the heat sink.
14. Remove the system board.
NOTE: The system board can be removed with the memory, solid-state drive, coin-cell battery, and processor attached.
15. Remove the audio board.
16. Remove the power-button and I/O board.
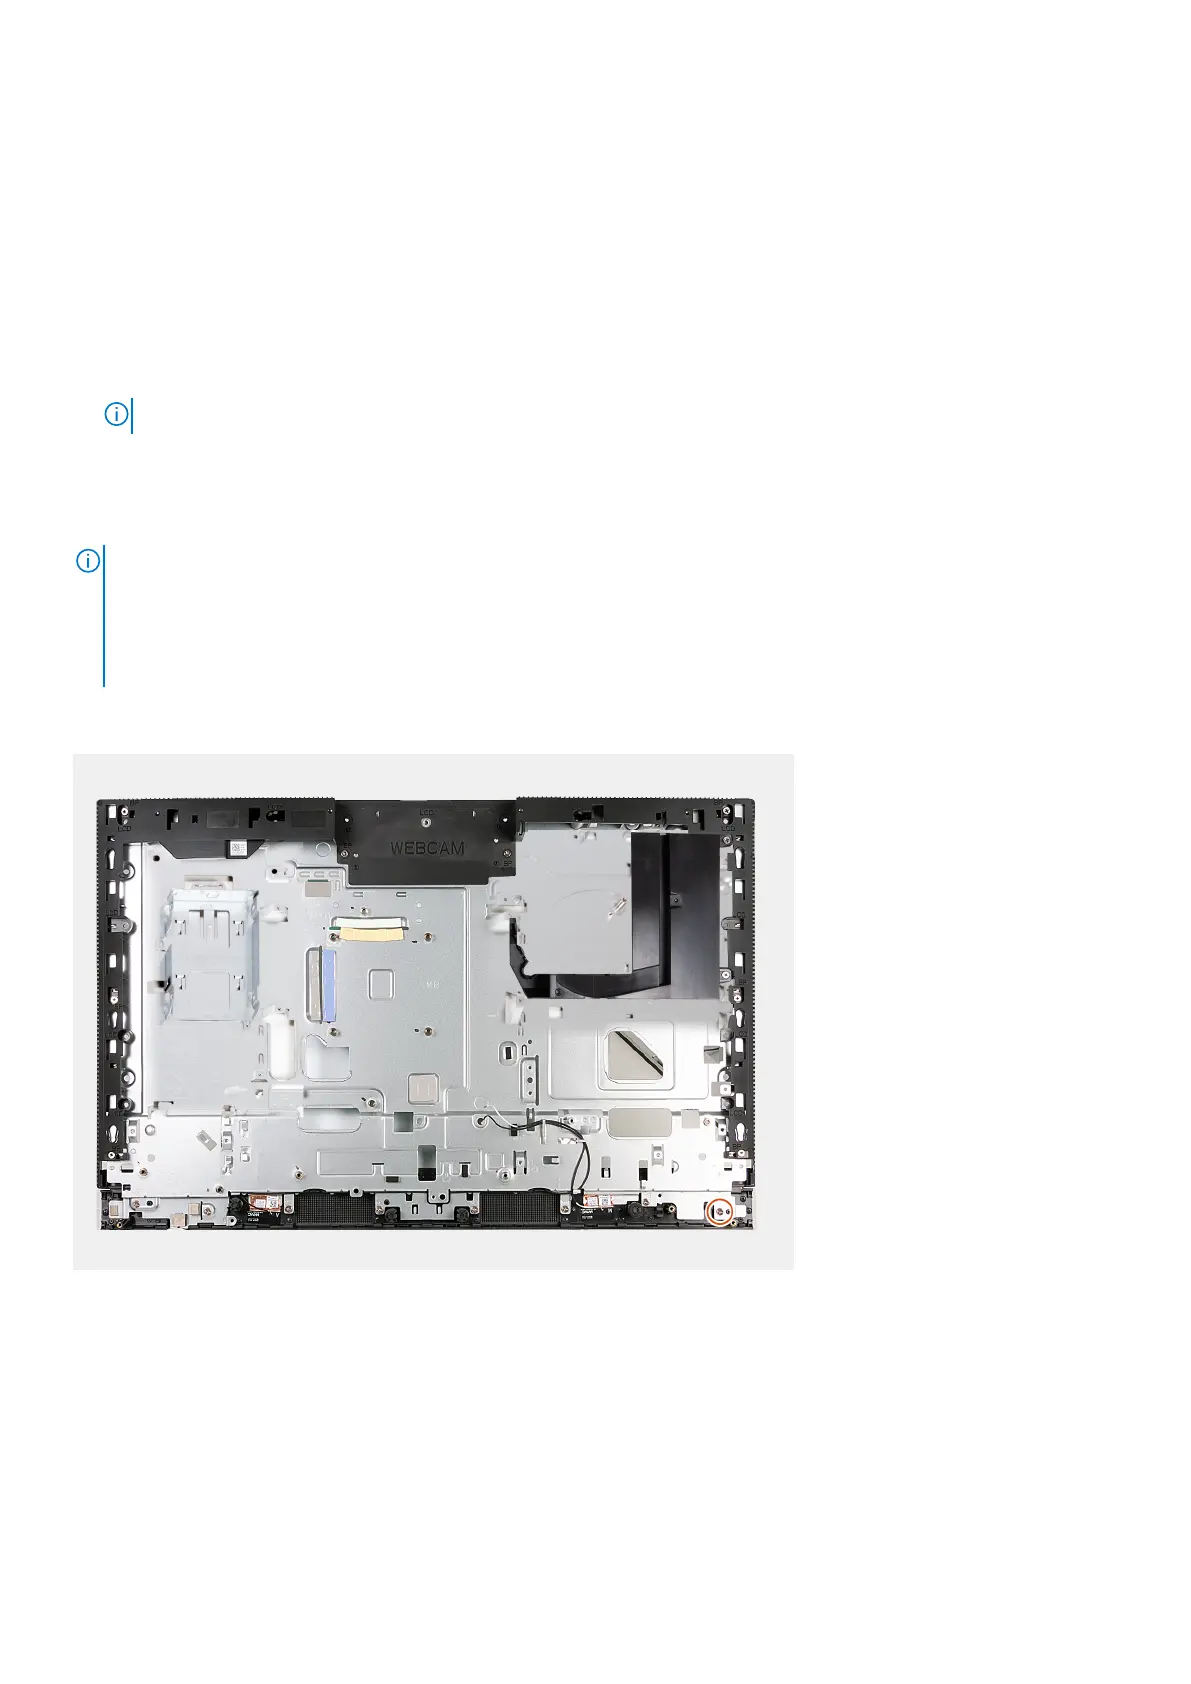
About this task
NOTE: The display-assembly base includes the following components:
● antenna modules
● display panel
● middle frame
To replace any of these components, replace the entire display-assembly base.
The following image(s) indicate the location of the display-assembly base and provides a visual representation of the removal
procedure.
Steps
After performing the pre-requisites you are left with the display-assembly base.
Installing the display-assembly base
Prerequisites
If you are replacing a component, remove the existing component before performing the installation process.
Removal and installation procedures for Energy Efficient processors
151