98 Front I/O Panel
4
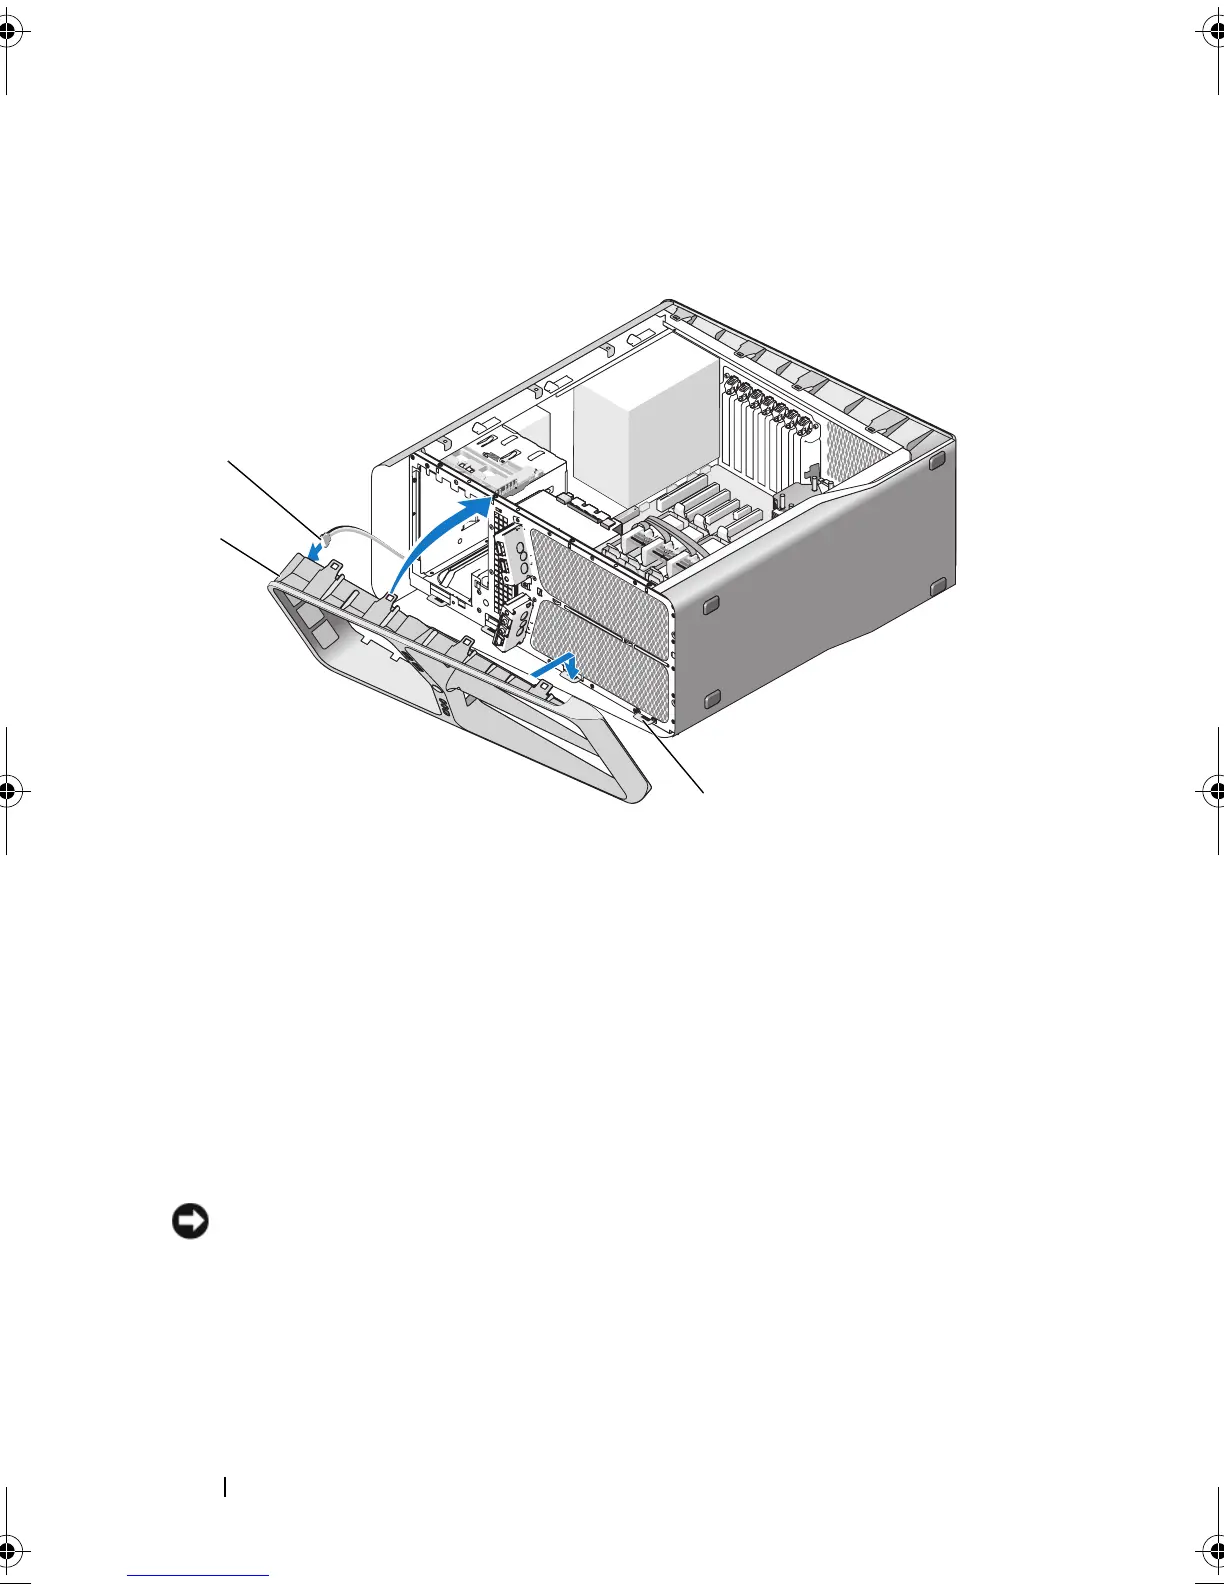
Align the securing tabs on the front panel with the corresponding slots on
the chassis and connect the FRONT_LED cable to the front panel.
5
Rotate the front panel towards the computer until it snaps into place.
6
Replace the drive panel (see "Installing the Drive Panel" on page 54)
7
Connect the
FRONT_AUDIO_USB_LED
cable, the FRONT_USB_LED
cable, and the USB_MB cable to the front I/O panel.
8
Replace the card fan cage (see "Installing the Card Fan" on page 71).
NOTICE: Ensure that you replace all the cables originally connected to the master
I/O board or your computer may not function properly.
9
Connect all the cables to the master I/O board (see "Master I/O Board
Components" on page 101).
10
Replace any expansion cards that you removed (see "Installing PCI and
PCI Express Cards" on page 35).
1 front panel 2 FRONT_LED cable
3 securing tabs (4)
1
2
3
book.book Page 98 Monday, January 7, 2008 2:53 PM
 Loading...


