56 Drives
5
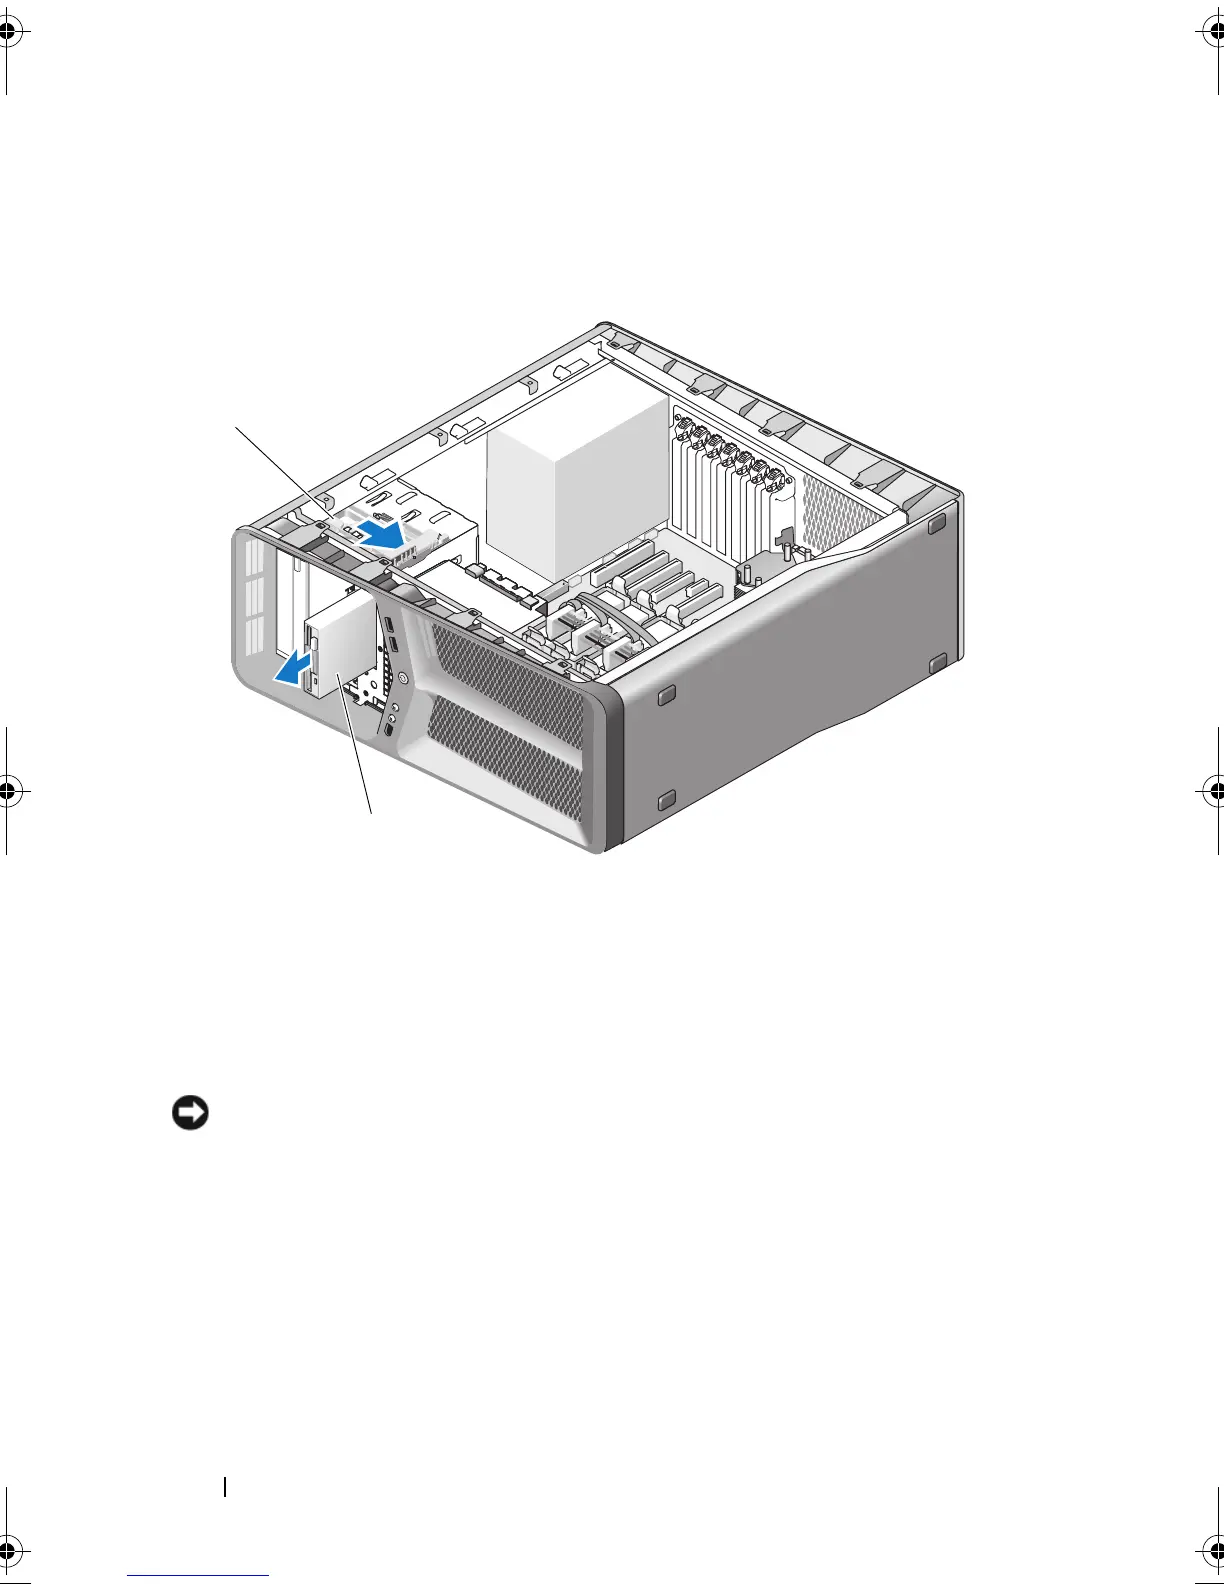
Slide the drive-release latch towards the base of the computer to release
the shoulder screw, and then slide the drive out of the drive bay.
6
Replace the drive panel (see "Installing the Drive Panel" on page 54).
7
Replace the computer cover (see "Replacing the Computer Cover" on
page 119).
NOTICE: To connect a network cable, first plug the cable into the network port or
device and then plug it into the computer.
8
Connect your computer and devices to electrical outlets, and then turn
them on.
Installing a Floppy Drive
1
Follow the procedures in "Before You Begin" on page 9.
2
Remove the computer cover (see "Removing the Computer Cover" on
page 13).
1 drive-release latch 2 floppy drive
1
2
book.book Page 56 Monday, January 7, 2008 2:53 PM
 Loading...


