34
Button Time
9 minutes
1.5 hours
3 hours
4. Press the button (B1) to exit the menu. (If the appliance
is left idle for
about 1 minute, it exits automatically from
the settings menu and is ready for use again).
12.4 Default values
The appliance can be reset to the default values. Proceed as
follows:
1. Press and hold the
(B3) and
(B7) buttons for at
least 3 seconds to access the menu;
2. Press and hold the button for a few seconds until the
corresponding light starts ashing;
3. Press the button (B1) to exit the menu. (If the appliance
is left idle for
about 1 minute, it exits automatically from
the settings menu and is ready for use again).
12.5 Energy saving
Use this function to enable or disable energy saving. When en-
abled, the function reduces energy consumption in compliance
with European regulations.
Proceed as follows:
1. Press and hold the
(B3) and
(B7) buttons for at
least 3 seconds to access the menu;
2. Press the
button (B6). The light (B12) comes on ;
3. Press the button (B1) to exit the menu. (If the appliance
is left idle for
about 1 minute, it exits automatically from
the settings menu and is ready for use again).
Please note:
• If energy saving is active, you may have to wait a few seconds before delivery.
• When energy saving is disabled, steam is delivered immediately.
12.6 Extra grinding adjustment
Over time, the burrs will wear down and the quantity of ground
coee will diminish. When adjusting the burrs as described in
section "4.5 Adjusting the quantity of ground coee in the l-
ter" is no longer enough, you can select a new grinding range.
Proceed as follows:
1. Press and hold the (B3) and (B7) buttons for at
least 3 seconds to access the menu. The (B15) and
(B16) lights alternate;
2. Turn the mode selection dial (B8) to the position. The
light (B14) remains on steadily;
3. Select the new grinding range by pressing the button
(B4);
4. Press the button (B1) to exit the menu. (If the appli-
ance is left idle for about 1 minute, it exits automatically
from the settings menu and is ready for use again);
5. Turn the ground coee quantity dial (B2) to the "min”
position, then proceed to adjust as if it were the rst time
("4.5 Adjusting the quantity of ground coee in the lter").
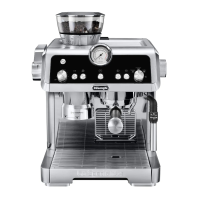
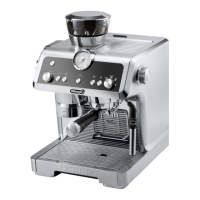
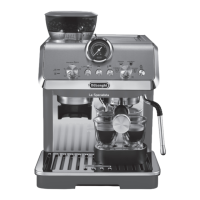
13. CLEANING
13.1 Cleaning the machine
The following parts of the machine must be cleaned regularly:
- drip tray (A13) complete with cup grille (A11) and drip tray
grille (A12);
- espresso cup grille (A10);
- coee lters (C2) and (C3);
- the beans container (A2);
- the coee mill burrs;
- the coee mill outlet (A22) (smart tamping station);
- boiler outlet (A21);
- water tank (A17);
- cappuccino maker (A8) as described in section "10. Clean-
ing the cappuccino maker after use".
Important!
• Do not use solvents, abrasive detergents or alcohol to clean
the coee machine.
• Do not use metal objects to remove encrustations or coee
deposits as they could scratch metal or plastic surfaces.
• None of the components of the appliance can be washed in
a dishwasher with the exception of the drip tray (A13) and
cup grilles (A10) and (A11).
• If the appliance is not used for more than a week, before
using it again, we recommend you perform a rinse cycle as
described in section "3. Setting up the appliance".
Danger!
• While cleaning, never immerse the coee maker in water. It
is an electrical appliance.
• Before cleaning the outside of the appliance, turn it o,
unplug from the mains socket
and allow to cool.
13.2 Cleaning the drip
tray
The drip tray is tted with a
level indicator (A14) showing
the amount of water it contains.
Before the indicator protrudes
from the cup tray, the drip tray
must be emptied and cleaned,
otherwise the water may over-
33