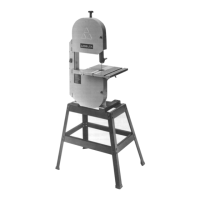
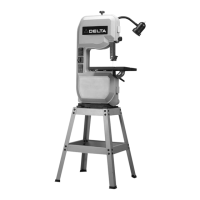
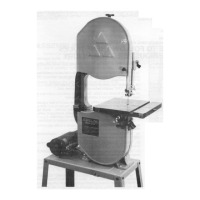
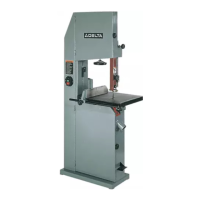
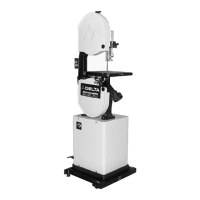
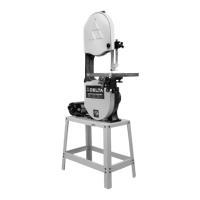
This document is an instruction manual for a 12" Band Saw, Model 28-190, manufactured by Delta International Machinery Corp. The manual is dated 5-6-98 and has a part number of 1345385.
Function Description:
The Delta 12" Band Saw (Model 28-190) is a woodworking machine designed for cutting various materials, primarily wood. It utilizes a continuous loop saw blade that rotates around two wheels, allowing for straight cuts, curves, and intricate shapes. The machine is equipped with a motor to drive the blade and a table that can be tilted for angled cuts. Safety features, such as guards and proper grounding, are emphasized throughout the manual to ensure safe operation.
Important Technical Specifications:
- Model: 28-190
- Motor: 1/2 HP, 120V, Single Phase
- Table Size: 14" x 14"
- Table Groove: 3/8" x 3/4"
- Table Tilt: 46° right / 3° left
- Blade Width: 1/8" minimum, 1/2" maximum
- Blade Length: 82"
- Capacities:
- Blade to Frame: 12"
- Table to Frame: 6"
- Height on Stand: 64"
- Width: 31"
- Depth (front to rear): 22-1/2"
- Weight: 120 lbs.
- Power Connections: Requires a separate electrical circuit, not less than #12 wire, protected with a 20 Amp fuse.
Usage Features:
- Starting and Stopping: The saw is turned "ON" by moving the switch to the up position and "OFF" by moving it to the down position.
- Locking Switch: The switch toggle can be pulled out to lock the switch in the "OFF" position, preventing accidental startup.
- Blade Tension Adjustment: A tension knob and scale allow for precise adjustment of blade tension based on blade width. This is crucial for accurate work and blade longevity. The manual advises releasing tension when the saw is not in use.
- Blade Tracking: The blade's position on the upper wheel can be adjusted using a tracking knob to ensure it runs steadily. This adjustment should be done by hand, with the power disconnected.
- Upper Blade Guide Assembly Adjustment: The upper blade guide assembly should be set approximately 1/8" above the workpiece for optimal cutting and safety.
- Blade Guide and Support Bearing Adjustment: Both upper and lower blade guides and support bearings need to be adjusted to prevent blade twisting during operation. The guides should be close to the blade sides without pinching, and the support bearings should be set about 1/64" behind the blade.
- Table Tilting: The table can be tilted 45 degrees to the right and 3 degrees to the left for angled cuts. A lock handle secures the table at the desired angle, and a scale indicates the degree of tilt. A positive stop ensures the table returns to 90 degrees to the blade.
- Minimum Cutting Radius: The manual provides a chart indicating the minimum turning radius for different blade widths, emphasizing the use of wider blades for straight cuts and narrower blades for curves.
- Extension Cords: Guidelines are provided for selecting the correct gauge extension cord based on length to prevent power loss and overheating.
- Grounding: The tool must be properly grounded with a 3-wire extension cord and a 3-prong plug to protect the operator from electric shock.
Maintenance Features:
- Changing Blades: The process involves disconnecting power, opening wheel guards, releasing blade tension, removing the table insert, slipping off the old blade, checking the new blade's tooth direction, and then installing and adjusting the new blade for tension, guides, and tracking.
- Adjusting Belt Tension: If the drive belt slips, the motor mounting hardware can be loosened to slide the motor forward or backward to achieve the correct belt tension (approximately 1/4" deflection in the center span).
- Blade Brushes: Two blade brushes are included to keep the blade and rubber tires clean from chips and build-up, and they can be adjusted as needed.
- Dust Chute: A 2-1/4" I.D. dust chute is provided for connecting a shop vacuum or dust collector to manage sawdust.
- Blade Care: Users are advised to always use sharp blades, keep them free from gum and pitch, and clean rubber tires frequently. It is recommended to purchase new blades rather than sharpening them due to their low cost.
- General Safety and Maintenance: The manual stresses the importance of keeping guards in place, wearing eye protection, maintaining a clean work area, disconnecting power before servicing, and checking for damaged parts. It also advises against forcing the tool, overreaching, or leaving the tool running unattended. Regular lubrication and accessory changes are also part of maintaining the tool in top condition.