CAUTION!Machine and equipment damage may occur.
Make sure to choose proper size for AC cable.
- Failed to follow these instructions may cause AC plug damage.
- AC plug’s installation must meets the local electrical code.
- If there is any conflict between installation instruction and electrical code,
please follow the electrical code.
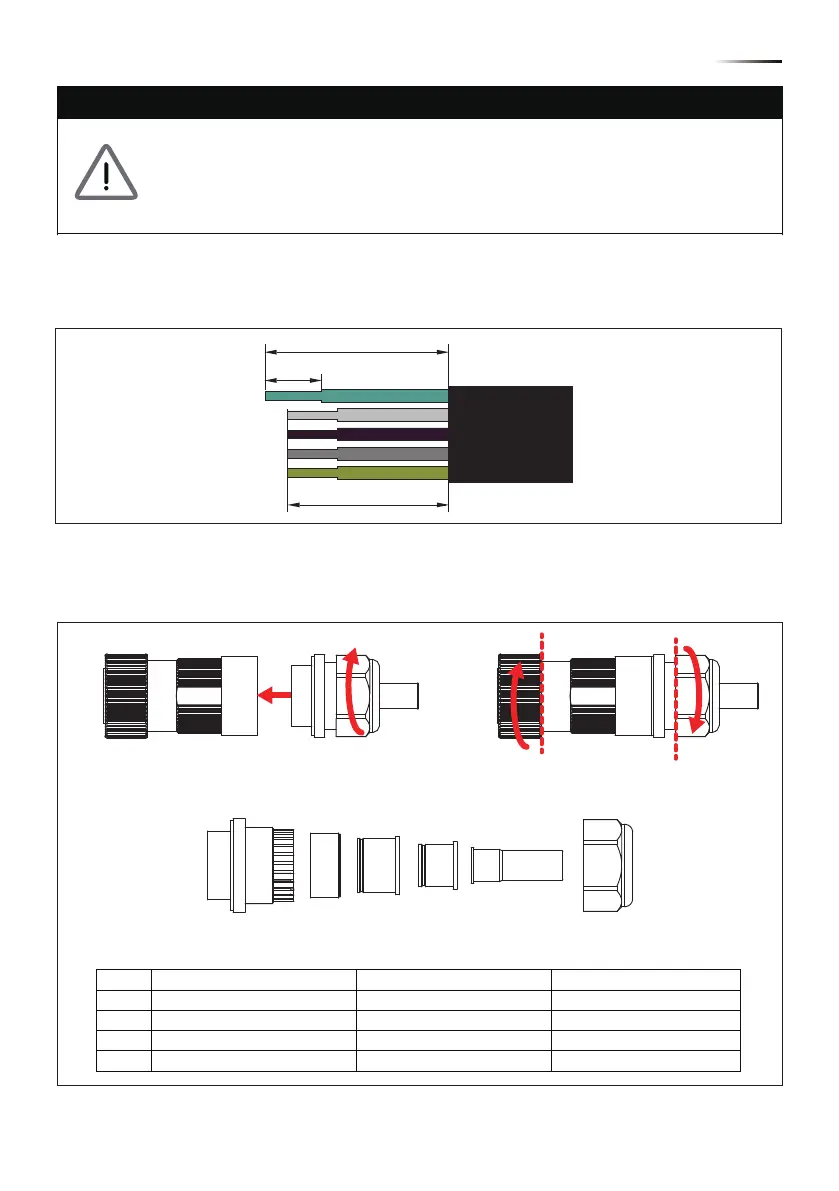
Figure 4-3 Striping the wires
Follow the steps below to strip the wires before assembling the AC plug:
• Remove 68.5 mm (MAX) of AC cable outer jacket.
• Trim the L1, L2, L3, and N wire to 70 mm (MAX).
• Strip 20 mm of insulation from all wires ends.
70 mm (MAX)
68.5 mm (MAX)
5
*
20 mm
PE
N
L1
L2
L3
Outer Jacket
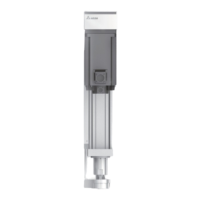
Assemble the AC plug and wires as the procedures shown in Figure 4-4.
The sequence of L1~ L3 can be connected randomly. However,
N and PE must be connected correctly.
1. The packing has the parts of AC Plug, please follow
the step to assemble the ac plug first. The fastening
torque range is 55kgf-cm~75kgf-cm.
2. Rotate the plug to release part A & B.
A
B
Figure 4-4 AC plug illustration for M15A/ M20A.
D1 D2 D3 D4
3. Users should select the appropriate diameter rubber gasket for part A to ensure good water resistance.
Cable range (mm) / Part F fastening torque (Nm) / Fastening distance P (mm)
Tightening torque (N・m)
D1
D2 20.5 ~ 32.6 13 ~ 20
D3 15.3 ~ 20.5
Gap P (mm)Outer jacket diameter (mm)
32.6 ~ 41.3 13 ~ 20 1 ~ 7
0 ~ 7
13 ~ 20 1 ~ 5.5
9 ~ 13 1 ~ 6.5 D4 10.8 ~ 16
17
Wiring
 Loading...