7
ENGLISH
BEFORE RECORDING AND PLAYING CASSETTE TAPES
7
NOTES:
• If a foreign object is caught in the cassette tray during closing, simply press the OPEN/CLOSE button again and
the tray will open.
• Do not press the cassette tray in by hand when the power is off. Doing so will damage it.
• Do not place foreign objects in the cassette tray. Doing so will damage it.
(1)
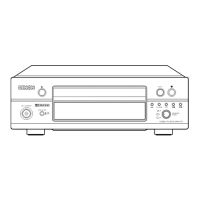
Loading and Unloading Cassette Tapes
(2)
Auto Tape Select Mechanism
z
Loading
x
Unloading
CD SRS
REC
0
1
PLAY
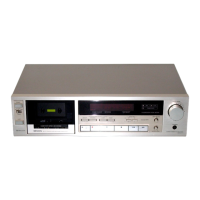
CASSETTE DECK DRR-F101
REC
CD SRS
PLAY
ON / STANDBY
e
DOLBY NR
ON
OFF
REVERSE
MODE
3
2,4
1
1
2
3
4
Turn on the power.
In the stop mode, press the cassette
holder open/close button.
• The cassette holder opens.
Set the cassette tape in the cassette tray with
the side on which the tape is exposed facing the
inside.
Close the cassette holder.
CD SRS
REC
0
1
PLAY
CASSETTE DECK DRR-F101
REC
CD SRS
PLAY
ON / STANDBY
e
DOLBY NR
ON
OFF
REVERSE
MODE
2
1,3
1
2
3
In the stop mode, press the cassette
holder open/close button.
• The cassette holder opens.
Remove the cassette tape.
Close the cassette holder.
The DRR-F101 is equipped with an auto tape selector
mechanism which uses the detection holes in the
cassette halves to detect the type of tape and
automatically set the most appropriate recording bias and
equalization for that type of tape.
Detection holes
High tape (TYPE
II)
The metal tapes can only be used for playback.
NOTE:
(3)
Using the Auto Reverse Function
2 This set is equipped with an auto reverse mechanism allowing one-sided recording and playback, two-sided recording
and playback or continuous playback without removing the cassette tape.
z
Direction of cassette tape travel
2 Playback can be switched to the other side of the tape
during playback by pressing the direction selector
button (
01).
C
D
S
R
S
R
E
C
0
1
P
L
A
Y
C
A
S
S
E
T
T
E
D
E
C
K
D
R
R
-F
1
0
1
R
E
C
C
D
S
R
S
P
L
A
Y
O
N
/
S
T
A
N
D
B
Y
e
D
O
L
B
Y
N
R
O
N
O
F
F
R
E
V
E
R
S
E
M
O
D
E
NOTE:
• The diagram below shows the relationship between
the play direction indicators and the direction of
cassette tape travel. When loading cassette tapes
in the cassette tray, pay attention to the direction of
the tape.
The front side
of the tape.
Buttons pressed and direction of tape travel.
(Operation
buttons)
(Operation
buttons)
(Direction of
travel indication)
(Direction of
travel indication)
Front
Side
Back
Side
x Reverse modes
There are three reverse modes, as described below. For
instructions on switching between them, refer to pages
7, 8.
• Single-sided recording/playback mode ( )
Use this to record or play only the front or back side.
(The stop mode is set automatically when the end of
that side of the tape is reached.)
• Double-sided recording/playback mode ( )
• In this mode, when the end of the front side of the
tape is reached during recording or playback, the tape
automatically switches to the back side and playback
or recording continues.
(The stop mode is set automatically when the end of
the tape on the back side is reached.)
• Continuous play mode ( )
In this mode, playback continues until the stop button is
pressed.
Start from
front side
Start from
front side
Auto stop
Auto stop
Reverse
ReverseReverse
Start from
back side
Auto stop
* During recording, the deck automatically operates in the
same way as for the double-sided recording/playback
mode ( ).
* When started from the back side, only the back side is
recorded or played.
F
G
 Loading...