1-7-5. All servo on
• Press the "
CURSOR
d
" button to turn on the all servos and perform the auto adjustment. After auto
adjustment completes, the playback operation starts.
(playback sound is output)
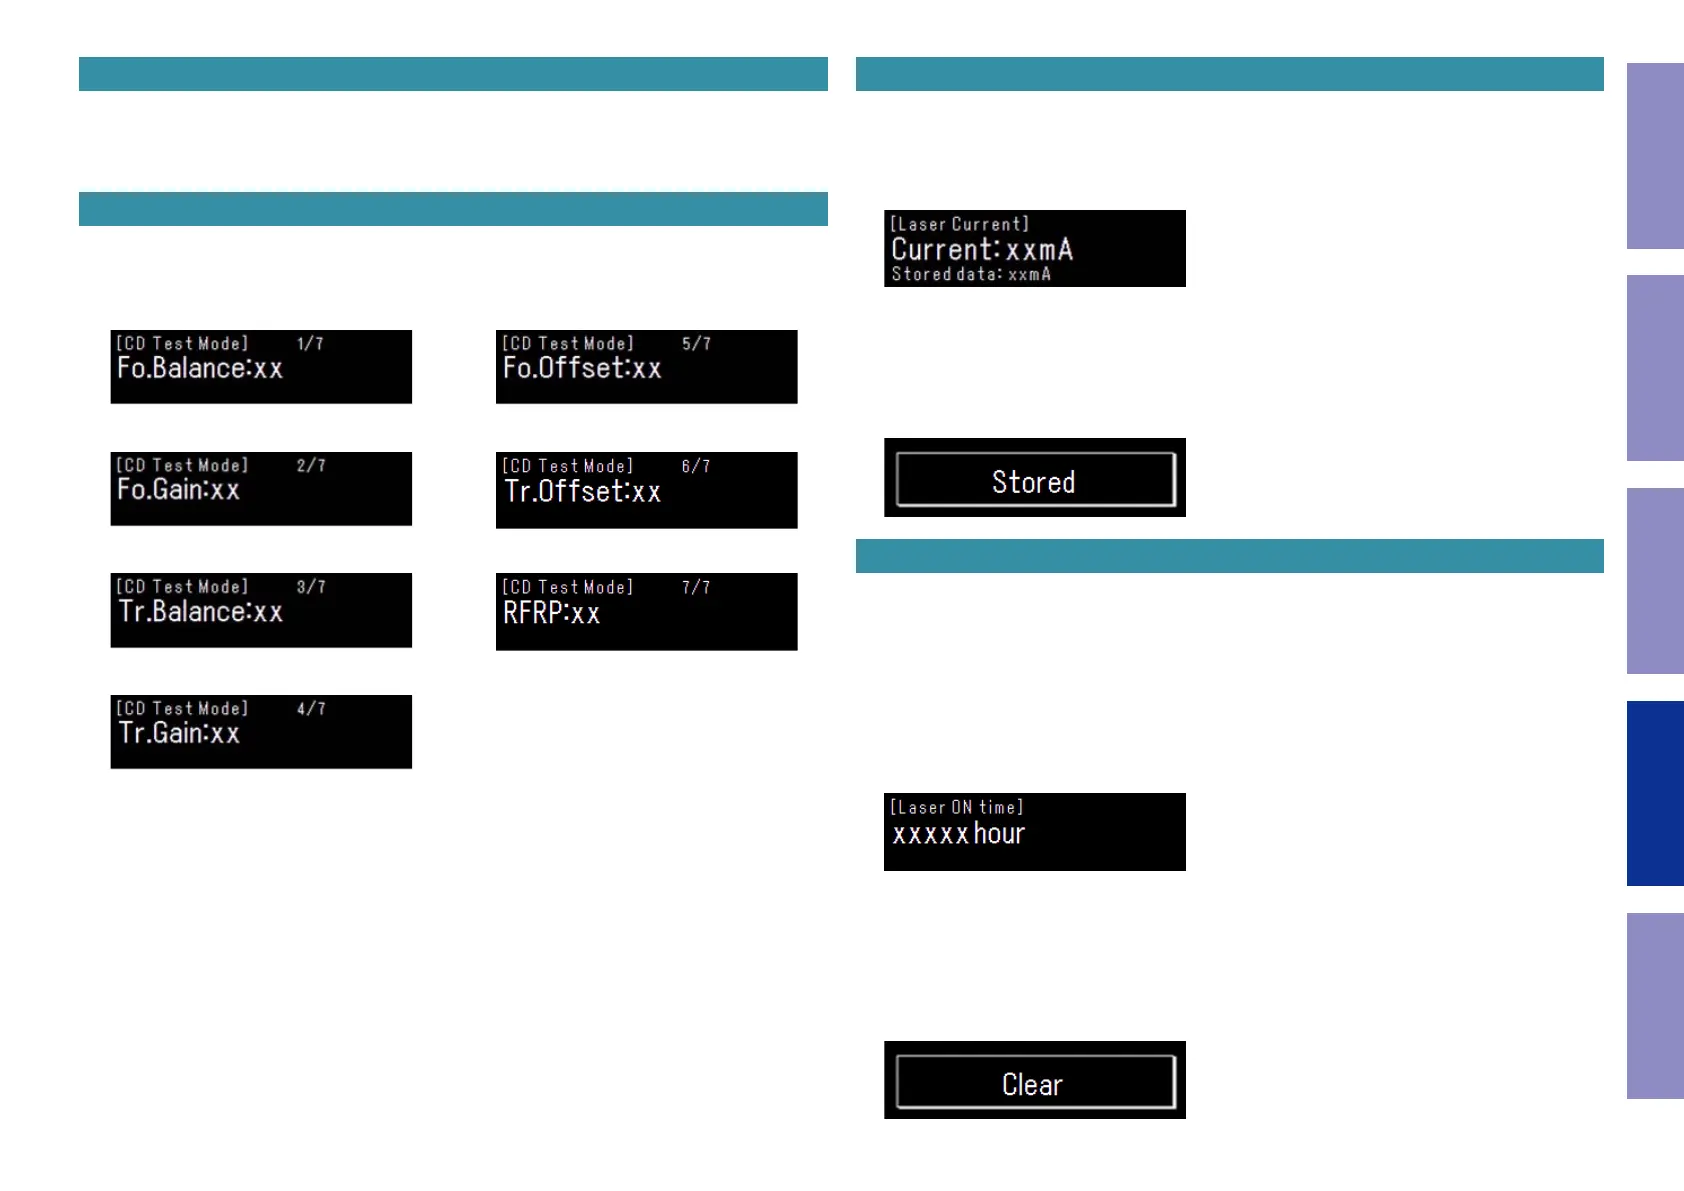
1-7-6. Adjustment value display
• Press "Source" once after executing automatic servo adjustment (see 1-7-5. All servo on).
• Next, press the "
CURSOR
d
" or "
CURSOR
f
" button to display the adjustment value.
("
CURSOR
d
": + Direction / "
CURSOR
f
": - Direction)
NOTE: If automatic adjustment is not completed, a normal value is not displayed.
(1) FOCUS BALANCE (5) FOCUS OFFSET
(2) FOCUS GAIN (6) TRACKING OFFSET
(3) TRACKING BALANCE (7) RFRP
(4) TRACKING GAIN
1-7-7. Displaying the laser current
• Press and hold the "Volume Up" button for at least 1 second while stopped(1-7-4. Stop) to turn the
laser ON and measure and display the laser current.
• The current is updated every 3 seconds.
• Press the "Source" button, to return to the "CD TEST MODE" screen.
• Stored data is not deleted when the main unit is initialized (for factory settings or manual entry).
• See "4. Notes on Handling the Laser Pick-Up"
Overwriting the stored data
• With the laser current displayed, press and hold the "
9
" button for over 5 second to save the cur-
rent value on EEPROM (overwrite the stored data).
• After overwriting, the "1-7-7. Displaying the laser current" appears again.
• Rewriting is performed upon when the CD mechanism is replaced.
• "Stored" is displayed for 3 seconds.
1-7-8. Displaying the accumulated laser-on time
• Press and hold button "Volume Down" for 1 second or more while stopped (1-7-4. Stop) to display
total laser-on time.
• Total time is saved to EEPROM every 10 minutes.
• Monitors and counts laser-on/off.
• Press the "Source" button, to return to the "CD TEST MODE" screen.
• Total time is not deleted when the main unit is initialized (initialize, factory reset).
• Display Specications:
•Number of digits retained in EPROM: 4 digits, 0xFFFF
•Number of digits displayed: 5 digits
• When 10922 hours are exceeded, the retained data is not updated and the value is xed as 0xFFFF
(the display is xed as "10922 hour").
Initialize total laser-on time
• Press and hold button "
13
" for 5 seconds or more while total laser-on time is displayed to initialize
total laser-on time.
• The display returns to the display in "1-7-8. Displaying the accumulated laser-on time" ("0 hour") after
initialization is completed.
• Total laser-on time is initialized when the CD mechanism is replaced.
• "Clear" is displayed for 3 seconds.
Before Servicing
This Unit
Electrical Mechanical Repair Information Updating
63
 Loading...