aXcs
®
Wall/Cabinet Unit 9
Unit Head Assembly
1. Place the nylon bushing inside the pivot
cylinder of the mounting bracket.
2. Slowly insert the fixed arm pivot (with wiring
and tubings) into the nylon bushing in the
pivot cylinder.
3. Feed the following three tubings from the
fixed arm pivot out through the opening in
the back of the cylinder:
1/4" red
1/8" black
1/8" blue
4. Feed the remaining four tubings from the
fixed arm pivot out through the bottom of
the cylinder:
1/8" red
1/8" green
1/8" clear
1/8" yellow
5. Feed the fiber optic black and white wiring
from the fixed arm pivot out through the
bottom of the cylinder.
Section III Installation
Air & Water Tubings
1. Position the end of the umbilical under the
pivot cylinder.
2. Color match and connect the 1/8" red, green,
clear and yellow tubings from the umbilical to
the 1/8" tubings from the unit head.
NOTE: Align the quick connects, press together
and twist to lock.
3. Feed the 1/4" red tubing from the umbilical
up and out through the opening in the back
of the pivot cylinder.
4. Position the foot control tubing with cover
attached on the preferred side of the mounting
bracket. (Bracket covers are reversible.)
5. Connect the foot control tubings by matching
the numbered tags attached to each tubing.
#1 to #1 (1/4" red from umbilical)
#2 to #2 (1/4" red from unit head)
#3 to #3 (1/8" black from unit head)
#4 to #4 (1/8" blue from unit head)
6. Feed the fiber optic black and white wires
from the fixed arm pivot down through the
umbilical.
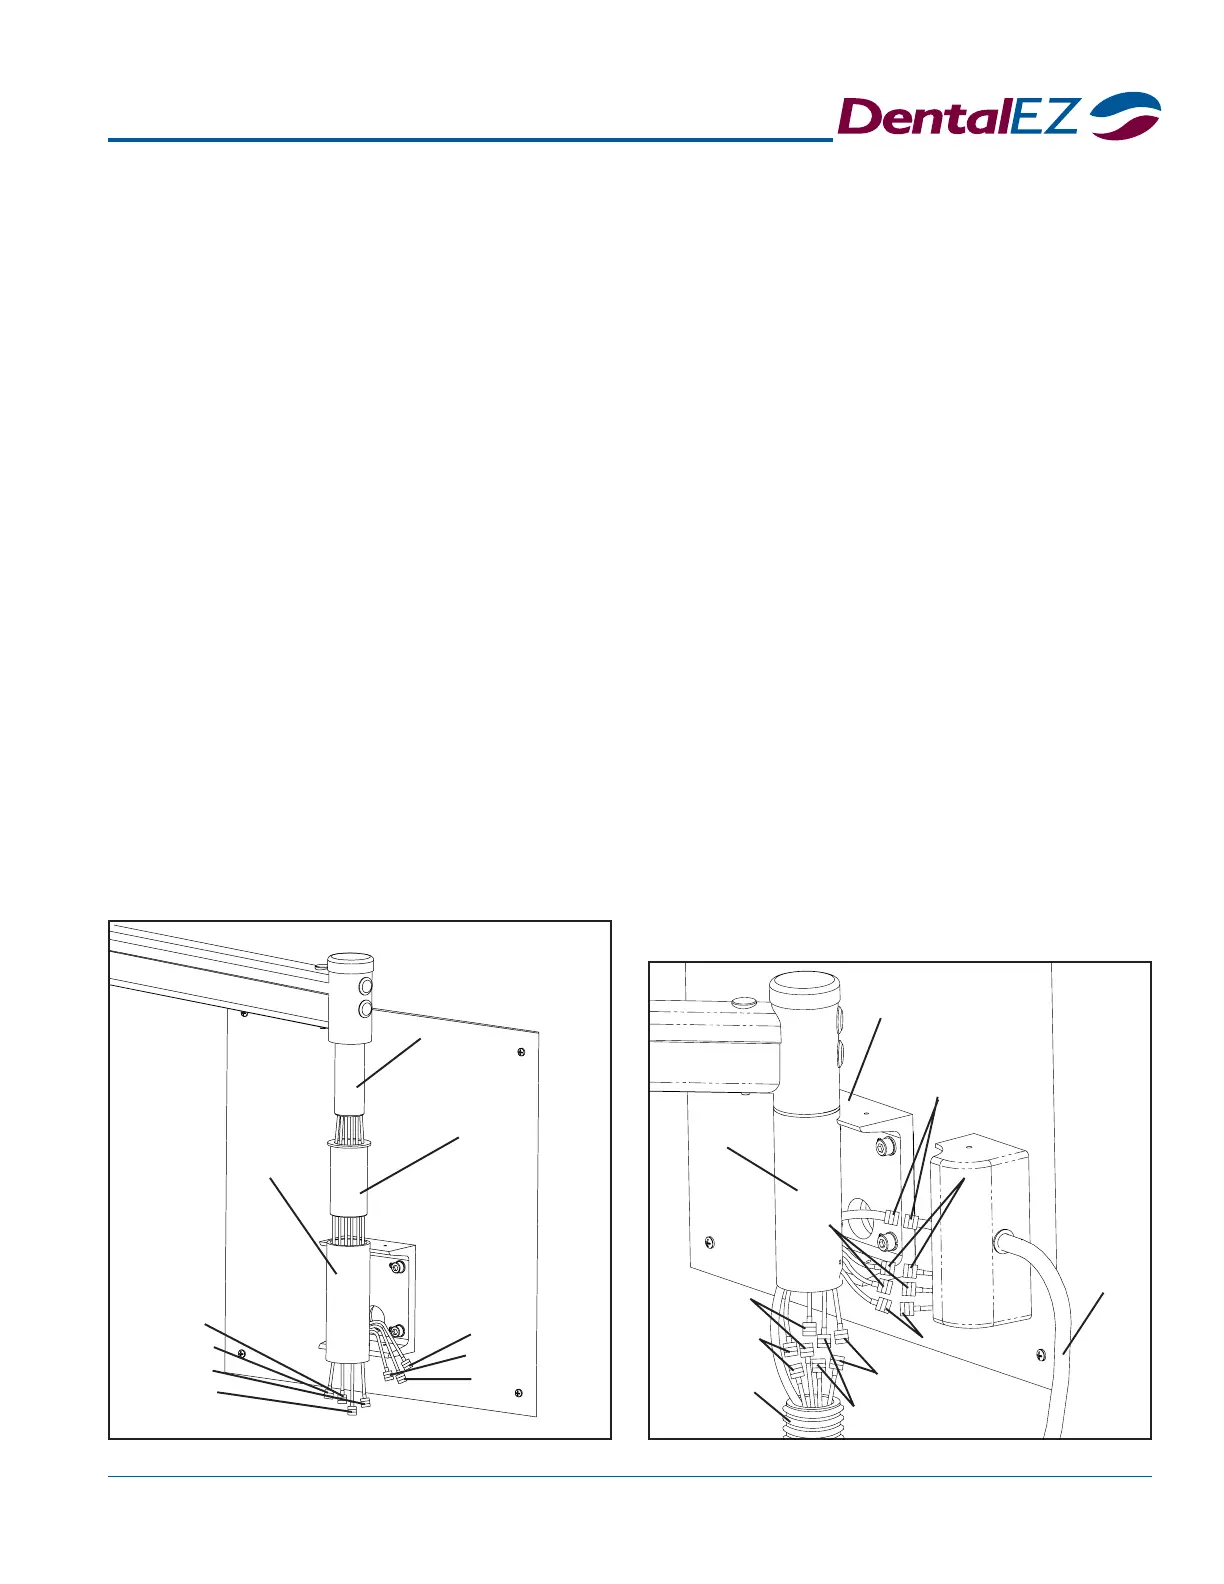
Fixed Arm
Pivot
Nylon
Bushing
1/8" Red,
1/8" Green,
1/8" Clear,
1/8" Yellow
Pivot
Cylinder
1/4" Red (#2),
1/8" Black (#3),
1/8" Blue (#4)
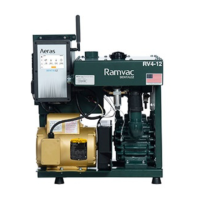
Pivot
Cylinder
Mounting Bracket
Foot
Control
Tubing
w/Cover
Umbilical
1/8" Blue (#4)
1/8" Black (#3)
1/4" Red (#2)
1/4" Red (#1)
1/8" Red
1/8" Green
1/8" Clear
1/8" Yellow