aXcs
®
Wall/Cabinet Unit
12 Installation, Operation and Care Manual
Section III Installation
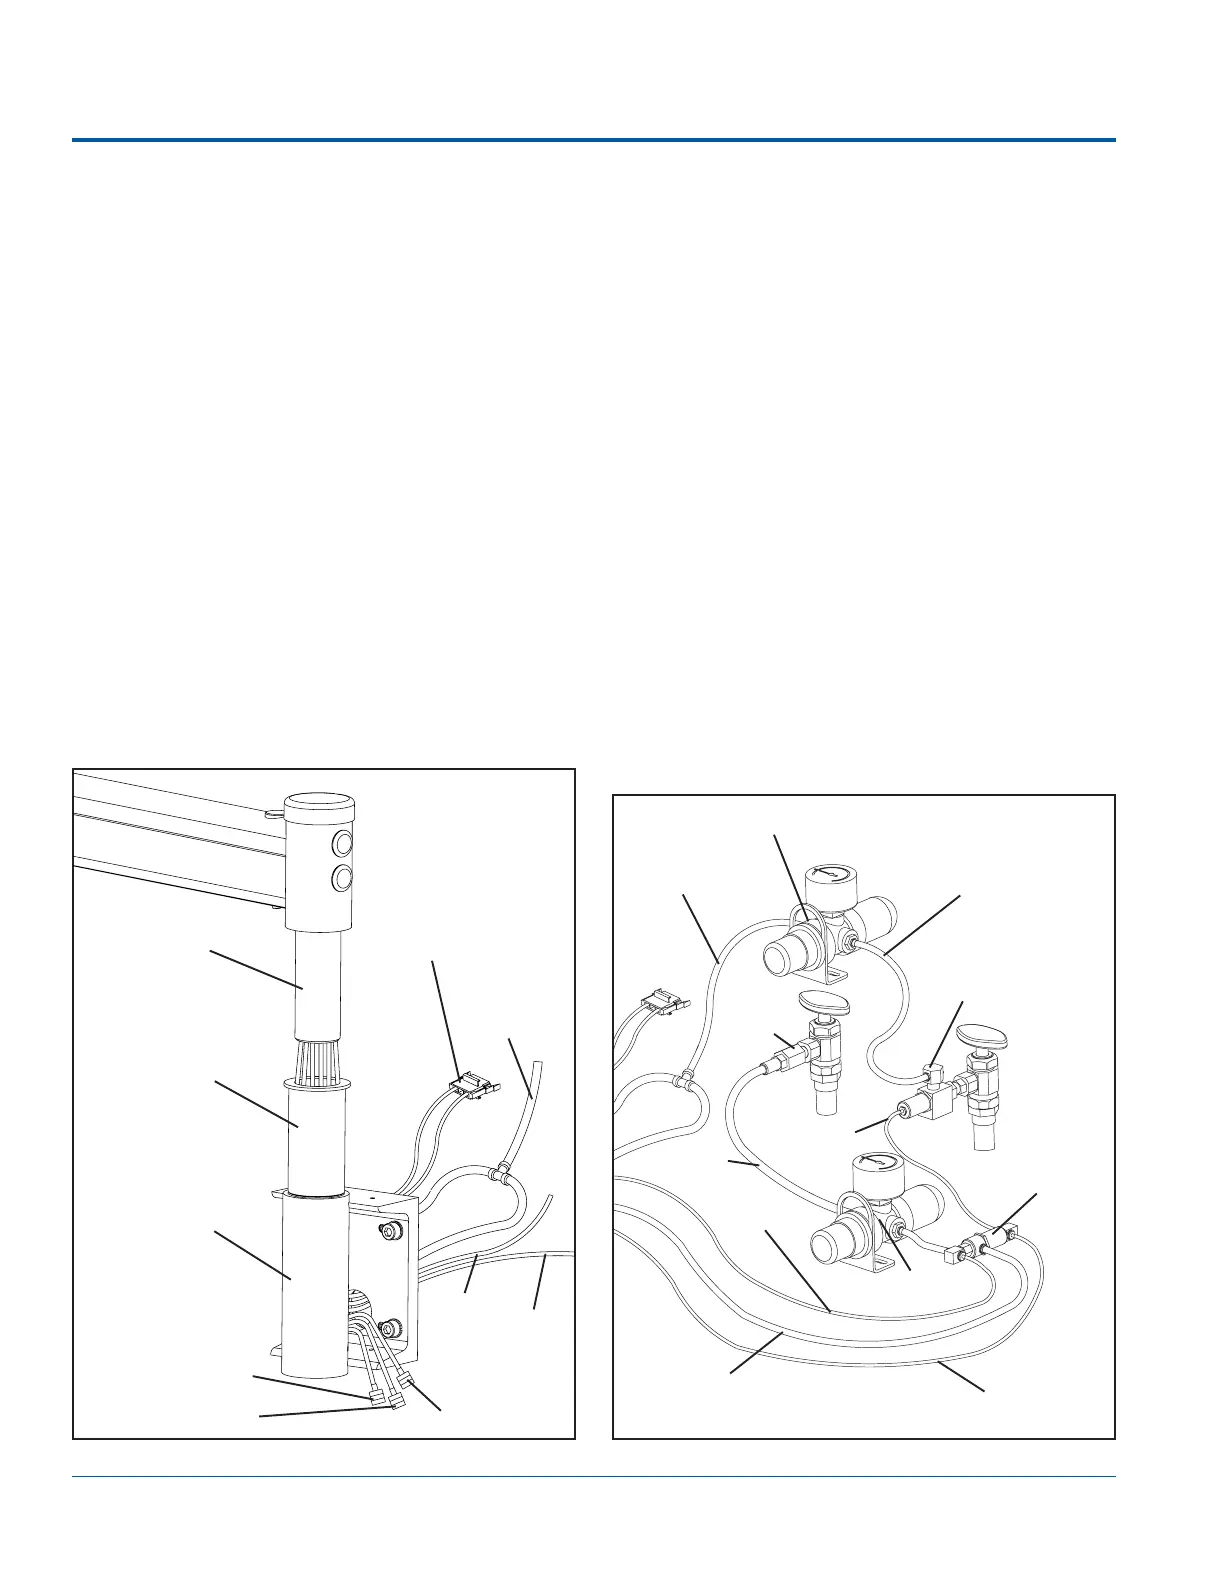
Unit Head Assembly
1. Place the nylon bushing inside the pivot
cylinder of the mounting bracket.
2. Slowly insert the fixed arm pivot (w/wiring and
tubings) into the pivot cylinder nylon bushing.
3. Feed all the tubings and wiring from the fixed
arm pivot out through the opening in the
back of the cylinder:
4. Feed the following three tubings from the
fixed arm pivot out through the hole in the
side of the cabinet.
1/4" green
1/8" yellow
1/8" red
5. Feed the fiber optic black and white wiring
from the fixed arm pivot out through the hole
in the side of the cabinet.
Utilities Connection
1. Connect the 14" red tubing from the air
regulator to the air shut off.
2. Connect the 14" green tubing from the water
regulator to the water shut off.
3. Connect the 1/8" yellow from the air poppet
assembly to the barb on the water actuator.
4. Connect these tubings from the unit head:
1/4" green to the water filter/regulator
1/8" red to the valve assembly (gauge end)
1/8" yellow to valve assembly (bowl end)
5. Feed the 1/4" red (#1) tubing from the
poppet valve assembly out through the hole in
the cabinet.
6. Mount each regulator vertically with bowl
down. (This allows easy access for
maintenance.)
1/4" Green
Fiber Optic
Connector
Pivot
Cylinder
Fixed Arm
Pivot
Nylon
Bushing
1/8"
Red
1/8"
Yellow
Poppet Valve
Assembly
1/8" Blue (#4)
Air
Valve
Fitting
1/8" Yellow
Water
Actuator
Water Regulator
1/4" Green
1/4" Green
1/4" Red
1/8" Red
1/8" Yellow
1/4" Red
(#1)
Air
Regulator
1/4" Red (#2)
1/8" Black (#3)
 Loading...