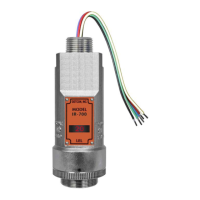
Model IR-700
IR-700 Instruction Manual Rev. 4.3 Page 25 of 46
Set Serial ID is used to set the Modbus serial ID address. It is adjustable from 01 to 256 in hexadecimal format
(01-FF hex). The current serial ID can be viewed in View Sensor Status using the instruction given in Section
3.5.1 View Sensor Status.
The menu item appears as: “Set Serial ID”.
From the “Set Serial ID” text scroll, hold the programming magnet over PGM1 or PGM2 until the “” prompt
appears and continue to hold the magnet in place for an additional 3-4 seconds (until the display starts to scroll
“Set ID”). The display will then switch to “XX“(where XX is the current ID address). Swipe the magnet
momentarily over PGM2 to increase or PGM1 to decrease the hexadecimal number until the desired ID is
displayed. Hold the magnet over PGM1 or PGM2 for 3-4 seconds to accept the new value. The display will
scroll “ID Saved”, and revert to “Set Serial ID” text scroll.
Move to another menu item by executing a momentary hold, or, return to Normal Operation via automatic
timeout of about 15 seconds (the display will scroll “Set Serial ID” 5 times and then return to Normal Operation).
3.5.6 Set Sensor Gain
Each Detcon IR-700 combustible hydrocarbon gas sensor requires a one-time gain setting to match the plug-in
IR sensor with the ITM electronics. This is set automatically during the “Set Sensor Gain” sequence. The “Set
Sensor Gain” sequence determines the required gain resistance setting for optimal operation. This technique
provides for uniformity in sensor-to-sensor operational performance.
NOTE: The “Set Sensor Gain” function is executed during factory calibration of every IR-700
sensor. In the field, this menu item is only needed when a replacement plug-in IR sensor is being
installed, or when mating a new IR-700 ITM with an existing plug-in sensor. It is also required
if the Restore Defaults menu item is executed.
The menu item appears as: “Set Sensor Gain”.
From the Set Sensor Gain text scroll, hold the magnet over PGM1 or PGM2 until the “” prompt appears and
then hold continuously for an additional 3 seconds. The display will scroll “Setting Gain” and then show the
count-up of the gain settings for the active (Ag) and reference (Rg) detectors. The typical final values are Ag =
7-14 and Rg = 30-45 (Rg maximum should be 65). At completion, the ITM will display “Gain Complete” and
revert to “Set Sensor Gain” text scroll.
The user can then choose to either: 1) move to another menu item by executing a momentary hold, or 2) return
to Normal Operation via 5 second automatic timeout.
3.5.7 Signal Output Check
Signal Output Check provides a simulated 4-20mA output and RS-485 Modbus™ output. This simulation
allows the user to conveniently perform a functional system check of their entire safety system. This signal
output simulation also aids the user in performing troubleshooting of signal wiring problems.
The menu item appears as: “Signal Output Check”.
From the “Signal Output Check” text scroll, hold the magnet over PGM1 or PGM2 until the “” prompt appears
and then hold continuously for an additional 10 seconds. Once initiated, the display will scroll “Simulation
Active” until the function is stopped. During simulation mode, the 4-20mA value will be increased from 4.0mA
to 20.0mA (in 1% of range increments at about a 1 second update rate) and then decreased from 20.0mA to
4.0mA. The same simulation sequence is applied to the Modbus™ output gas reading.
 Loading...