10- ENG
D26805
Unpacking
1. Remove unit from carton and discard all packaging. NOTE: Save all parts
bags.
The wheels and handle do not provide adequate
clearance, stability or support for pulling the unit up and
down stairs or steps. The unit must be lifted, or pushed up a ramp.
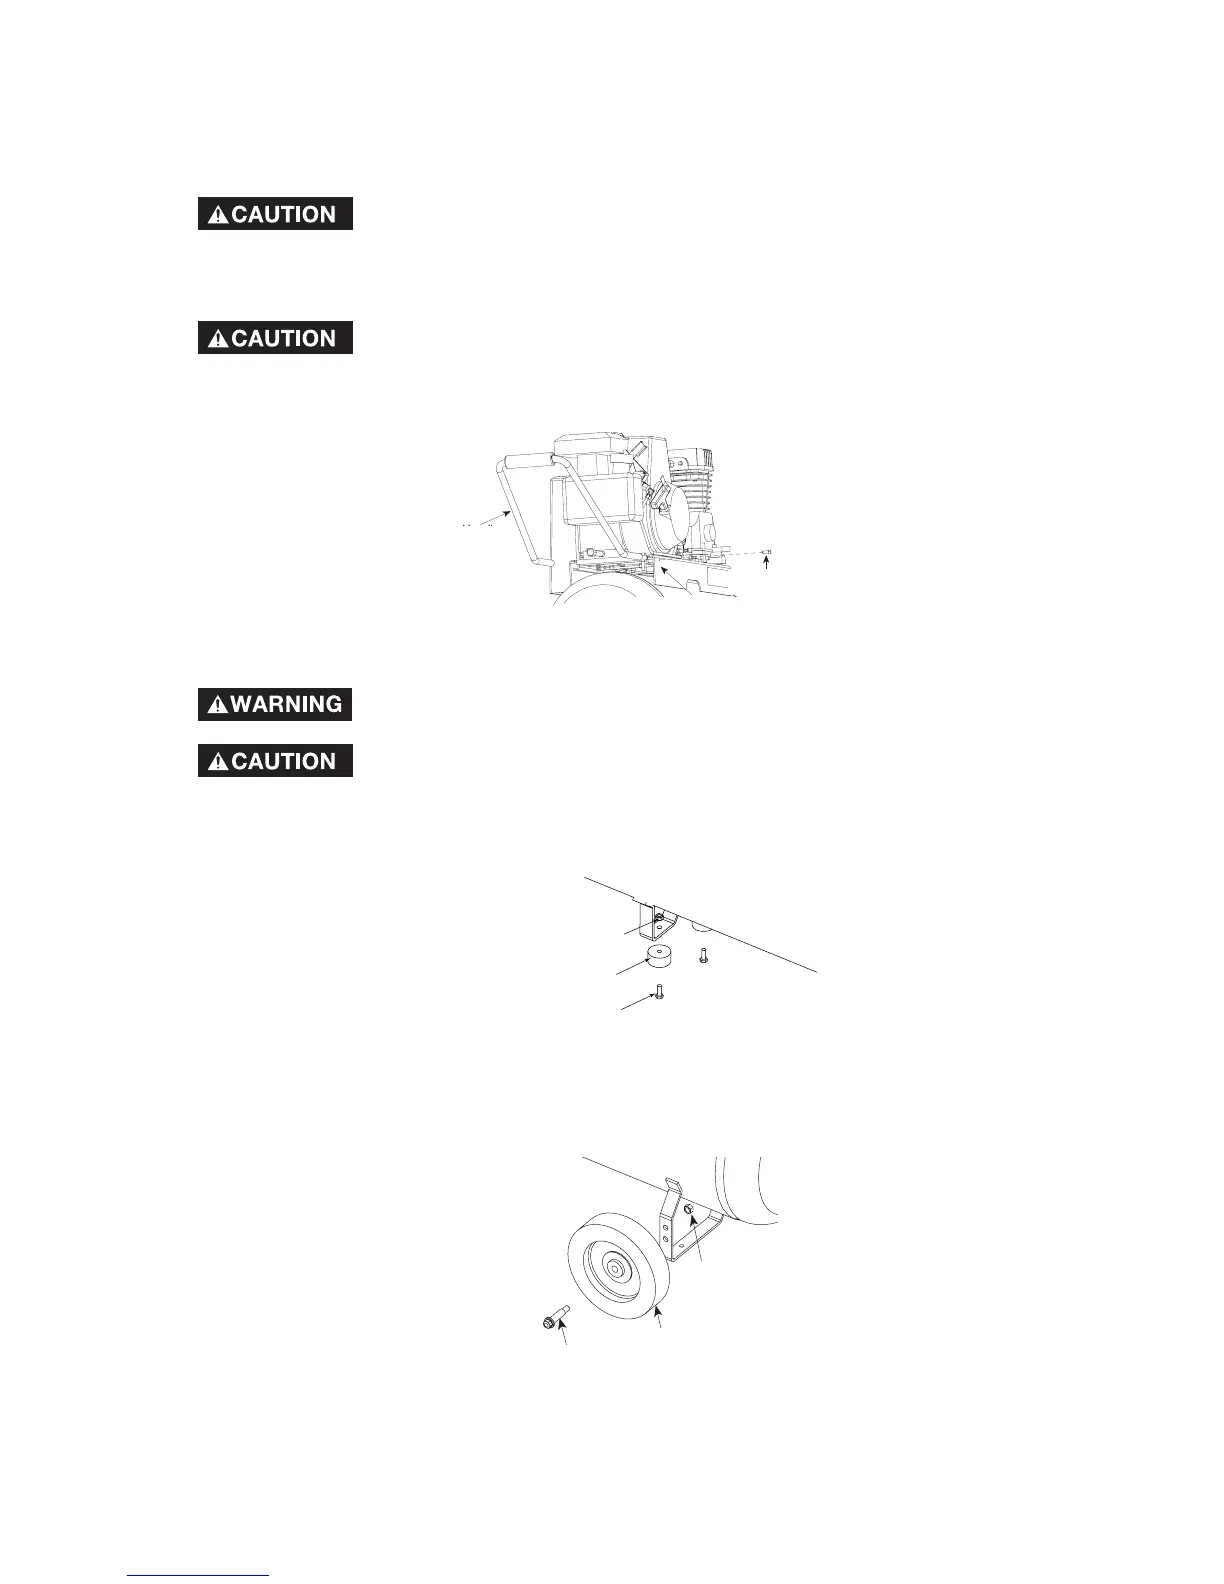
Installing Handle
Do not use the engine gas tank as a support for lifting the
air compressor.
1. Insert the handle into pockets under the tank saddle. Put one set screw
through hole in one side of tank saddle and tighten down on handle.
Assemble Wheels and Rubber Feet for Portability
Excessive tank vibration can weaken the air tank and
cause rupture or explosion. Rubber feet must be installed.
It will be necessary to brace or support one side of the
unit when installing the wheels because the compressor
will have a tendency to tip.
1. Attach the rubber feet to the bottom of the air tank bracket as shown.
2. Attach wheels with shoulder bolts and nuts as shown. Place the bolts in
the top hole of the wheel bracket on unit.
3. Tighten securely. NOTE: The unit will sit level if the wheels are properly
installed.