21- ENG
D26805
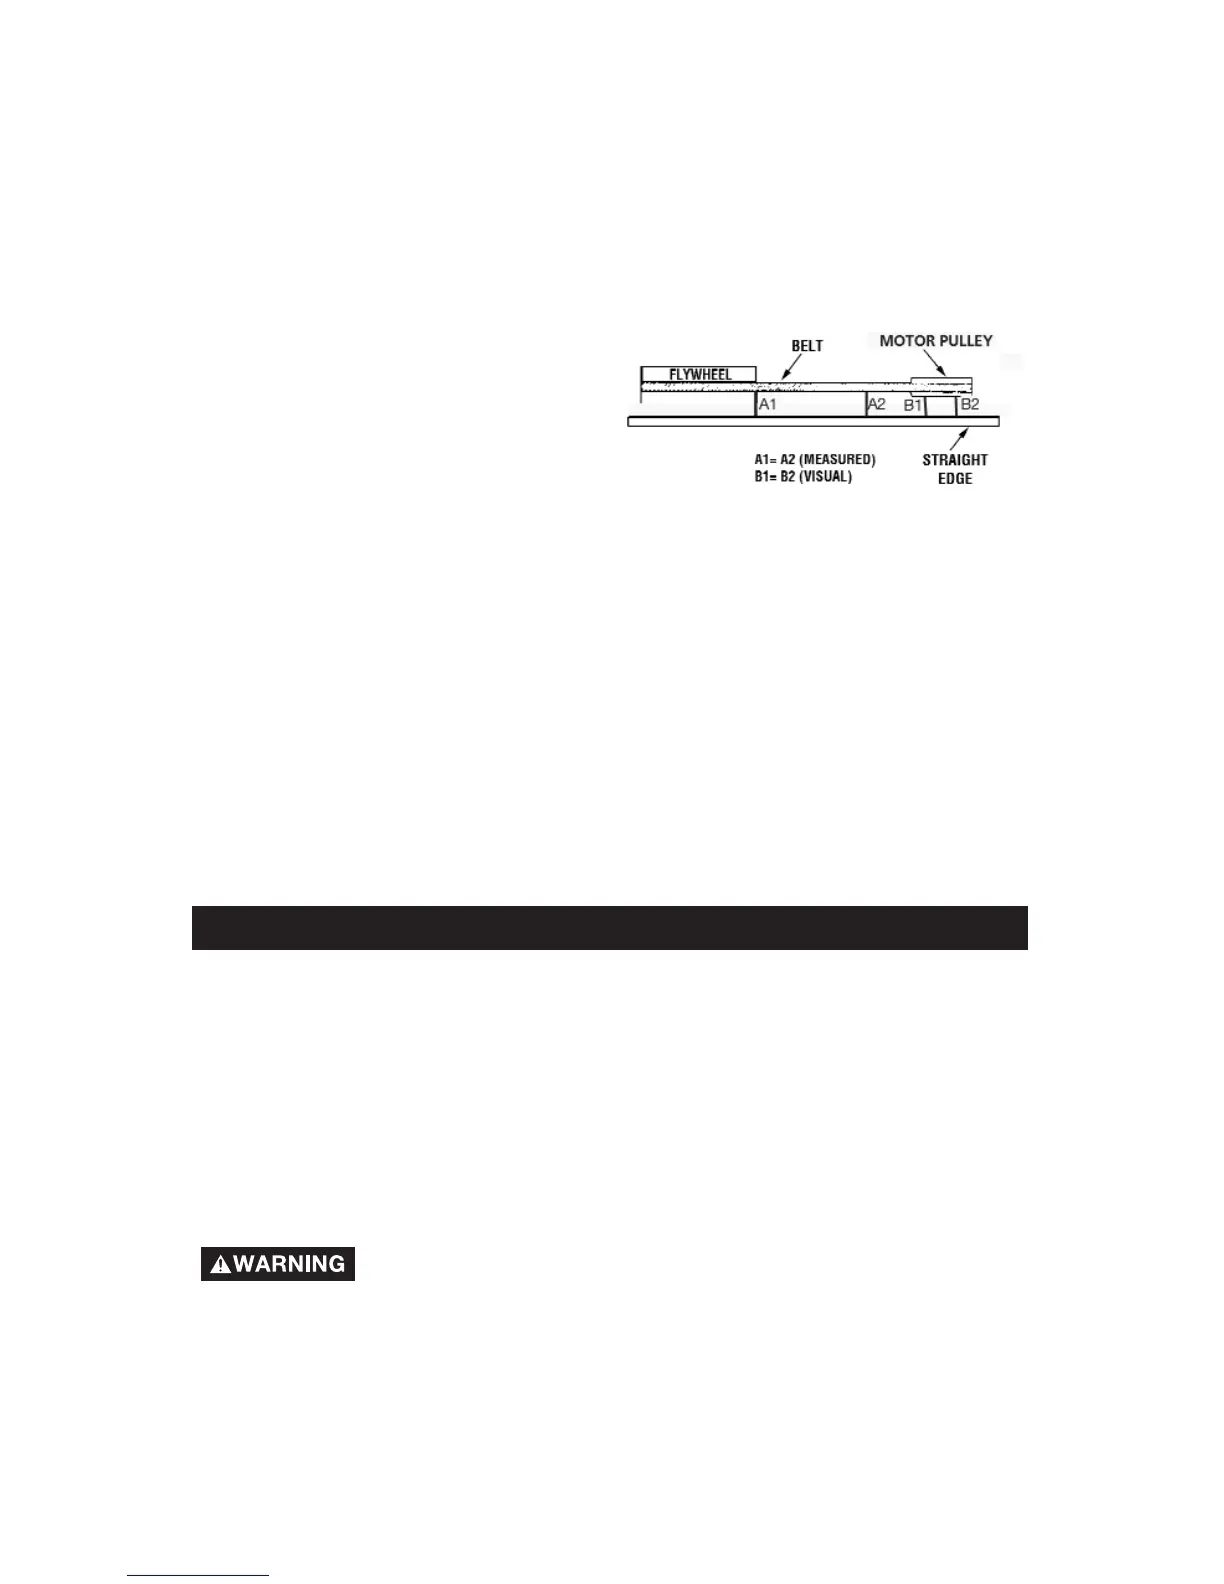
Pulley and Flywheel - Alignment
The air compressor flywheel and engine pulley must be in-line (in the same
plane) within 1/16" to assure belt retention within flywheel belt grooves. To
check alignment, perform the following steps:
1. Disconnect the spark plug wire on the engine and release all air tank
pressure.
2. Remove belt guard.
3. Place a straightedge against the
outside of the flywheel and the
engine drive pulley. Refer to Figure as
required.
4. Measure the distance between the
edge of the belt and the straightedge
at points A1 and A2 in Figure. The
difference between measurements
should be no more than 1/16".
5. If the difference is greater or less than 1/16", loosen the setscrew holding
the engine drive pulley to the shaft and adjust the pulley's position on the
shaft until the A1 and A2 measurements are within 1/16" of each other.
6. Tighten the engine drive pulley setscrew to 70-80 in.-lbs.
7. Visually inspect the engine drive pulley to verify that it is perpendicular to the
drive motor shaft. Points B1 and B2 of Figure should appear to be
equal. If they are not, loosen the setscrew of the engine drive pulley and
equalize B1 and B2, using care not to disturb the belt alignment performed
in step 2.
8. Retighten the engine drive pulley setscrew to 70-80 in.-lbs.
9. Reinstall belt guard.
10. Reconnect spark plug wire to spark plug on engine.
STORAGE
Before you store the air compressor, make sure you do the following:
1. Review the "Maintenance" section on the preceding pages and perform
scheduled maintenance as necessary.
2. Review the "Engine Manufacturer's Operating and Maintenance
Instructions".
3. Remove the air tool or accessory.
4. Pull ring on safety valve allowing air to bleed from the tank until tank
pressure is approximately 20 psi. Release safety valve ring.
5. Drain water from air tank by opening drain valve on bottom of tank.
Water will condense in the air tank. If not drained, water
will corrode and weaken the air tank causing a risk of air
tank rupture.
6. After the water has been drained, close the drain or drain valve.
NOTE: If drain valve is plugged, release all air pressure. The valve can then be
removed, cleaned, then reinstalled.
7. Wind air hose around hose wrap and secure in place.
Store the air compressor in a clean and dry location.