8. If finish is too wet, reduce fluid flow by turning fluid adjusting knob (14) clockwise. If atomisation is
too coarse, increase air inlet pressure. If too fine, reduce inlet pressure.
10. Hold gun perpendicular to surface being sprayed. Arcing or tilting may result in uneven coating.
1. Connect the gun to a clean, moisture and oil free air supply using a conductive hose.
5. Adjust inlet air pressure if required.
6. Turn fluid adjusting knob counter clockwise until first thread shows.
7. Test spray. If the finish is too dry, reduce airflow by reducing air inlet pressure.
2. Mix coating material to Manufacturer's instructions and strain material.
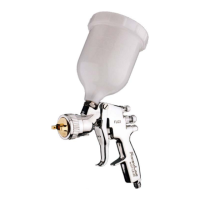
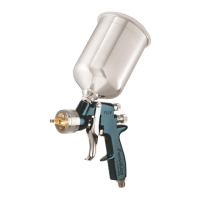
3. Turn fluid adjusting knob (14) clockwise to prevent fluid needle movement.
9. The pattern size can be reduced by turning spreader valve knob (19) clockwise.
11. The recommended spray distance is 50-100mm.
12. Spray edges first. Overlap each stroke a minimum of 75%. Move gun at a constant speed.
13. Always turn off air supply and relieve pressure when gun is not in use.
Depending on hose length, larger I.D. hose may be required. Install an air gauge at the gun handle.
When gun is triggered on, adjust regulated pressure as required. Do not use more pressure than is
necesarry to atomise the material being applied. Excess pressure will create additional overspray and
reduce transfer efficiency.
4. Turn spreader valve adjusting knob (19) counter clockwise to fully open.