EasyManuals Logo

Digital Check SmartSource Elite Series User Manual

Digital Check SmartSource Elite Series
32 pages
To Next Page IconTo Next Page
To Previous Page IconTo Previous Page
Page #26 background imageLoading...
Page #26 background image
SmartSource Elite Series - Installation & Operations Guide
January 2017 8227 4907-003 Page 26 of 32
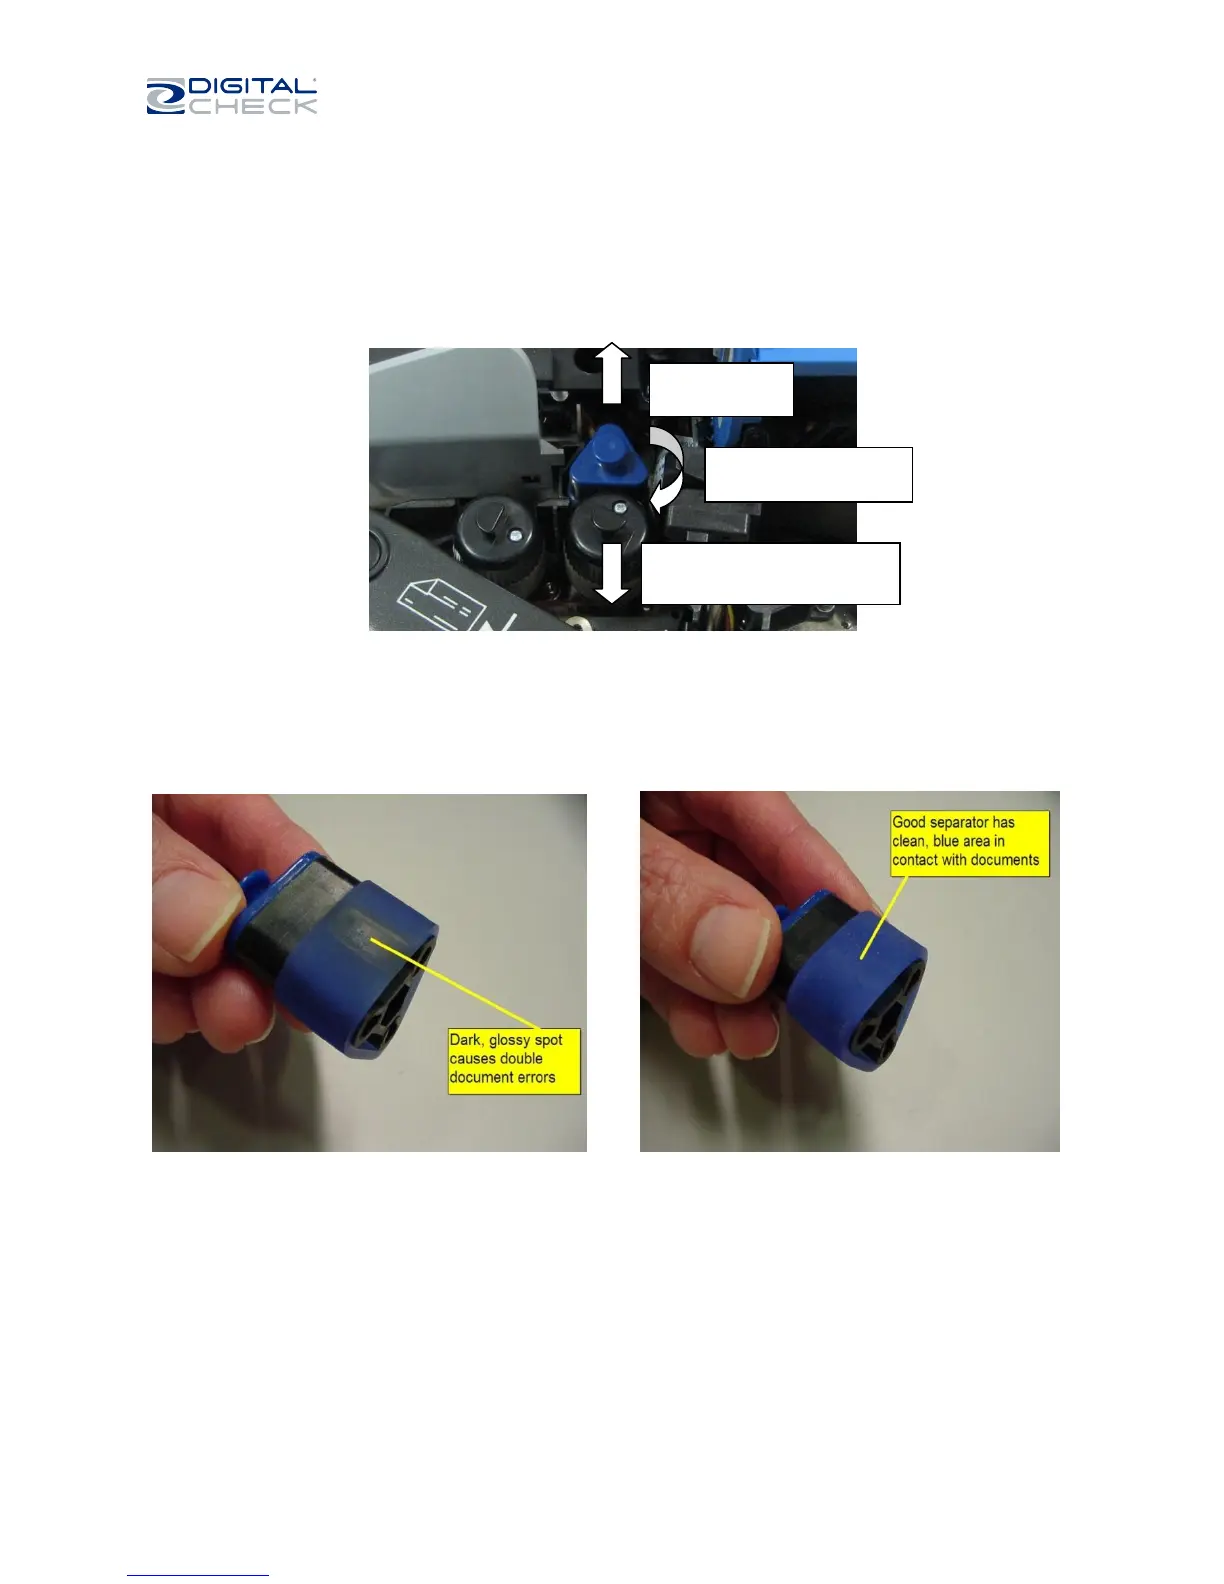
To remove and examine the separator:
1. Open the front cover, lift off the endorser cover and locate the triangular separator it has a blue top
cap and a blue rubber tire.
2. Lift straight up, the separator will ‘snap’ off its guide post.
3. Examine the surface of the blue rubber tire which was facing the documents if it shows a dark,
glossy area or a dirt build-up, as shown; rotate the separator to a clean, new face, as shown.
4. Re-install by pressing the separator back down onto the guide post, it will ‘snap’ into place.
There are several options for separator renewal, see section 5.
1 Lift straight
up to remove
. . . .
3 Press down until separator
‘snaps’ into place
2 Rotate to next face of
triangle

Questions and Answers:

Question and Answer IconNeed help?

Do you have a question about the Digital Check SmartSource Elite Series and is the answer not in the manual?

Digital Check SmartSource Elite Series Specifications

General IconGeneral
Document FeedingAutomatic Document Feeder (ADF)
InterfaceUSB 2.0
MICR ReadYes
Scanning TechnologyContact Image Sensor (CIS)
SpeedUp to 155 documents per minute
Image TypeGrayscale, Black and White, Color
MICR CapabilityE13B & CMC7
Barcode RecognitionYes
Operating System CompatibilityWindows

Related product manuals