english
16
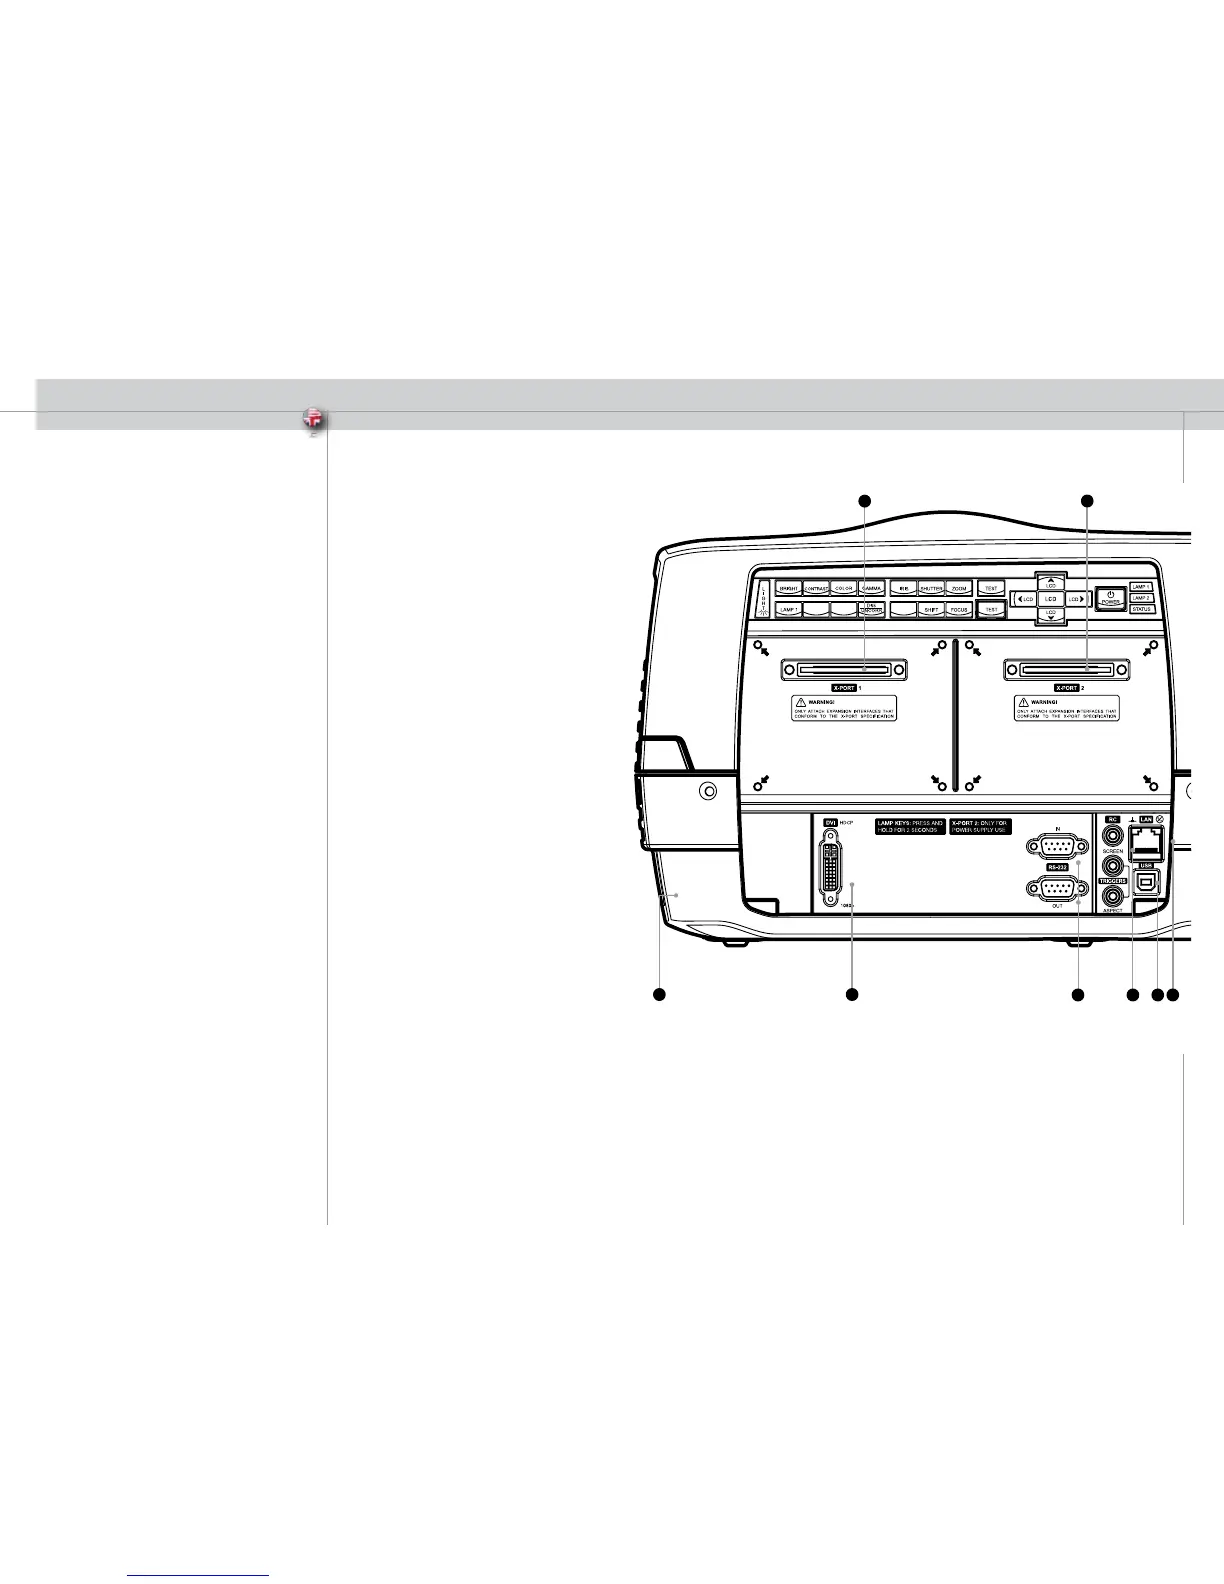
The conector panel may be illuminated by pushing the LIGHT key on
the keypad.
A DVI-D - Digital RGB:
For a low noise computer and video image.
B RS 232 control in-out: Allows for wired remote control and
monitoring of many projector functions used in installation
environments. The secondary output connector allows for
daisy-chaining, enabling both individual and global control
and monitoring of multiple projectors.
C RC:
Allows connection of external IR receiver or wired remote control.
Triggers: 12VDC for Screen Drop and Aspect Ratio control
D USB - interface: Allows for software upgrade.
E LAN:
Provides access to control and monitoring over a Local Area
Network
F Mains power connector: Use only three-prong / grounded power
cord.
G X-PORT 1, 2: Custom interfaces used for application-specific
signal processing. Use only approved interfaces that conform to
the X-PORT specification.
SET UP
Before setting-up, switch off all equipment. The projector may be connected
a 1080p 50-60Hz image source only using DVI-D (Digital Visual Interface).
Connect the RS232 or the LAN interface for control. Connect the power
cord.
CONNECTOR PANEL

 Loading...


