6
Section 1 - Setting Up
Studio Quad Owner's Manual
5) PREV PAGE BUTTON - Scrolls to the previous Page in the
Parameter list. Note that the Page indicators change to reflect the
currently selected Page number in the Parameter list.
6) STORE BUTTON - The <STORE> button is used to store user
Programs in memory for later recall.
7) NEXT PAGE BUTTON - Scrolls to the next Page in the Parameter
list. Note that the Page indicators change to reflect the currently
selected Page number in the Parameter list.
8) UTILITY - Selects the Utility mode where global functions such as
Screen Contrast, MIDI Channel, Program Maps, SysEx Channel,
SysEx Dumps, Program AutoLoad and Reset can be accessed.
9) IN LEVELS - This button is used to access both the automatic and man-
ual input leveling controls. For more on setting input levels, see pg. 32.
10) BYPASS - Bypasses all the effects in the Studio Quad.
11) DATA WHEEL - The Data Wheel lets you scroll through Programs
and change Parameters values.
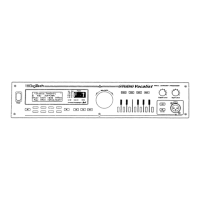
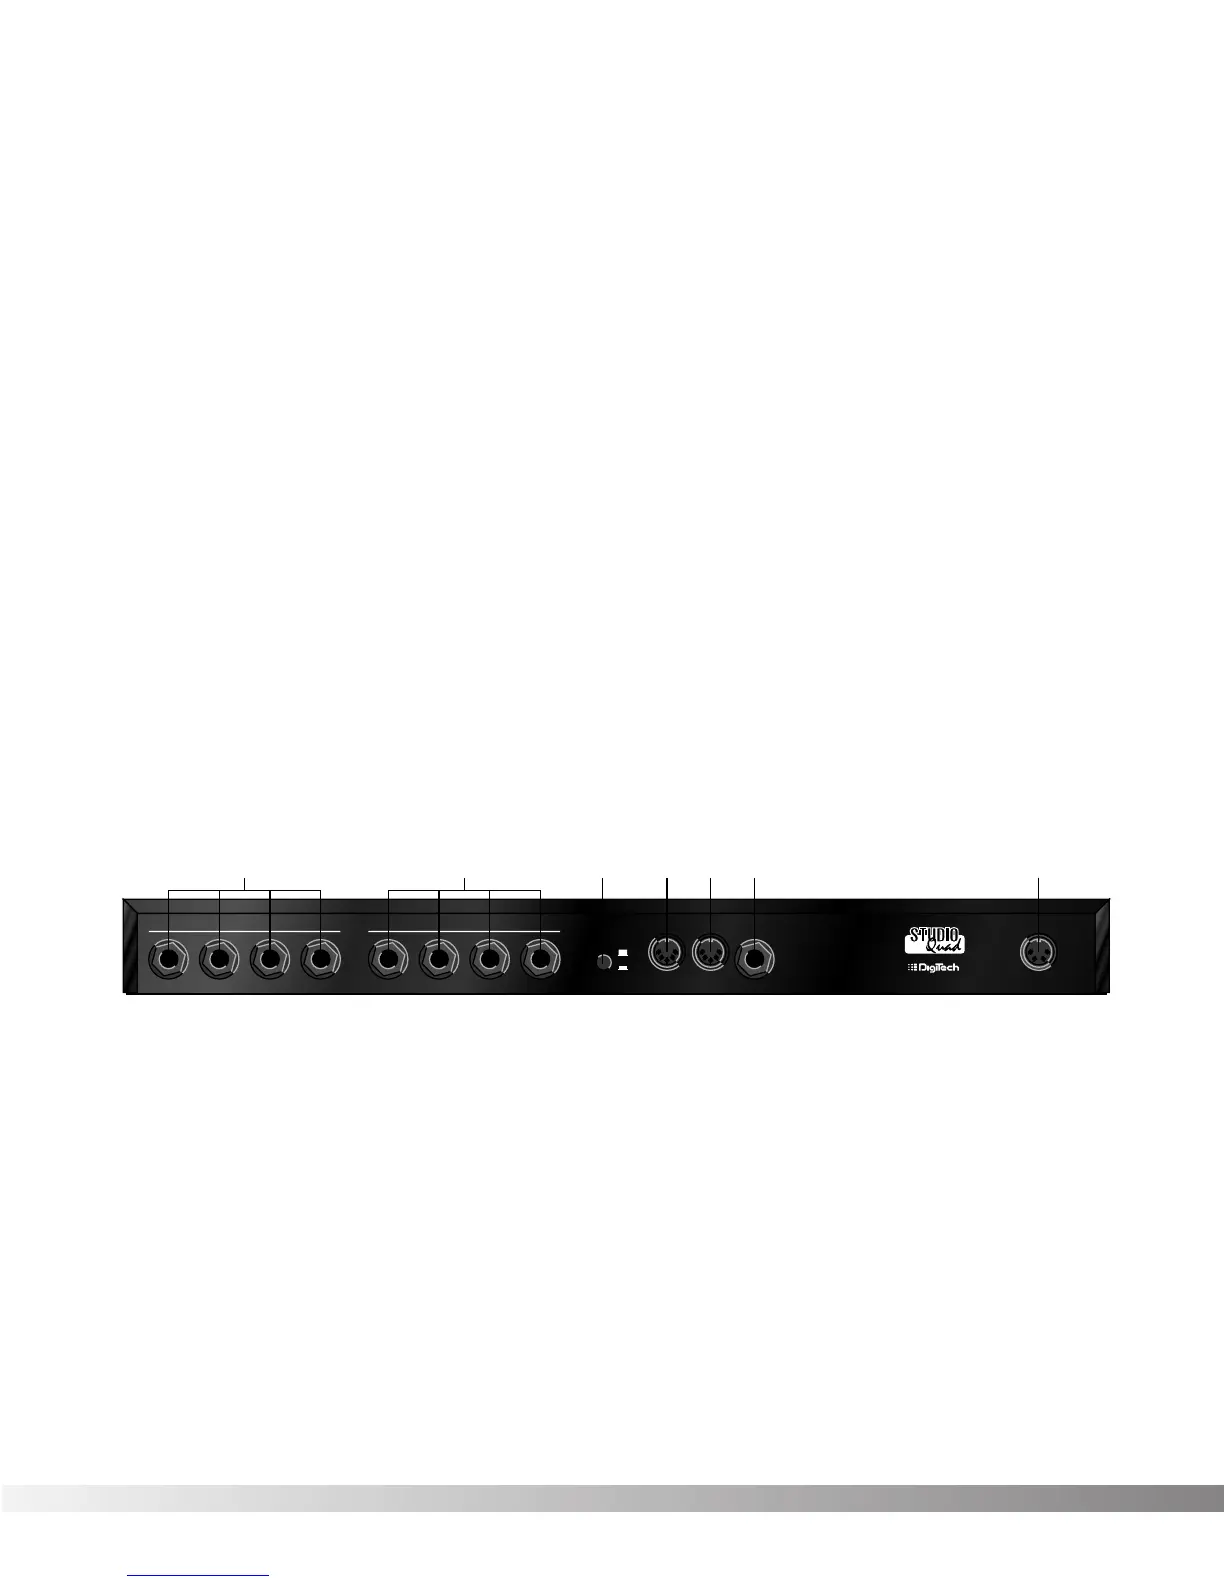
REAR PANEL CONNECTIONS
The layout of the Studio Quad's simple and straightforward rear panel
is illustrated in Figure 1-2.
Figure 1-2 Rear Panel
1) AUDIO INPUTS - These four inputs can be used for several differ-
ent combinations of input configurations. The Input Configuration
module of each Program defines how each Input is used. See
pg. 12 for more info.
2) AUDIO OUTPUTS - The Studio Quad's outputs can also be config-
ured in many different ways. These settings are found in the Output
Configuration module of each Program. See pg. 12 for more info.
3) OUTPUT LEVEL SWITCH - Selects whether the signal is nominally
output at line level (-10 dB) or at professional level (+4).
WARNING: Make sure the Studio Quad's power switch is off before chang-
ing the setting of this switch. Also, be sure you know which setting is best for
your particular equipment setup, as setting this switch to +4 can overload
the inputs of some line-level equipment. DigiTech is not responsible for any
damage to speakers or components due to misuse of this switch.