©2012 Digitrax, Inc. www.digitrax.com 5
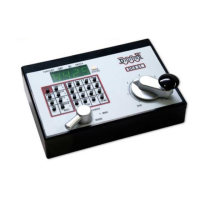
34<?3-<B357;
Before proceeding to the next step, make sure the Throttle Knob is turned all
the way to “STOP” and the Direction/Brake lever is set to “BRAKE”
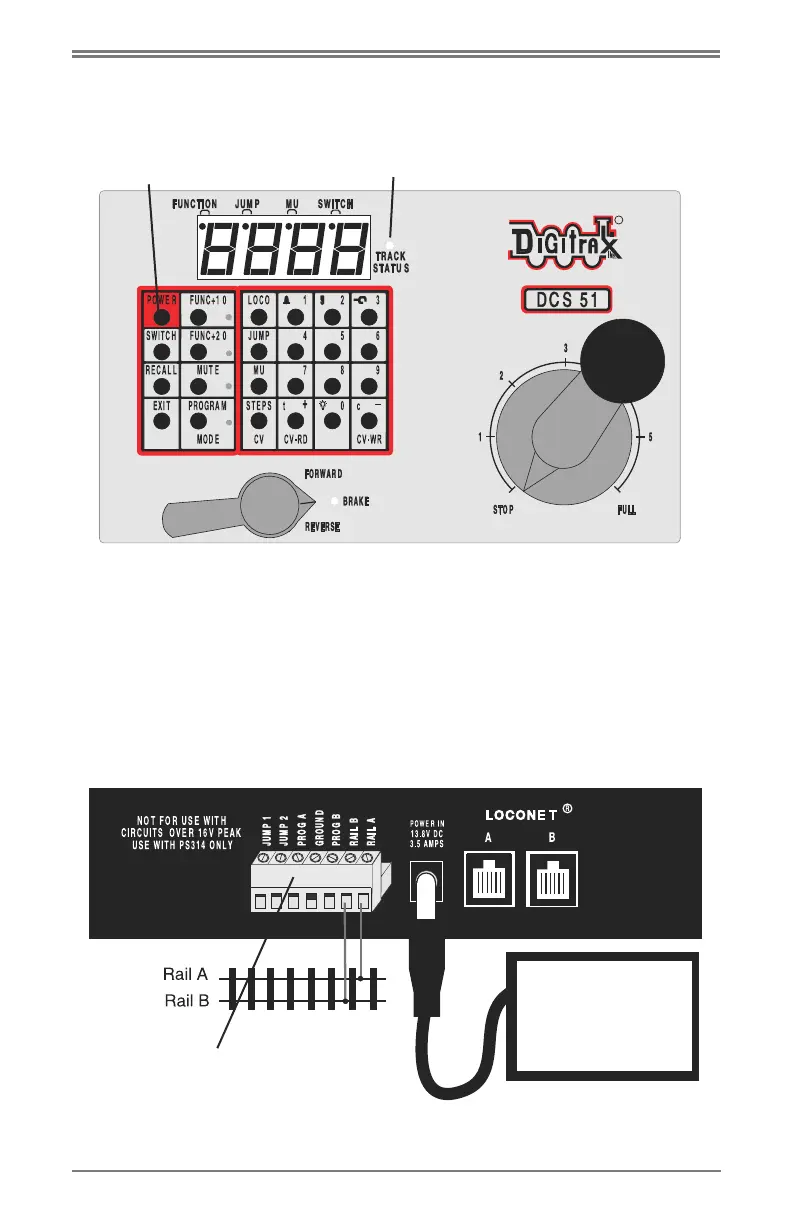
<;;31A7;5A63$7313@
On the back of the DCS51, locate the gray screw terminal strip.
On this strip, locate the two terminals labeled “RAIL A” and “RAIL B”.
Attach your layout track wires to these terminals.
It does not matter which is which. Find the jack on the back of the DCS51
marked “POWER IN, 13.8 V DC, 3.5 AMPS” Plug the PS314 DC plug into
this jack and then connect the PS314 into an AC outlet that matches the power
cord on the PS314. The PS314 will work universally on 110 through 240V AC
$#+&Lkey
(&L'(()'Llight
PS314
or similar DC
supply
'1?3DA3?:7;/9@A?7=