15
Power Cord Replacement
Tools Required: Philips head screwdriver
Needle-nose pliers
Flat Head Screwdriver
WARNING: If the log grate was operating prior to ser-
vicing, allow at least 10 minutes for the heating elements to
cool o to avoid accidental burning of skin.
WARNING: Disconnect power before attempting any
maintenance to reduce the risk of electric shock or damage
to persons.
1. Lift the ame panel from the unit and put it aside in a
safe place.
2. Remove the ember mat by disconnecting it from the
right side of the unit.
3. Remove the 3 screws along the bottom of the front and
back of the bottom assembly and the four screws from
each corner on both ends. (Figure 4)
4. Gently tilt the unit onto the back and lower the bottom
assembly so that the electrcial can be easily accessed.
5. Follow the wiring from the power cord to the wire nuts,
removing any tie wraps and remove the connections,
taking note of the original locations.
6. Disconnect the ground wire from the screw on the bot-
tom pane.
7. With needle nosed pliers, squeeze and push the grom-
met securing the power cord out of the casing.
8. Insert the new power cord and grommet, reattaching
the wire with new tie wraps.
9. Reconnect the wires according in their original congu-
ration.
10. Re-assemble the remainder of the log grate in reverse
order from the instructions above.
Flicker Motor Replacement
Tools Required: Philips head screwdriver
WARNING: If the log grate was operating prior to ser-
vicing, allow at least 10 minutes for the heating elements to
cool o to avoid accidental burning of skin.
WARNING: Disconnect power before attempting any
maintenance to reduce the risk of electric shock or damage
to persons.
1. Lift the ame panel from the unit and put it aside in a
safe place.
2. Remove the ember mat by disconnecting it from the
right side of the unit (if applicable).
3. Remove the two screws at the front of the back log and
set it aside, ensuring that the wires are not strained (if
applicable). (Figure 3)
4. IRemove the 3 screws along the bottom of the front
and back of the bottom assembly and the four screws
from each corner on both ends. (Figure 4)
5. Gently tilt the unit onto the back and lower the bottom
assembly so that the electrcial can be easily accessed.
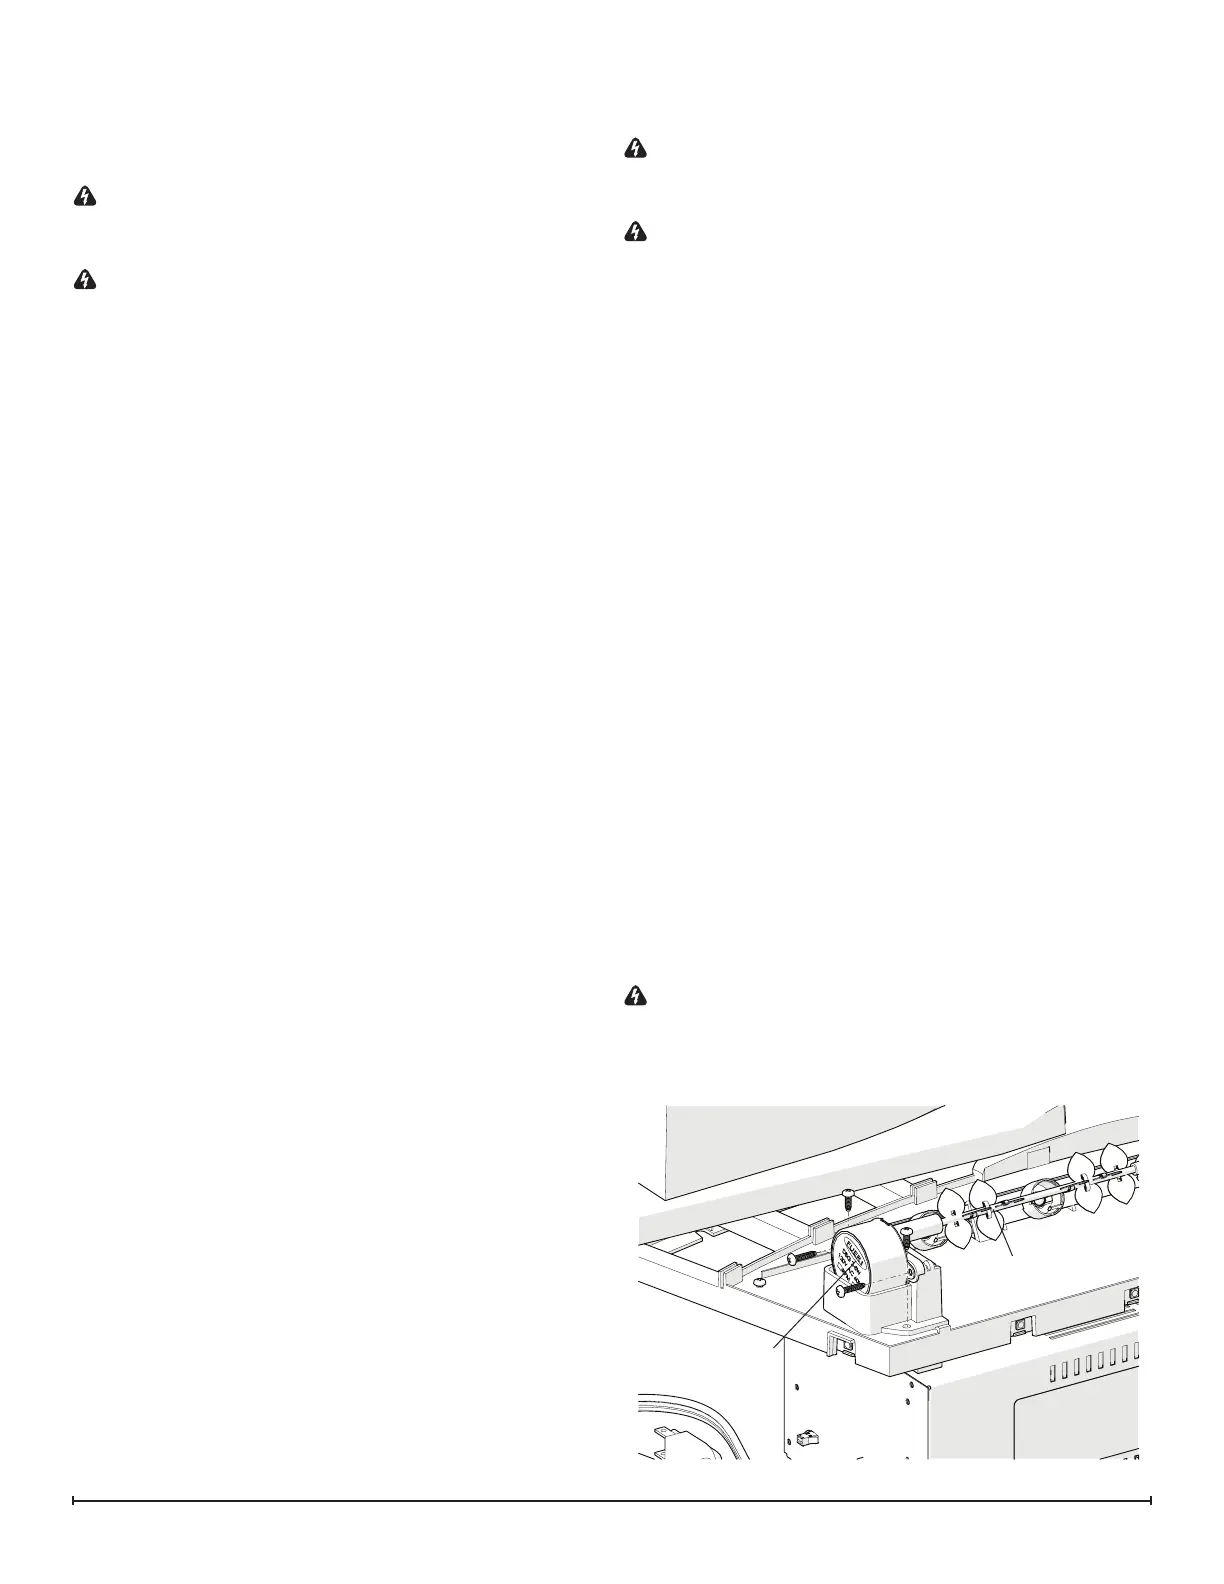
6. Remove the two screws that secure the motor support
to the base of the grate (verticle). (Figure 8)
7. Disconnect the icker rod and rubber grommet from the
icker motor.
8. Remove the two screws that secure the motor from the
motor support (horizontal). (Figure 8)
9. Trace the wires from the motor to the main control
board and disconnect the wire, noting the location on
the board.
10. Run the wire from the new motor, following the same
path as the wire that was removed. Attach the new wire
to the board.
11. Re-assemble the remainder of the log grate in reverse
order from the instructions above.
WARNING: Ensure wires do not come in contact with
moving parts by securing wires in wiring tie wraps.
Figure 8
Flicker Motor
Flicker Rod