EasyManua.ls Logo

Dimplex XLF50 - User Manual

Dimplex XLF50
26 pages
Print Icon
To Next Page IconTo Next Page
Loading...
Owners Manual
Model
XLF50
XLF60
XLF74
XLF100
7215520100R02
IMPORTANT SAFETY INFORMATION:

Other manuals for Dimplex XLF50

Questions and Answers

Summary

Welcome & Congratulations

Product Registration and Support

Register your product online for future reference and find support contacts.

Important Safety Instructions

General Safety Precautions

Read all instructions before use and follow safety guidelines to prevent injury.

Quick Reference Guide

Product Information and Support Contact

Find electrical information, register your unit, and contact customer service.

Fireplace Installation

General Installation Guidelines

Select a suitable location and follow basic installation precautions.

Framing Options

Unit allows partial recess, flush mounted, or sub-surface mounting.

Installation Recommendations with Overhanging Surfaces

Clearance recommendations for areas above the fireplace based on temperature.

Framing the Fireplace

Prepare wall opening and sill for fireplace installation.

Mounting and Leveling

Mount the fireplace securely and ensure it is level within the framing.

Electrical Wiring Preparation

Route power wire and ensure proper connections for safety.

Permanent Heat Disable

How to permanently disable the fireplace heater using the control board.

120 V Direct Wire Installation

Connect the fireplace directly to the power supply for 120V systems.

120 V Wall Switch Installation

Wiring the fireplace through a standard wall switch for 120V systems.

120 V Plug Kit Installation

Instructions for installing the plug kit for 120V power connection.

240 V Installations

Direct wiring instructions for 240V electrical systems.

Bathroom Use Precautions

Specific electrical safety requirements for bathroom installations.

Installing Screw Covers

Final step to cover mounting screws for a clean finish.

Final Assembly

Glass and Media Installation

Steps for installing the glass panels and media tray components.

Wiring Diagram

XLF50 Wiring Schematic

Detailed electrical diagram for the XLF50 model.

XLF60 Wiring Schematic

Detailed electrical diagram for the XLF60 model.

XLF74, XLF100 Wiring Schematic

Detailed electrical diagram for the XLF74 and XLF100 models.

Operation

General Operation and Comfort$aver

How the fireplace operates automatically to maintain room temperature.

Remote Operation and Controls

Using the remote control and manual controls for operation.

Standby Mode

Turning the unit On and Off using the standby button.

Flame Effects Control

Turning the flame effect feature on and off.

Heat ON;OFF Control

Activating and deactivating the heater function.

Temperature Adjustment (Down)

Decreasing the temperature setting and fan speed.

Temperature Adjustment (Up)

Increasing the temperature setting and fan speed.

Eco Operation Mode

Running the heater in a reduced wattage range for energy saving.

Heat Boost Function

Quickly heating a cold room by running at full wattage.

Disable Heater Function

How to disable the heater function using manual controls.

Color Themes Selection

Selecting different lighting color combinations for the flame and media.

Brightness Control

Adjusting the brightness level of the unit's lights.

Sleep Timer Function

Setting a timer to automatically shut off the fireplace.

Control Lockout Feature

Locking or unlocking manual controls to prevent accidental changes.

Resetting the Temperature Cutoff Switch

Maintenance

Remote Control Battery Replacement

Steps for replacing the battery in the remote control.

Glass and Surface Cleaning

Instructions for cleaning glass and exterior fireplace surfaces.

Servicing Recommendations

When to call an authorized service representative for repairs.

Warranty

5-Year Limited Warranty Coverage

Details of what the limited warranty covers for specific models.

Products Excluded from Warranty

List of products and regions not covered by the limited warranty.

Warranty Claim Procedure

How to notify Dimplex of a warranty concern and required information.

Warranty Service Performance

How limited warranty service is performed by authorized agents.

Limitations of Liability

Exclusions and limitations on Dimplex's liability for damages.

Technical Support

Overview

This document is an owner's manual for the Dimplex IgniteXL™ electric fireplace, covering models XLF50, XLF60, XLF74, and XLF100. It provides comprehensive instructions for installation, operation, maintenance, and warranty information.

Function Description

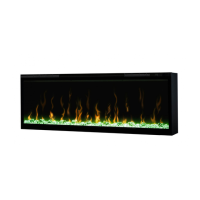
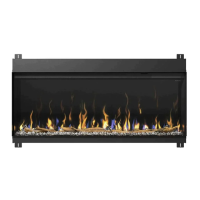
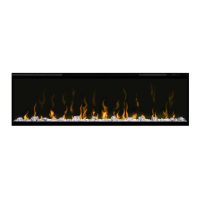
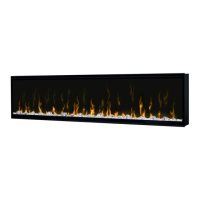
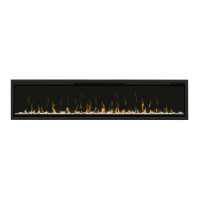
The Dimplex IgniteXL™ electric fireplace is designed to provide the ambiance of a real fire with the convenience and safety of an electric appliance. It features Comfort$aver™ technology, which automatically adjusts fan speed and heater wattage to precisely match room requirements based on thermostat settings. The heater operates continuously at a low level once the set point is reached, maintaining the desired room temperature. If the room temperature rises significantly (e.g., due to sunlight or a central furnace), the heater will turn off and periodically cycle back on to circulate air until the temperature drops and constant heating is required again. The fan is designed to run continuously while the heater is active. After the heater is turned off, there is a 2-minute cool-down period before the fan completely shuts off. The unit can also be operated in a "Heat Only Mode," where only the heater functions.

The fireplace offers various lighting color combinations, including a "prism" mode that cycles through different colors for the flame base and media lighting. Users can stop the cycling in prism mode to hold a preferred color. The brightness of the lights can also be adjusted.

A Sleep Timer function allows the fireplace to automatically shut off after a preset time, ranging from 30 minutes to 8 hours. The unit also includes a temperature cutoff switch that automatically turns the unit off if it overheats, preventing damage.

Usage Features

The fireplace can be controlled using either manual controls located on the upper right of the unit or an IR multi-function remote control. For correct operation, the remote control must be pointed towards the front of the unit.

Key operational features include:

  • Standby (On/Off): Turns the unit on and off. When turned on, it resumes the last set functions, and the intake temperature is displayed.
  • Flame Effects: Turns the flame effect on and off.
  • Heat ON/OFF: Turns the heater on and off. When activated, the heater icon and setpoint temperature flash on the display, followed by the intake temperature.
  • Temperature Down/Up: Decreases or increases the desired temperature setting. Holding these buttons for two seconds on the manual controls allows for faster temperature adjustments.
  • Eco Operation: Runs the heater at a reduced wattage range, indicated by a reduced fan speed.
  • Heat Boost: Operates the heater at full heat for a user-defined period (up to 20 minutes in 5-minute increments) to quickly warm a cold room.
  • Disable Heat: The heater can be temporarily disabled by pressing the temperature down and heat ON/OFF buttons on the manual controls simultaneously for 2 seconds. If permanently disabled by removing the electronic jumper on the main control board, the display will indicate "H--".
  • Color Themes: Cycles through different preset lighting color combinations for the flame base and media lighting. In prism mode, users can stop the color cycling to select a static color.
  • Brightness: Adjusts the brightness of the unit's lights.
  • Sleep Timer: Sets a timer for automatic shutdown, with options from 30 minutes to 8 hours. The remaining time can be viewed, and the timer can be canceled.
  • Control Lockout: Locks or unlocks the manual controls by pressing the temperature down and brightness buttons simultaneously for 2 seconds.

Installation Options:

The unit supports three installation options: partial recess, flush mounted, or sub-surface mounted. Sub-surface mounting should be limited to ½ inch (13 mm) to ensure adequate airflow. The fireplace should be installed a minimum of 8 inches (20.4 cm) from the ceiling. It is recommended to mount the unit between 30 inches (76.2 cm) and 40 inches (101.6 cm) from the ground for an optimal viewing angle.

Electrical Installation:

The fireplace can be direct-wired for 120V or 240V, or installed with a 120V wall switch or plug kit. A dedicated, properly fused 15 Amp circuit is recommended for 120V installations. All wiring must comply with local and national electrical codes. For bathroom installations, the unit must be protected by a GFCI receptacle or circuit and installed away from water sources.

Final Assembly:

This involves securing the partially reflective glass, evenly distributing the media (large and small) in the media tray for optimal effect, and then placing and securing the front glass. A suction cup and Allen key are provided for this process and should be retained for future maintenance.

Maintenance Features

Regular maintenance is crucial for the safe and efficient operation of the fireplace.

  • Remote Control Battery Replacement: The remote control uses one 3 Volt (CR2032 or CR2025) battery. Instructions are provided for sliding open the battery cover, replacing the battery, and closing the cover. Used batteries should be recycled according to local regulations.
  • General Cleaning: Before any cleaning or maintenance, the power supply must be disconnected, and the heater allowed to cool to prevent electric shock or burns.
  • Partially Reflective Glass Cleaning: The glass is cleaned at the factory but may collect dust during shipping and installation. Dust can be removed with a clean, dry cloth. Fingerprints or other marks can be cleaned with a damp cloth, followed by drying with a lint-free cloth to prevent water spots. Abrasive cleaners should not be used.
  • Fireplace Surface Cleaning: Painted surfaces of the fireplace should be cleaned only with a damp cloth. Abrasive cleaners are not to be used.
  • Regular Inspection: The fireplace should not be operated with an accumulation of dust or dirt, as this can lead to heat buildup and damage. Therefore, the heater must be inspected regularly, at least yearly, depending on operating conditions.
  • Servicing: Except for the installation and cleaning procedures described in the manual, all other servicing must be performed by an authorized service representative. If the temperature cutoff switch continuously trips, the unit should be turned off at the main disconnect panel, and technical support should be contacted.

Dimplex XLF50 Specifications

General IconGeneral
TypeElectric Fireplace
Width50 inches
Voltage120 V
Wattage1500 W
Remote ControlYes
ThermostatYes
InstallationWall-mounted
Dimensions50 x 20 x 6 inches

Related product manuals