P.6 Guide de l’utilisateur
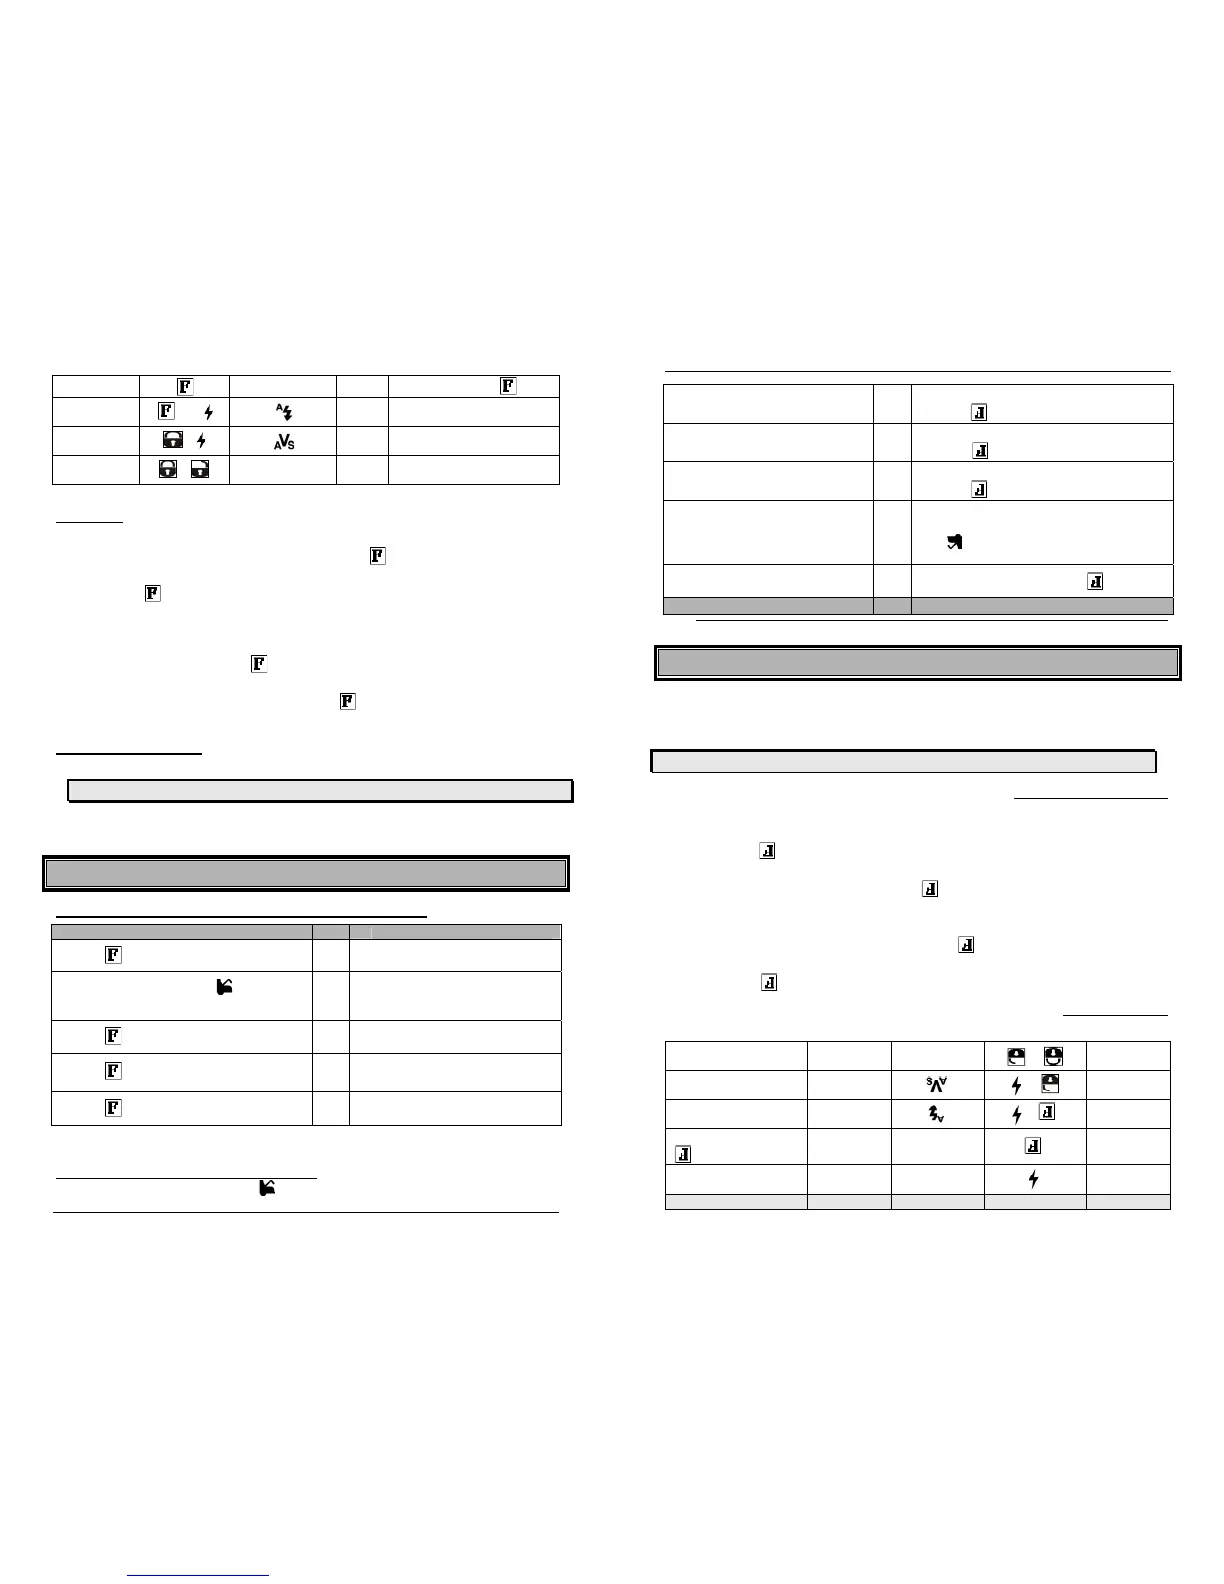
Fonction Touche actionnée Icône / TEXTE Sonorité Détails
ARRÊT Aucun
2 timbres
sonores
Arrête le moteur
Rétroéclairage
Illumination de
2 secs.
Appuyer sur la touche
puis relâcher rapidement.
Mode temps
froid
+
1 timbre sonore
Voir section Mode temps froid
(page-16)
Mode Valet à
distance
+
1 timbre sonore
Voir section Mode Valet
(page-13)
Mode Panique
ou
Aucun 1 timbre sonore
Voir section Mode panique
(page-14)
Rétroéclairage
Trois façons d’utiliser le rétroéclairage
x Allumer le rétroéclairage pour 3 secondes, appuyer sur la touche pour moins d’une
seconde et relâcher.
x Si vous pressez la touche et la maintenez enfoncée pendant plus de 5 secondes le
rétroéclairage restera allumé tant que la touche est enfoncée.
x Naviguer le MENU de la télécommande avec le rétroéclairage allumé :
a. Appuyer sur la touche pendant 1 seconde et relâcher. Le rétroéclairage
devrait s’allumer.
b. Dans les 3 secondes suivantes, appuyer sur la touche pendant 2
secondes pour accéder aux différentes fonctions.
Chargementdelapile
x Brancher la clé de chargement USB.
AVERTISSEMENT !! N’UTILISEZ PAS DE CHARGEUR AUTRE QUE CELUI FOURNI.
x L’écran LCD affiche « CHARGE » pendant que les barres de niveau situées dans
l’icône de la pile clignotent.
x Quand le chargement est complété l’écran LCD affiche alors « FULL ».
MENUetfonctionsavancéesdelatélécommande
CommentaccéderauMENUetauxfonctionsavancéesdelatélécommande
L’utilisateur La télécommande
1.
Appuyez pendant 1 seconde et relâcher.
La télécommande émettra un
signal sonore et affichera MENU
Note : À ce point, si vous pressez vous
accédez aux MENU de la télécommande.
Î
Suivre les étapes inscrites ci-
dessous : « Sélectionner et
ajuster les options avancées du
Menu »
2.
Appuyez une deuxième fois sur pendant 1
seconde et relâcher.
La télécommande émettra un
signal sonore et affichera L-01
3.
Appuyez une troisième fois sur pendant 1
seconde et relâcher.
Î
La télécommande émettra un
signal sonore et affichera L-02
4.
Appuyez une quatrième fois sur pendant 1
seconde et relâcher.
La télécommande émettra un
signal sonore et affichera L-03
P.6 User Guide
Back light
On for 2 seconds
Press and release the
quickly
Cold weather
, then
1 beep
See Cold Weather Mode section
(page-15)
Combo Valet
+
1 beep
See Vale mode section
(page-13)
Panic
or
None 1 beep
See Panic Mode section
(page-15)
Backlight
Three different ways to use the backlight:
x Turning the backlight on for 3 seconds, press the for less than 1 second and
release.
x If the button is pressed and held for more than 5 seconds the backlight will stay ON
as long as the button is held.
x To browse the MENU while the backlight is ON:
a) Press the for at least 1 second and release. The backlight should
turn ON.
b) Within 3seconds, press the button for 2 seconds to access the
various functions.
ChargingtheBattery
x Plug in the USB charger.
CAUTION!! DO NOT USE A CHARGER OTHER THAN THE ONE SUPPLIED.
x The LCD displays “CHARGE” while the battery level bars within the battery icon flash.
x When charging is complete the LCD then displays “FULL”.
Remote’sadvancedfunctionsandMENU
HowtoaccessadvancedremotefunctionsandMENU
User Transmitter
1. Press for 1 second and release
Î
Remote beeps once and MENU
appears on screen.
Note: At that point if you press you can enter
the remote’s MENU.
Î
Follow the steps listed below in
“Selecting and adjusting
advance MENU options”:
2. Press a 2
nd
time for 1 second and release
Remote beeps once and L-01
appears on screen.
3. Press a 3
rd
time for 1 second and release
Î
Remote beeps once and L-02
appears on screen.
4. Press a 4
th
time for 1 second and release
Î
Remote beeps once and L-03
appears on screen.
Note: The order of LEVELS and MENU can be re-arranged in the menu option FBPRO.
Selecting and adjusting advanced menu options:
1. When in MENU, press button to enter the menu.