1.
2.
1
2
3
5 mm
5. Installing the Drive
Secure the workplace against unauthorized access.
Falling parts or tools may lead to injuries.
The procedure described here is an example.
Structural or local conditions, available tools or other
circumstances may make a different procedure more
sensible.
Conditions
• A 230 V/50-60 Hz connection with a 16 A fuse is
available at the installation location.
• The door leaf must be in perfect mechanical condition
and easy to access.
Standard tightening torque
M 5 ......... 5 Nm
M 6 ...... 9.5 Nm
M 8 ....... 23 Nm
M 10 ..... 46 Nm
M 12 ..... 79 Nm
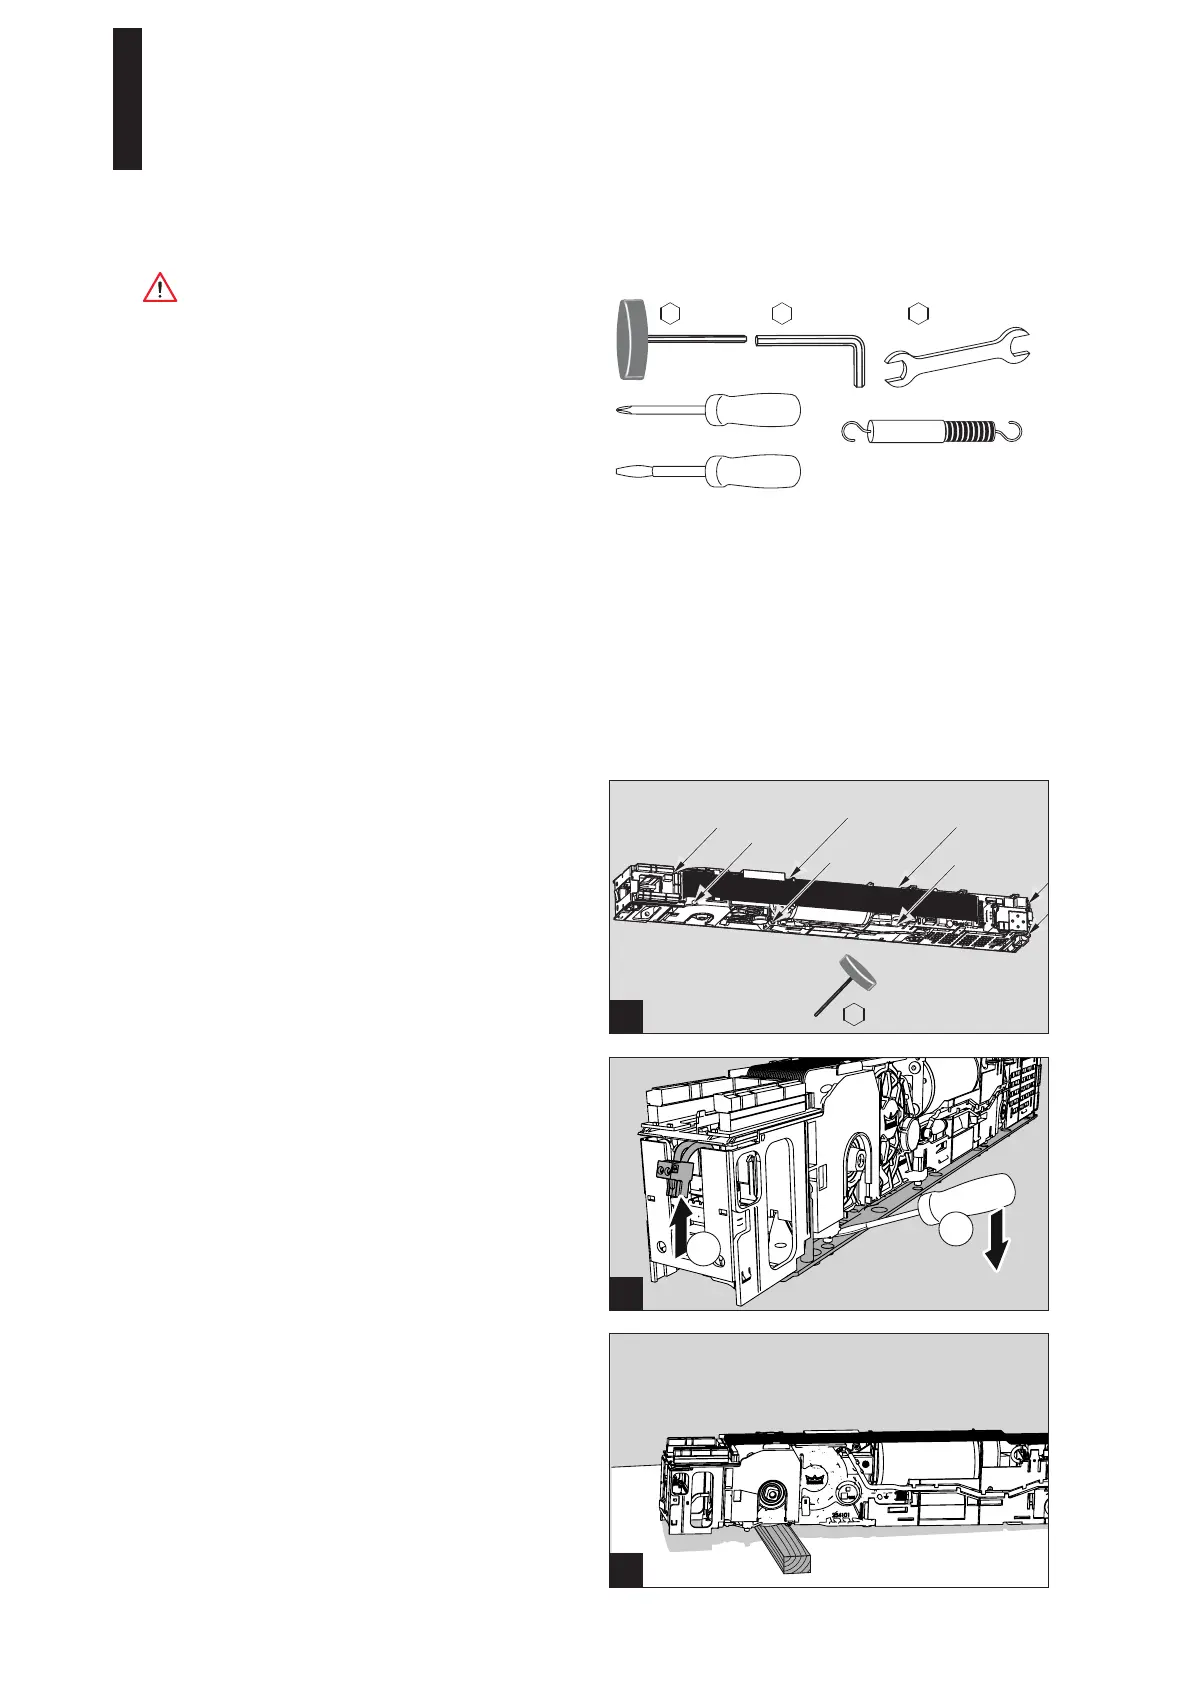
Required tools
2.5 mm
6 mm
2.5 mm insulated
6 mm
5 mm 13 mm
1 / 2 / 3
5.1 Dismantling the Drive from the Mounting Plate
1. Loosen the 8 fixing screws.
2. Pull out the 230 V plug.
3. Disconnect the drive from the mounting plate.
Use a screwdriver to lever the drive off the base plate.
4. Place a piece of wood or similar item beneath the drive
to prevent the connecting piece from coming loose.
ED 100, ED 250
—
15DORMA