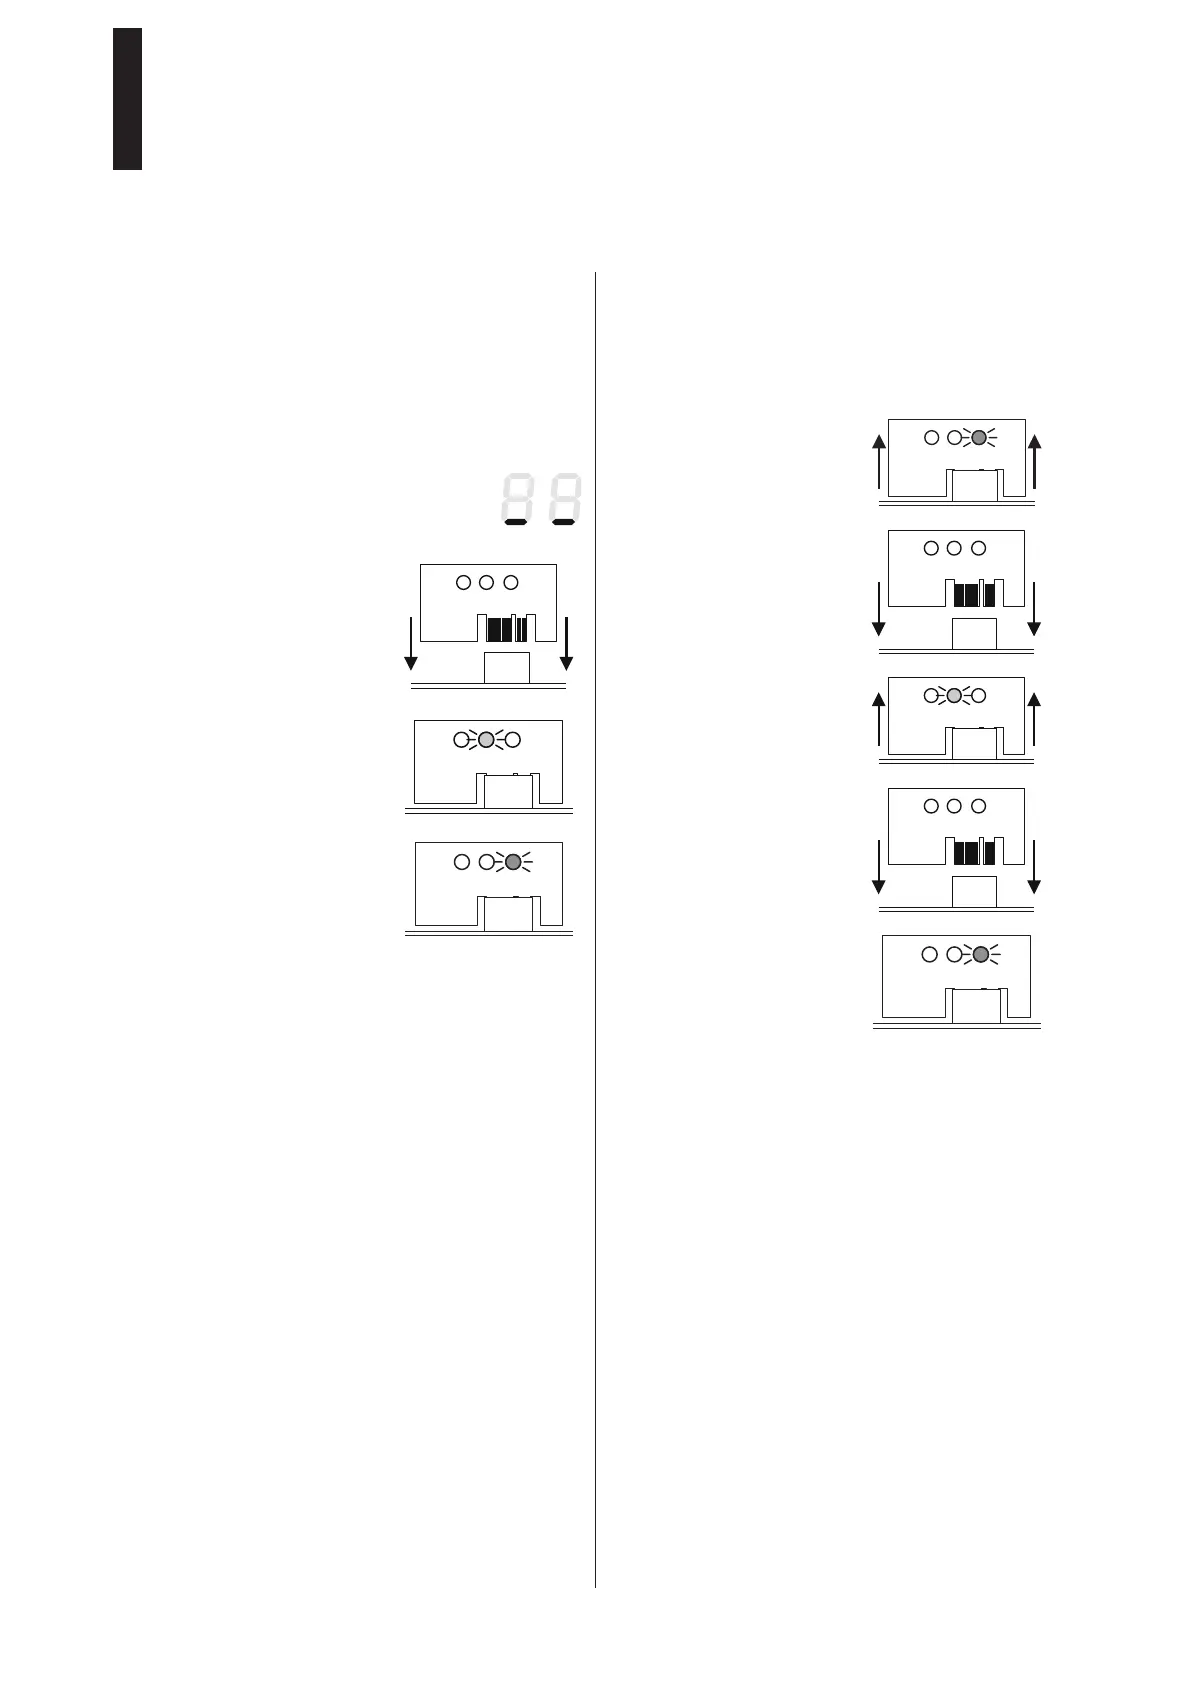
8.3 Installing Upgrade Cards
Conditions:
• The drive is completely installed.
• The learning cycle has been successfully completed.
• The power supply is switched on.
• The program switch is in the OFF position.
• The information display indicates
that the system is in stand-by mode.
Installing the First Upgrade Card
1. Insert the Upgrade Card into
the slot (see page 4, item 9).
► The yellow LED flashes once
during insertion.
► The data is being transferred.
The communication between
the modules is indicated by
the slow flashing of the green
LED.
► The first Upgrade Card becomes the Container module;
the green LED flashes slowly. The corresponding
function is now available and can be activated (see
page 35, parameters F1 – F8).
► The system is ready for operation.
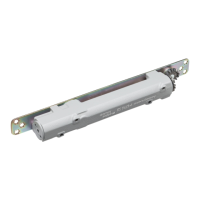
8.4 Installing Other Upgrade Cards
You can install other Upgrade Cards.
The first Upgrade Card installed takes on the function of the
Container module. All of the installed functions can be used
provided that the Container module is installed in the drive
unit.
1. Remove the Container
module.
2. Insert the next Upgrade Card.
► The function is copied to the
drive system and the Upgrade
Card is invalidated.
3. Remove the Upgrade Card as
soon as the yellow LED lights
up.
4. Insert the Container module.
► The control unit recognizes
the Container module and
saves the new functions in it.
► The slow flashing of the green
LED indicates successful
operation; the function can
be activated (see page 35,
parameters F1 – F8).
ED 100, ED 250
—
29DORMA